Introduction
The aroma of sizzling bacon wrapped around fresh green beans, mingling with a hint of brown sugar, is honestly one of those kitchen moments you never forget. You know that savory-sweet smell that stops everyone mid-conversation, making them drift closer to the oven? That’s exactly what happens every single time I make these crispy sweet green bean bacon bundles for a dinner party. The first time I tried these, I was knee-high to a grasshopper, watching my grandma whip them up for a holiday spread. She’d always say, “A little bacon never hurt anyone,” and, let’s face it, she wasn’t wrong.
One rainy Saturday, I decided to recreate her recipe, hoping for that same magic. Let me tell you, biting into that first bundle was the kind of moment where you pause, take a deep breath, and just smile because you know you’re onto something truly special. The green beans stay bright and snappy, the bacon crisps up perfectly, and the sweet glaze caramelizes into pure, nostalgic comfort. My family couldn’t stop sneaking bundles off the tray before I could even plate them (and I can’t really blame them).
Honestly, I wish I’d discovered just how easy these are years ago. They’re dangerously simple—perfect for potlucks, a sweet treat for your kids, or just to brighten up your Pinterest board with their vibrant green and golden hues. Over the years, I’ve tested and tweaked this recipe more times than I can count (all in the name of research, of course). Now, it’s become a staple for family gatherings, gifting, and those moments when you want a dish that feels like a warm hug. Bookmark this one—you’ll want it for every special occasion!
Why You’ll Love This Recipe
If you’re searching for an appetizer that’s equal parts impressive and easy, these crispy sweet green bean bacon bundles are about to be your new favorite. From my years of cooking for crowds (and picky eaters), I’ve learned the hard way that guests love anything wrapped in bacon—but these bundles take it up a notch. Here’s why they stand out:
- Quick & Easy: Comes together in under 40 minutes. You can prep ahead and pop them in the oven right before guests arrive—total lifesaver for busy hosts.
- Simple Ingredients: No fancy grocery trips needed. Green beans, bacon, brown sugar, and a few pantry staples—most of which are probably already in your kitchen.
- Perfect for Dinner Parties: They look gorgeous on a platter, and their individual serving size makes them ideal for cocktail hours, potlucks, or holiday feasts.
- Crowd-Pleaser: Kids and adults both rave about these. Even my veggie-skeptic uncle admitted they were “surprisingly addictive.”
- Unbelievably Delicious: The combination of crisp bacon, tender green beans, and sticky-sweet glaze is pure comfort food. It’s the kind of recipe that makes you close your eyes after the first bite.
But what really makes this crispy sweet green bean bacon bundles recipe different? I use a quick blanching step for the beans—so they stay bright and don’t turn mushy. Plus, a sprinkle of garlic powder and cracked black pepper gives the glaze a little kick. It’s not just another bacon-wrapped veggie—you get perfect texture and flavor every time. Whether you’re trying to impress guests without breaking a sweat, or you just want to turn a regular dinner into something memorable, trust me: these bundles deliver. Comfort food, but with a stylish twist. I’m always amazed at how fast they disappear (so make a double batch if you want leftovers!).
What Ingredients You Will Need
This crispy sweet green bean bacon bundles recipe is built around simple, wholesome ingredients that deliver bold flavor and satisfying texture without the fuss. Most are pantry staples, and you can swap things out if needed—so don’t stress if you’re missing something!
- Fresh green beans, trimmed (1 pound / 450g) – Look for bright, firm beans; avoid limp or spotty ones for best texture.
- Bacon strips, thin-cut (10-12 slices) – Thin-cut works best for wrapping and crisping; I usually go with Oscar Mayer or the store brand—whatever’s on sale!
- Brown sugar (1/4 cup / 50g) – Adds that sweet caramelized glaze. Light or dark both work; dark gives a deeper flavor.
- Unsalted butter, melted (2 tablespoons / 30g) – Helps the glaze stick and adds richness (use dairy-free margarine if needed).
- Garlic powder (1 teaspoon / 3g) – For a savory kick; you can swap in minced fresh garlic if you’re feeling fancy.
- Black pepper, freshly cracked (1/2 teaspoon / 1g) – Gives a little heat to balance out the sweet.
- Salt (1/2 teaspoon / 3g) – Just enough to bring everything together.
- Olive oil (1 tablespoon / 15ml) – For tossing the green beans before wrapping; helps them roast up nicely.
- Optional: Smoked paprika (1/2 teaspoon / 1g) – Adds a subtle smokiness, totally up to you.
Ingredient Notes & Substitutions:
- If you need gluten-free—double-check your bacon brand, some have hidden gluten (I’ve been burned before!).
- No brown sugar? Try coconut sugar or maple syrup for a slightly different sweetness.
- Dairy-free? Use olive oil or vegan butter instead of regular butter.
- Want even more flavor? Sprinkle a little grated parmesan over the bundles before baking.
I always keep a stash of green beans and bacon in my fridge “just in case”—it’s the kind of combo that works for almost any occasion. And don’t worry about perfection, a few uneven beans or slightly crispy edges just add to the charm!
Equipment Needed

Making crispy sweet green bean bacon bundles doesn’t require a fancy kitchen setup. Here’s what you’ll need:
- Large pot: For blanching green beans. Any old soup pot will do; I’ve used everything from enamel to stainless steel.
- Colander: For draining and cooling the beans quickly. If you don’t have one, just use a slotted spoon and a bowl of ice water.
- Baking sheet: A rimmed sheet is best to catch any bacon drippings. Parchment paper or foil makes cleanup a breeze.
- Oven-safe rack (optional): Gives even crisping all around, but if you don’t have one, just flip the bundles halfway through baking.
- Small bowl: For mixing glaze ingredients. Simple is best!
- Pastry brush or spoon: For spreading the glaze. I’ve honestly used both, and a spoon works fine in a pinch.
- Toothpicks: To secure the bundles. I buy the big box from the dollar store and keep them handy.
Budget tip: If you’re missing a rack or brush, don’t sweat it—just improvise. I’ve washed and reused parchment paper, and even used chopsticks to lift bundles for crispier bottoms. Specialty gear is nice, but not required!
Preparation Method
Ready to make crispy sweet green bean bacon bundles? Follow these steps (and trust me, a little mess is part of the fun). Here’s how I do it:
- Prep the green beans: Trim the ends off 1 pound (450g) of fresh green beans. Rinse thoroughly.
- Blanch the beans: Bring a large pot of salted water to a boil. Add green beans and cook for 3 minutes, just until bright green and tender-crisp. (Don’t overcook! Mushy beans don’t bundle well.) Drain immediately and plunge into a bowl of ice water for 2 minutes. Drain again and pat dry with paper towels.
- Preheat the oven: Set your oven to 400°F (200°C). Line a baking sheet with parchment paper or foil. If using an oven-safe rack, place it on top of the sheet.
- Season the beans: Toss the dried beans with 1 tablespoon (15ml) olive oil, 1/2 teaspoon (3g) salt, and a pinch of black pepper in a mixing bowl. (You’ll want the beans glossy but not oily.)
- Bundle the beans: Take 8–10 beans and lay them in a neat “stack.” Wrap tightly with one strip of bacon, overlapping ends underneath. Secure with a toothpick, placing bundles seam-side down on the baking sheet. Repeat until all beans and bacon are used.
- Mix the glaze: In a small bowl, whisk together 1/4 cup (50g) brown sugar, 2 tablespoons (30g) melted butter, 1 teaspoon (3g) garlic powder, 1/2 teaspoon (1g) black pepper, and 1/2 teaspoon (1g) smoked paprika (if using).
- Brush or spoon glaze: Spoon or brush the sweet glaze over each bundle, making sure to coat the bacon well. (Don’t worry if it drips—those crispy edges are the best part!)
- Bake: Place the sheet in the oven and bake for 20–25 minutes, until the bacon is golden and crisp. If you’re using a rack, check at 20 minutes. If not, flip bundles halfway for even crisping.
- Check for doneness: Bacon should be deeply golden, beans tender but still snappy. If bacon needs more color, broil for 2–3 minutes (watch closely to avoid burning).
- Cool & serve: Let bundles rest for 3 minutes before serving—trust me, the glaze sets up and they’re easier to handle. Remove toothpicks before plating for a polished look.
Troubleshooting tip: If bundles unravel, try using two toothpicks or wrapping the bacon a little tighter. If the glaze burns, lower the oven temp by 25°F (10°C) next time. And don’t stress about perfection—rustic is delicious!
Personal tip: I prep the beans and bacon ahead, keep them wrapped and chilled, then glaze and bake just before guests arrive. Saves time and keeps everything fresh!
Cooking Tips & Techniques
After making crispy sweet green bean bacon bundles for years, I’ve picked up a few tricks (and, let’s be honest, made my fair share of mistakes). Here’s what I’ve learned the hard way:
- Blanching matters: Don’t skip the ice bath! It keeps the beans bright and stops the cooking. I forgot once and ended up with drab, limp bundles—never again.
- Thin bacon wins: Thick-cut bacon doesn’t crisp up as well and can overpower the beans. If all you have is thick, slice it lengthwise to make it thinner.
- Glaze after wrapping: If you glaze the bacon before wrapping, it gets slippery and hard to secure. Always brush it on after bundling.
- Flip for even crispiness: If you aren’t using a rack, flip the bundles halfway through baking. Otherwise, the bottoms stay soggy (and nobody likes soggy bacon).
- Don’t overcrowd the pan: Give each bundle space to breathe. Overcrowding leads to steaming instead of roasting, and you lose the crispy texture.
- Broil with caution: Broiling gives extra color, but watch closely—brown sugar burns fast! I’ve lost a whole batch to the broiler before, so set a timer and don’t walk away.
- Multitasking tip: Prep bundles ahead of time and store them in the fridge. Bake just before serving for maximum crunch.
- Consistency is key: Try to keep bundles the same size so they cook evenly. If you have a few small ones, pull them out a minute early.
Honestly, a little imperfection is part of the charm! If the bacon curls or a bean slips out, just tuck it back in—these bundles are all about flavor and fun, not fuss.
Variations & Adaptations
One of the best things about crispy sweet green bean bacon bundles is how easy they are to customize. Here are some favorite twists (and a few personal experiments):
- Gluten-free: Use a bacon brand certified gluten-free and double-check any seasonings. I’ve made this for friends with celiac by swapping out the glaze for pure maple syrup—worked great!
- Vegetarian: Sub in turkey bacon or a smoky plant-based bacon. You’ll need to watch bake times, as veggie bacon can crisp up faster.
- Spicy kick: Add a sprinkle of crushed red pepper or drizzle with sriracha before baking. My husband loves the heat!
- Seasonal swap: Try asparagus or baby carrots instead of green beans—just adjust blanching time as needed.
- Dairy-free: Use olive oil instead of butter in the glaze. Still gets that gorgeous caramelization.
- Herb finish: Sprinkle bundles with chopped fresh thyme or rosemary right after baking for a fragrant touch.
Personally, I’ve tried swapping out the brown sugar for honey, and it made the glaze extra sticky and delicious. Don’t be afraid to get creative—if you love tangy flavors, a splash of balsamic in the glaze is fantastic. Just remember, whatever you do, keep the bundles snug and the bacon thin!
Serving & Storage Suggestions
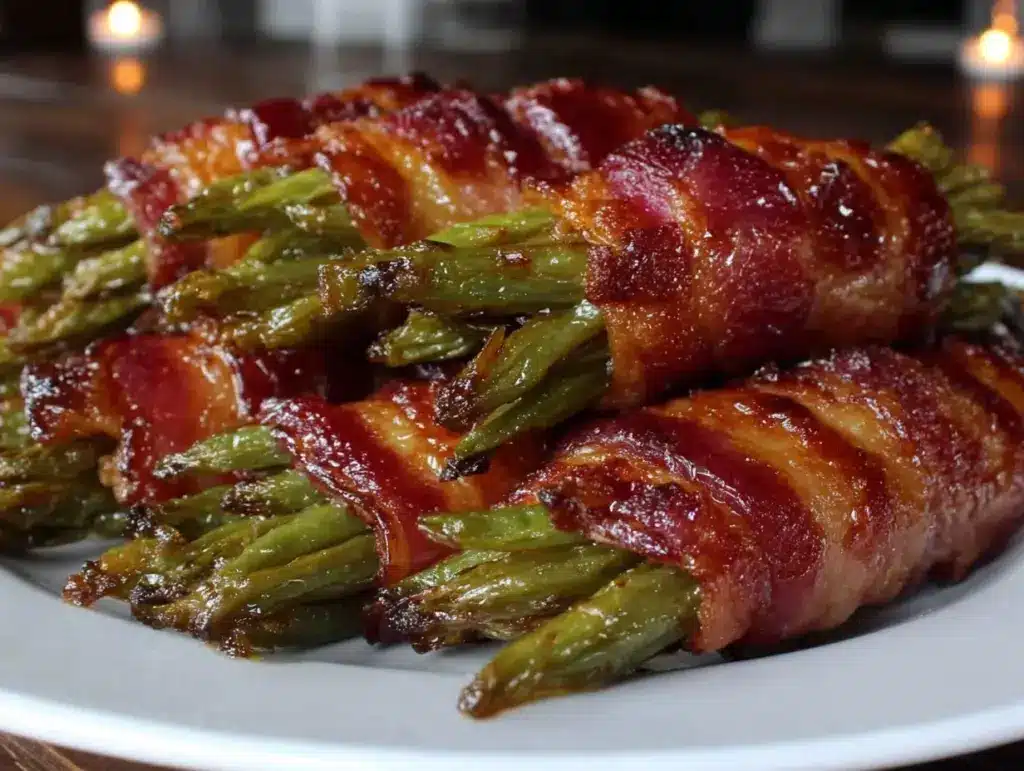
Crispy sweet green bean bacon bundles are best served hot, straight from the oven. Arrange them on a platter with the bacon seam-side down for a polished look. Garnish with a sprinkle of black pepper or a few fresh herbs if you’re feeling fancy.
Pair these bundles with roast chicken, steak, or even a simple pasta—honestly, they go with just about everything. For drinks, I love serving them alongside sparkling cider or a crisp white wine (the sweet and salty flavors are a match made in heaven).
If you have leftovers (rare!), store them in an airtight container in the fridge for up to 3 days. To reheat, place bundles on a baking sheet and warm in a 350°F (175°C) oven for 8–10 minutes. Avoid the microwave if you want to keep that bacon crispy. You can also freeze uncooked bundles for up to a month; just thaw overnight in the fridge before baking. The flavors deepen a bit with time, so leftovers are still delicious!
Nutritional Information & Benefits
Each crispy sweet green bean bacon bundle has roughly 80–100 calories, depending on bacon thickness and glaze amount. Green beans are packed with vitamin C, fiber, and antioxidants, while bacon brings protein and a little “treat factor.” Brown sugar adds sweetness, but you can use less or swap for coconut sugar for a lower-glycemic version.
This recipe is naturally low-carb (if you skip or limit the sugar in the glaze), and it’s gluten-free if you pick the right bacon. Allergens to watch for: pork, dairy (in the glaze), and garlic. From a wellness perspective, these bundles are a fun way to get veggies on the plate—my family eats way more green beans when they’re bundled up and crispy!
Conclusion
If you want a dinner party dish that’s guaranteed to impress—and super easy to make—crispy sweet green bean bacon bundles are the answer. The combo of sweet, salty, and crispy is irresistible, and they add a pop of color to any table. Whether you stick to the classic recipe or try one of the fun variations, you’ll end up with a crowd-pleaser that’s full of comfort and flavor.
I truly love these bundles because they remind me of family gatherings and simple, happy memories. Don’t be afraid to make them your own—add a twist, swap out ingredients, or double the batch for big groups. If you give them a try, leave a comment below and share your favorite variation! I’d love to hear how you serve them, and maybe even swap a few kitchen stories. Happy cooking, and here’s to dishes that bring people together!
FAQs
Can I make crispy sweet green bean bacon bundles ahead of time?
Yes! Prep and wrap the bundles, then cover and refrigerate for up to 24 hours. Add the glaze and bake right before serving for best results.
Can I use frozen green beans instead of fresh?
You can, but fresh green beans give the best texture. If using frozen, thaw and pat dry thoroughly to avoid soggy bundles.
What’s the best way to keep bacon crispy?
Bake on a rack if possible, and don’t overcrowd the pan. Flip bundles halfway through baking if not using a rack.
How do I make these bundles gluten-free?
Double-check your bacon and seasonings for hidden gluten. Otherwise, all other ingredients are naturally gluten-free.
Can I use turkey bacon or plant-based bacon?
Absolutely! Adjust baking time as needed—turkey or plant-based bacon can crisp up faster than pork bacon. Keep an eye on them so they don’t overcook.
Pin This Recipe!
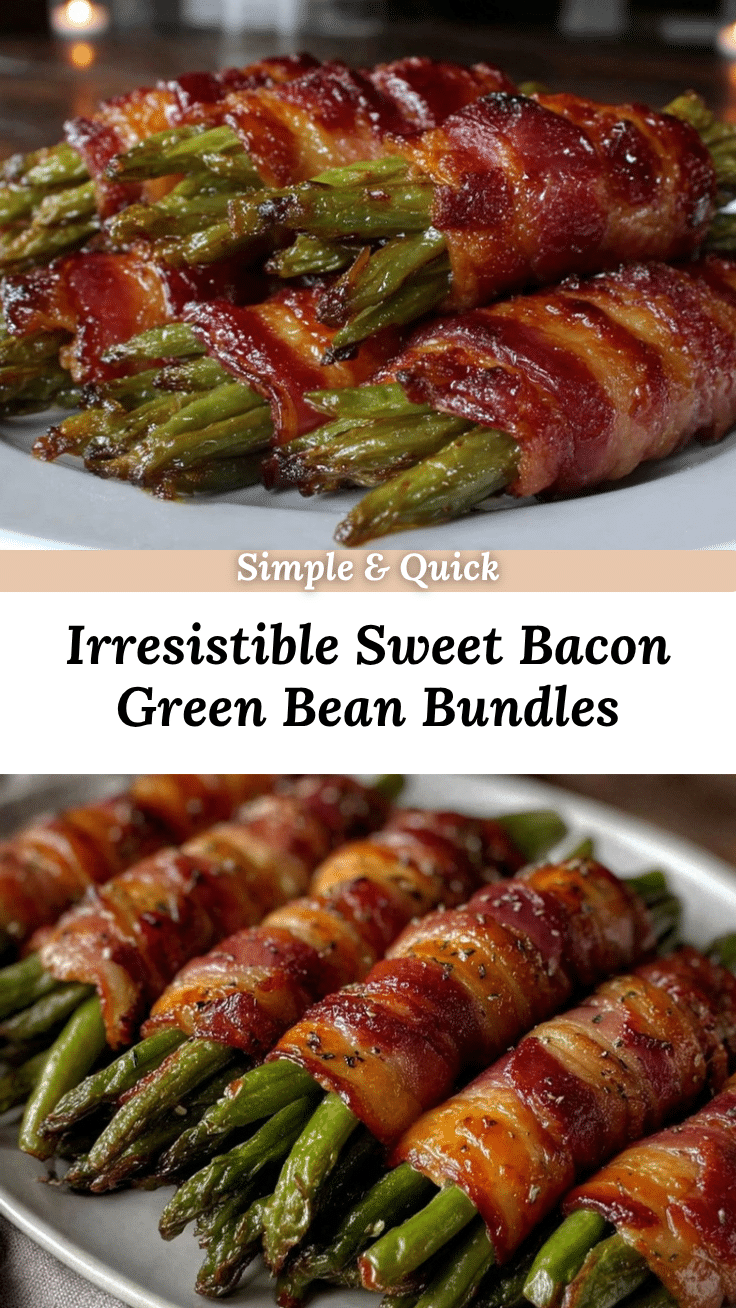
Crispy Sweet Green Bean Bacon Bundles

Fresh green beans are wrapped in crispy bacon and glazed with a sweet, savory brown sugar mixture for an irresistible appetizer or side dish. Perfect for dinner parties, potlucks, or holiday gatherings, these bundles are easy to make and always a crowd-pleaser.
- Prep Time: 15 minutes
- Cook Time: 25 minutes
- Total Time: 40 minutes
- Yield: 10-12 bundles (4-6 servings) 1x
- Category: Appetizer
- Cuisine: American
Ingredients
- 1 pound fresh green beans, trimmed
- 10–12 thin-cut bacon strips
- 1/4 cup brown sugar
- 2 tablespoons unsalted butter, melted
- 1 teaspoon garlic powder
- 1/2 teaspoon freshly cracked black pepper
- 1/2 teaspoon salt
- 1 tablespoon olive oil
- 1/2 teaspoon smoked paprika (optional)
Instructions
- Trim the ends off the green beans and rinse thoroughly.
- Bring a large pot of salted water to a boil. Add green beans and cook for 3 minutes until bright green and tender-crisp. Drain and plunge into ice water for 2 minutes. Drain again and pat dry.
- Preheat oven to 400°F (200°C). Line a baking sheet with parchment paper or foil. Place an oven-safe rack on top if available.
- Toss dried beans with olive oil, salt, and a pinch of black pepper in a mixing bowl.
- Take 8–10 beans and lay them in a stack. Wrap tightly with one strip of bacon, overlapping ends underneath. Secure with a toothpick and place seam-side down on the baking sheet. Repeat until all beans and bacon are used.
- In a small bowl, whisk together brown sugar, melted butter, garlic powder, black pepper, and smoked paprika (if using).
- Brush or spoon the glaze over each bundle, coating the bacon well.
- Bake for 20–25 minutes, until bacon is golden and crisp. Flip bundles halfway through baking if not using a rack.
- If bacon needs more color, broil for 2–3 minutes, watching closely.
- Let bundles rest for 3 minutes before serving. Remove toothpicks before plating.
Notes
Blanching the beans and using thin-cut bacon ensures crispiness and bright color. Prep bundles ahead and bake just before serving for best texture. For gluten-free, double-check bacon and seasonings. Try variations with asparagus, turkey bacon, or a spicy glaze. Avoid overcrowding the pan for maximum crispiness.
Nutrition
- Serving Size: 1 bundle
- Calories: 90
- Sugar: 5
- Sodium: 250
- Fat: 6
- Saturated Fat: 2
- Carbohydrates: 7
- Fiber: 2
- Protein: 4
Keywords: green bean bundles, bacon wrapped green beans, dinner party appetizer, holiday side dish, easy bacon recipe, sweet bacon glaze, crowd pleaser, gluten-free option


