“You know that moment when you bite into a dessert and a warm, gooey chocolate river just oozes out? Well, that’s exactly what happened one chilly Friday evening when my power flickered off mid-bake. I was halfway through making what was supposed to be a simple chocolate cake, but with the oven acting up, I panicked and pulled them out early. Honestly, I thought I’d ruined the whole batch. Instead, these molten lava cakes turned out to be a sweet little accident that’s now a favorite go-to indulgence—especially paired with cool, creamy vanilla ice cream. Maybe you’ve been there, rushing in the kitchen, trying to salvage a dessert that just might surprise you.
That night, the rich aroma of chocolate filled my small kitchen, mingling with the faint vanilla scent from the ice cream melting on the side. There was a cracked ramekin on the counter, a bit of batter spilled on the floor (classic me), and a neighbor knocking to borrow sugar, which I barely noticed because I was too busy savoring that first molten bite. This recipe for decadent molten lava cakes with vanilla ice cream is not just about dessert; it’s about those imperfect, cozy kitchen moments that stick with you.
If you’ve never tried making molten lava cakes at home, I promise this recipe makes it surprisingly simple. It’s quick, requires just a handful of ingredients, and delivers that dreamy, molten center every single time. Let’s be honest—nothing quite beats that warm chocolate paired with a scoop of vanilla ice cream melting together on your tongue. It’s comfort food with a touch of fancy, and you’ll want to make it again and again.
Why You’ll Love This Recipe
Having tested countless chocolate desserts over the years, this molten lava cake recipe stands out for a few solid reasons:
- Quick & Easy: Ready in under 30 minutes, perfect for those evenings when you want a fancy dessert without the fuss.
- Simple Ingredients: No need to hunt down obscure items—just pantry staples like good-quality chocolate, butter, and eggs.
- Perfect for Special Occasions: Whether it’s a romantic date night, a birthday, or just a treat-yourself moment, these cakes impress every time.
- Crowd-Pleaser: Kids, adults, chocolate lovers, skeptics—you name it, they all come back for seconds.
- Unbelievably Delicious: The contrast between the crisp edges, soft cake, and molten center is pure magic.
What makes this version different? I blend a touch of espresso powder into the batter—not enough to taste coffee, but just enough to deepen the chocolate flavor remarkably. Plus, I swear by using Valrhona or Ghirardelli chocolate bars for that perfect melt and silky texture. Not to mention, the trick of chilling the batter before baking helps the cakes set perfectly on the outside while keeping the center delightfully runny.
This recipe isn’t just about satisfying a sweet tooth. It’s about creating a moment—one where you pause, close your eyes, and let the rich chocolate wash over you. It’s a little luxury you can whip up at home, no fancy skills required.
What Ingredients You Will Need
This recipe uses simple, wholesome ingredients to deliver bold flavor and satisfying texture without the fuss. Most are pantry staples, but a few tips on choosing the best chocolate and butter will help you get that perfect molten center.
- Unsalted butter, 6 tablespoons (85g), plus extra for greasing ramekins (adds richness and smooth texture)
- Bittersweet or semi-sweet chocolate, 6 ounces (170g), chopped (I recommend Ghirardelli or Valrhona for best melt and flavor)
- Granulated sugar, 1/2 cup (100g)
- Large eggs, 2, room temperature (helps with smooth batter)
- Large egg yolks, 2, room temperature (boosts creaminess)
- All-purpose flour, 1/4 cup (30g), sifted (for light structure)
- Espresso powder, 1 teaspoon (optional, enhances chocolate depth without coffee taste)
- Vanilla extract, 1 teaspoon (adds subtle warmth)
- Pinch of salt (balances flavors)
- Vanilla ice cream, for serving (choose your favorite brand or homemade for that extra touch)
Substitution tip: For a gluten-free option, swap all-purpose flour with almond flour or gluten-free baking flour blends. Coconut sugar can replace granulated sugar for a deeper caramel note. If dairy-free is needed, use vegan butter and dairy-free chocolate, plus coconut or almond milk ice cream.
Equipment Needed
- Ramekins: Four 6-ounce (180ml) ramekins work best; they help the cakes hold their shape while baking. If you don’t have ramekins, small oven-safe bowls or muffin tins can work, but adjust baking time slightly.
- Mixing bowls: Use a medium and a small bowl for melting and mixing ingredients.
- Double boiler or microwave-safe bowl: For melting chocolate and butter gently. A double boiler prevents scorching, but a microwave in short bursts works fine too.
- Whisk or electric mixer: To beat eggs and sugar for that light, airy batter.
- Spatula: For folding in flour gently without deflating the batter.
- Baking sheet: To place ramekins on for easy handling in and out of the oven.
If you’re on a budget, ramekins can often be found cheaply at thrift stores or online, and they’re worth the investment for this and many other desserts. Also, maintaining your double boiler by drying it thoroughly after use prevents rust and keeps your chocolate melting smooth.
Preparation Method
- Preheat your oven to 450°F (230°C). Butter the ramekins generously and lightly dust with cocoa powder to prevent sticking. Place them on a baking sheet for easy handling. (5 minutes)
- Melt the butter and chocolate: In a double boiler or microwave-safe bowl, gently melt the 6 tablespoons of butter with the chopped chocolate. Stir every 20 seconds if microwaving to avoid burning. The mixture should be smooth and glossy. Let it cool slightly. (5 minutes)
- Whip the eggs and sugar: In a medium bowl, whisk together the 2 large eggs, 2 egg yolks, and 1/2 cup sugar until pale, thick, and creamy—about 3-4 minutes. This aeration is key for light texture.
- Combine chocolate and eggs: Slowly pour the melted chocolate mixture into the eggs while whisking continuously to avoid cooking the eggs. Add the 1 teaspoon vanilla extract and 1 teaspoon espresso powder here.
- Fold in flour and salt: Using a spatula, gently fold the sifted 1/4 cup flour and a pinch of salt into the chocolate batter. Mix just until combined—overmixing can deflate the batter and affect texture.
- Chill the batter: Cover the bowl and refrigerate the batter for at least 20 minutes. This step is crucial to ensure the cakes set on the outside while remaining molten inside.
- Fill ramekins: Divide the batter evenly among the prepared ramekins, filling about 3/4 full.
- Bake: Place the baking sheet with ramekins into the preheated oven. Bake for 12-14 minutes. The edges should be firm and set, while the center remains soft and slightly jiggly.
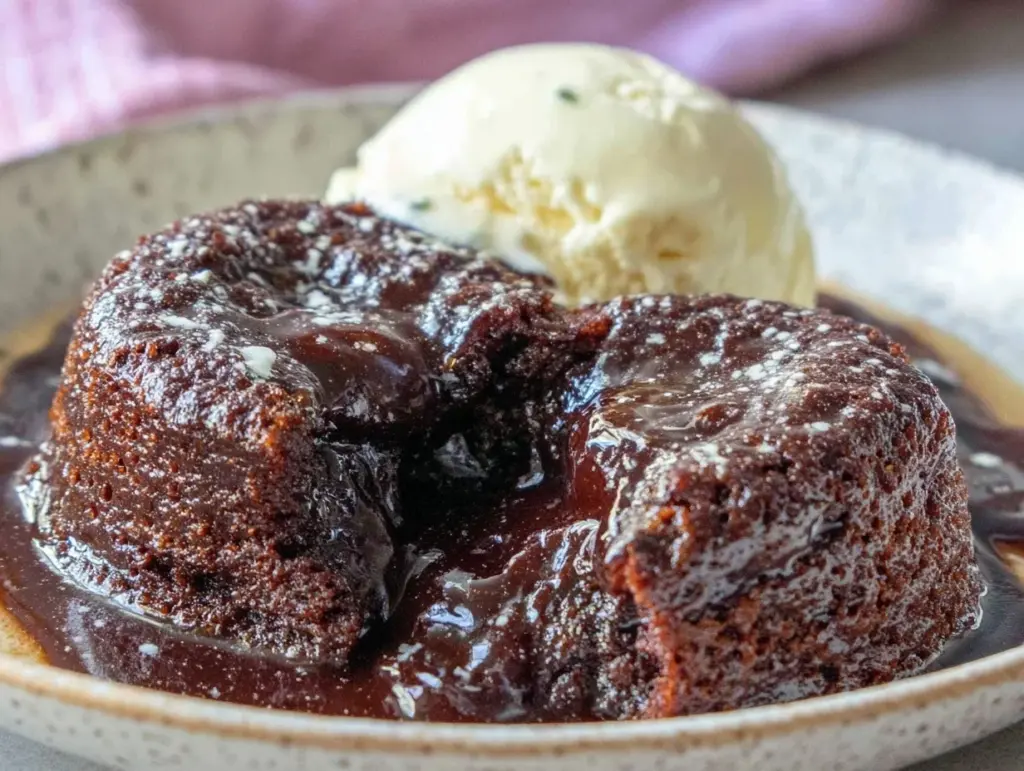
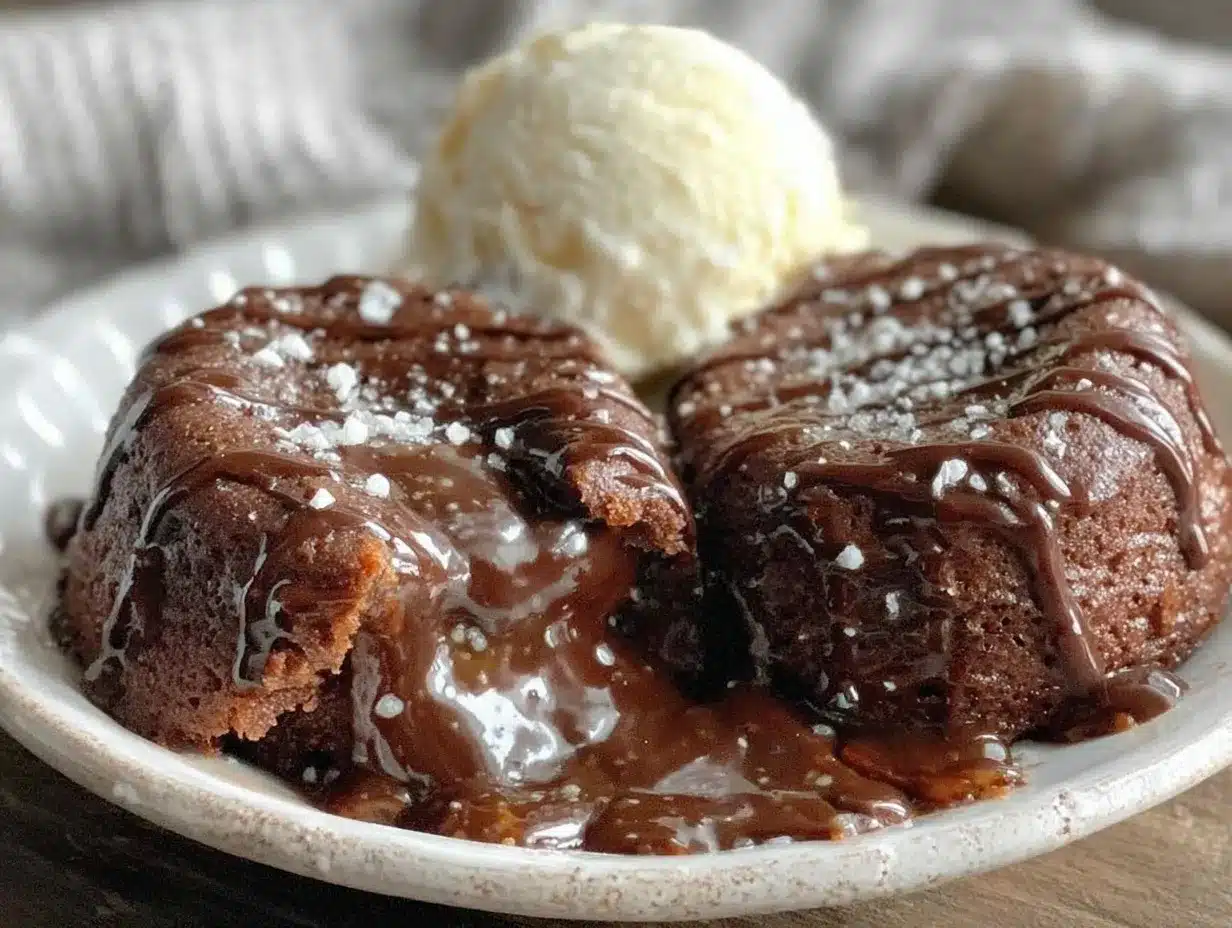
- Serve immediately: Remove from the oven and let sit for 1 minute. Then, run a knife around the edges to loosen the cakes, invert onto serving plates, and top with a scoop of vanilla ice cream.
Pro tip: Keep an eye on the baking time; every oven is different. If you leave them too long, the molten center disappears. Too short, and the cakes might collapse. The first try might take a little adjusting, but once you get it, it’s magic every time.
Cooking Tips & Techniques
One of the trickiest parts of making molten lava cakes is getting that perfect molten center without underbaking the entire cake. Here’s what I learned from my early failures (and messy kitchen moments):
- Temperature control: Preheating your oven fully before popping in the cakes ensures even baking. A too-low oven means the center won’t melt properly; too hot, and the edges can burn before the center sets.
- Use room temperature eggs: This helps the batter whip up better and creates a smoother texture.
- Don’t overmix once flour is added: Overworking the batter can lead to dense cakes.
- Chilling the batter: This isn’t just a random step. It firms up the batter so the outside bakes faster than the inside, giving you that signature molten effect.
- Baking time matters: I always set a timer for 12 minutes and check. If the center jiggles slightly and edges look firm, it’s done. If not, bake for another minute or two—but watch closely!
- Use quality chocolate: Cheap chocolate can result in grainy texture or bland flavor. Invest in good bars for best results.
- Multitasking tip: While the cakes chill, prep your ice cream bowls and set the table. This way, everything’s ready once the cakes come out.
Variations & Adaptations
While the classic molten lava cake is hard to beat, I’ve played around with a few tweaks that might suit your mood or dietary needs:
- Salted caramel lava cakes: Add a teaspoon of caramel sauce in the center before baking for a gooey caramel surprise.
- Fruit-infused: Mix in fresh raspberries or a spoonful of raspberry jam for a fruity twist that cuts through the richness.
- Gluten-free option: Swap the all-purpose flour with almond flour or a gluten-free blend. The texture will be slightly different but still delicious.
- Vegan adaptation: Use dairy-free butter, a flax egg (1 tablespoon ground flaxseed mixed with 3 tablespoons water per egg), and dairy-free dark chocolate. Bake a little longer to compensate for the different moisture content.
- Spiced chocolate: Add a pinch of cinnamon or cayenne pepper for a subtle warmth that makes the chocolate pop.
Personally, I once tried adding a splash of orange liqueur to the batter, and it was surprisingly delightful—citrus and chocolate, a classic combo.
Serving & Storage Suggestions
Molten lava cakes are best served warm right out of the oven, with a generous scoop of vanilla ice cream melting on top. The contrast between hot and cold, soft and crunchy, is part of the charm.
For presentation, dust with a little powdered sugar or cocoa powder, and maybe garnish with fresh mint or berries if you’re feeling fancy. Pair the dessert with a cup of strong espresso or a glass of red wine to complete the experience.
If you have leftovers (though rare!), cover the cakes tightly with plastic wrap and store in the refrigerator for up to 2 days. To reheat, pop them in a 350°F (175°C) oven for 8-10 minutes—just enough to warm through without overbaking.
The flavor often deepens after a day, but the texture changes, so fresh is best. Ice cream can be stored separately and scooped fresh when serving.
Nutritional Information & Benefits
Each serving of these decadent molten lava cakes packs approximately:
| Calories | 380-420 kcal |
|---|---|
| Fat | 25g (mostly from butter and chocolate) |
| Carbohydrates | 35g (includes sugar and flour) |
| Protein | 6g (from eggs and chocolate) |
Chocolate is a great source of antioxidants and can boost mood thanks to compounds like theobromine and phenylethylamine. Eggs add protein and essential nutrients, while vanilla extract contains trace amounts of antioxidants. This dessert is definitely an indulgence, but when enjoyed occasionally, it can fit into a balanced diet.
For those mindful of allergens, remember this recipe contains eggs, dairy, gluten (unless substituted), and chocolate. Adjustments can be made as noted earlier.
Conclusion
Honestly, these decadent molten lava cakes with vanilla ice cream are the kind of dessert that feels fancy but actually comes together quickly and easily. Whether you’re impressing friends or indulging solo, this recipe hits that sweet spot between comfort and celebration. I love how it brings a little joy to hectic nights and special moments alike.
Feel free to tweak the flavors or adapt the recipe to your taste—maybe a pinch of chili for heat or a swirl of peanut butter for richness. I’d love to hear how you make it your own! Drop a comment below with your variations or questions, and don’t forget to share this recipe with anyone who needs a little chocolate happiness.
Go on, treat yourself—you deserve it.
Frequently Asked Questions
Can I make molten lava cakes ahead of time?
You can prepare the batter and keep it refrigerated for up to 24 hours before baking. Just bring it back to room temperature before filling ramekins and baking for best results.
What if my cakes don’t have a molten center?
That usually means they’ve baked too long. Try shortening the baking time by a minute or two next time, and make sure the batter is well chilled before baking.
Can I use chocolate chips instead of chopped chocolate?
Yes, but high-quality chocolate chips melt differently. Chopped chocolate bars usually give a smoother texture and richer flavor.
How do I prevent the cakes from sticking to the ramekins?
Butter the ramekins generously and dust with cocoa powder instead of flour. This helps the cakes release easily and keeps the edges deliciously chocolatey.
Is there a dairy-free version of this recipe?
Absolutely! Use dairy-free butter, vegan dark chocolate, and substitute eggs with flax eggs or other egg replacers. Baking time might need slight adjustment.
Pin This Recipe!
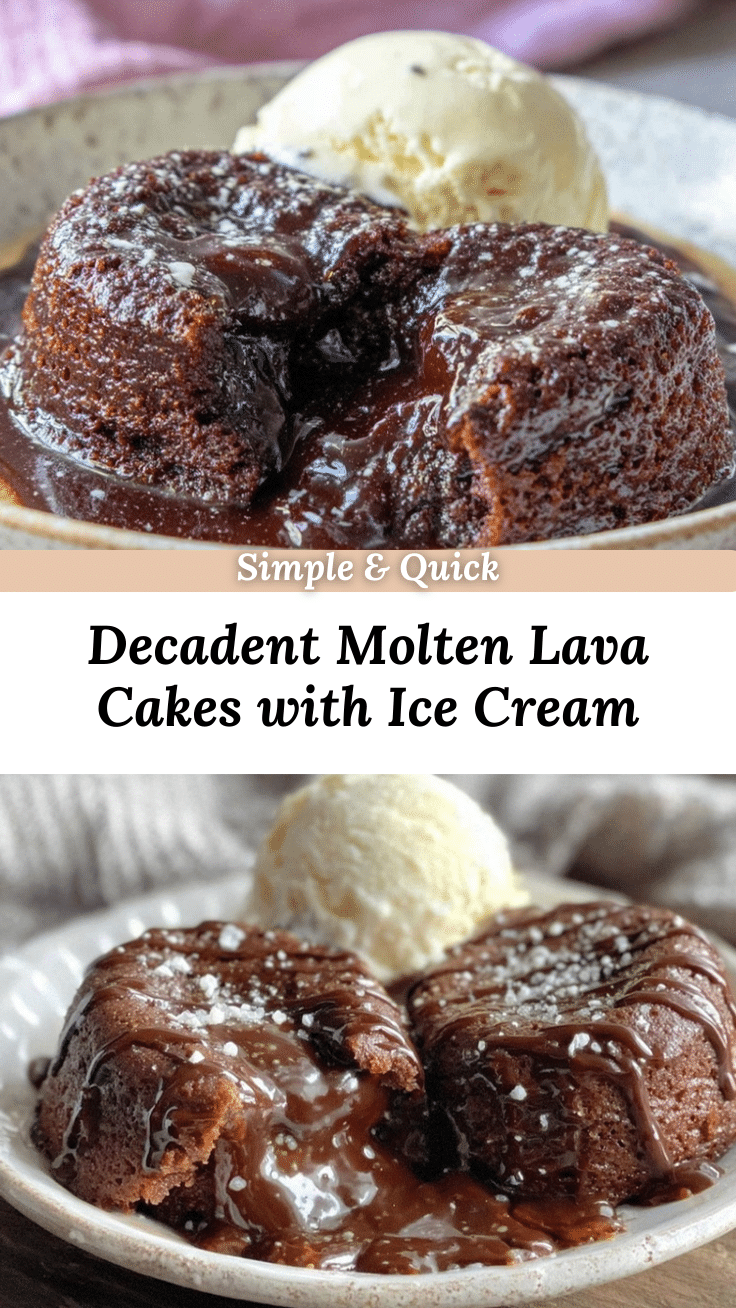
Decadent Molten Lava Cakes Recipe Easy Homemade Dessert with Vanilla Ice Cream
These decadent molten lava cakes feature a warm, gooey chocolate center paired perfectly with creamy vanilla ice cream. Quick and easy to make, they deliver a rich, indulgent dessert experience.
- Prep Time: 10 minutes
- Cook Time: 14 minutes
- Total Time: 24 minutes
- Yield: 4 servings 1x
- Category: Dessert
- Cuisine: American
Ingredients
- 6 tablespoons unsalted butter (85g), plus extra for greasing ramekins
- 6 ounces bittersweet or semi-sweet chocolate, chopped (recommended: Ghirardelli or Valrhona)
- 1/2 cup granulated sugar (100g)
- 2 large eggs, room temperature
- 2 large egg yolks, room temperature
- 1/4 cup all-purpose flour (30g), sifted
- 1 teaspoon espresso powder (optional)
- 1 teaspoon vanilla extract
- Pinch of salt
- Vanilla ice cream, for serving
Instructions
- Preheat your oven to 450°F (230°C). Butter the ramekins generously and lightly dust with cocoa powder to prevent sticking. Place them on a baking sheet for easy handling.
- Melt the butter and chocolate in a double boiler or microwave-safe bowl. Stir every 20 seconds if microwaving to avoid burning. Let the mixture cool slightly.
- Whisk together the eggs, egg yolks, and granulated sugar in a medium bowl until pale, thick, and creamy, about 3-4 minutes.
- Slowly pour the melted chocolate mixture into the eggs while whisking continuously. Add vanilla extract and espresso powder.
- Gently fold in the sifted flour and salt using a spatula until just combined.
- Cover the batter and refrigerate for at least 20 minutes to chill.
- Divide the batter evenly among the prepared ramekins, filling about 3/4 full.
- Bake for 12-14 minutes until edges are firm and center is soft and slightly jiggly.
- Remove from oven and let sit for 1 minute. Run a knife around edges, invert onto plates, and serve immediately with a scoop of vanilla ice cream.
Notes
Use room temperature eggs for better batter texture. Chill the batter before baking to ensure a molten center. Watch baking time closely to avoid overbaking. Use high-quality chocolate for best flavor and texture. Butter ramekins and dust with cocoa powder to prevent sticking.
Nutrition
- Serving Size: 1 molten lava cake w
- Calories: 380420
- Sugar: 25
- Sodium: 70
- Fat: 25
- Saturated Fat: 15
- Carbohydrates: 35
- Fiber: 3
- Protein: 6
Keywords: molten lava cake, chocolate dessert, easy dessert, homemade lava cake, vanilla ice cream, quick dessert, chocolate cake


