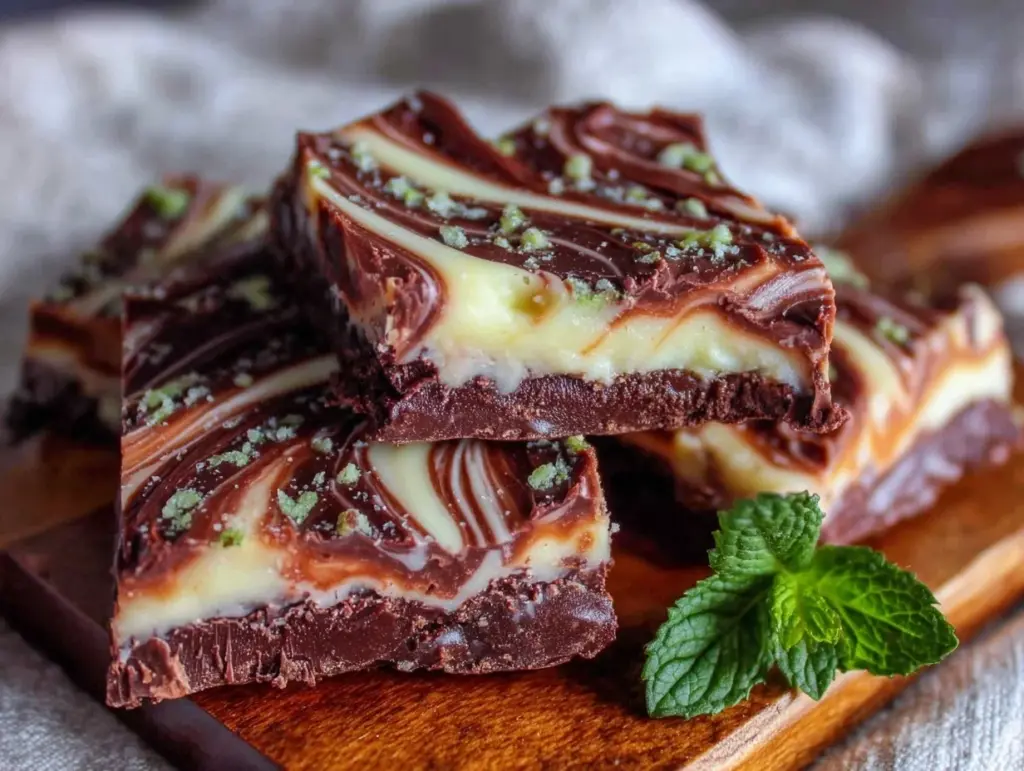
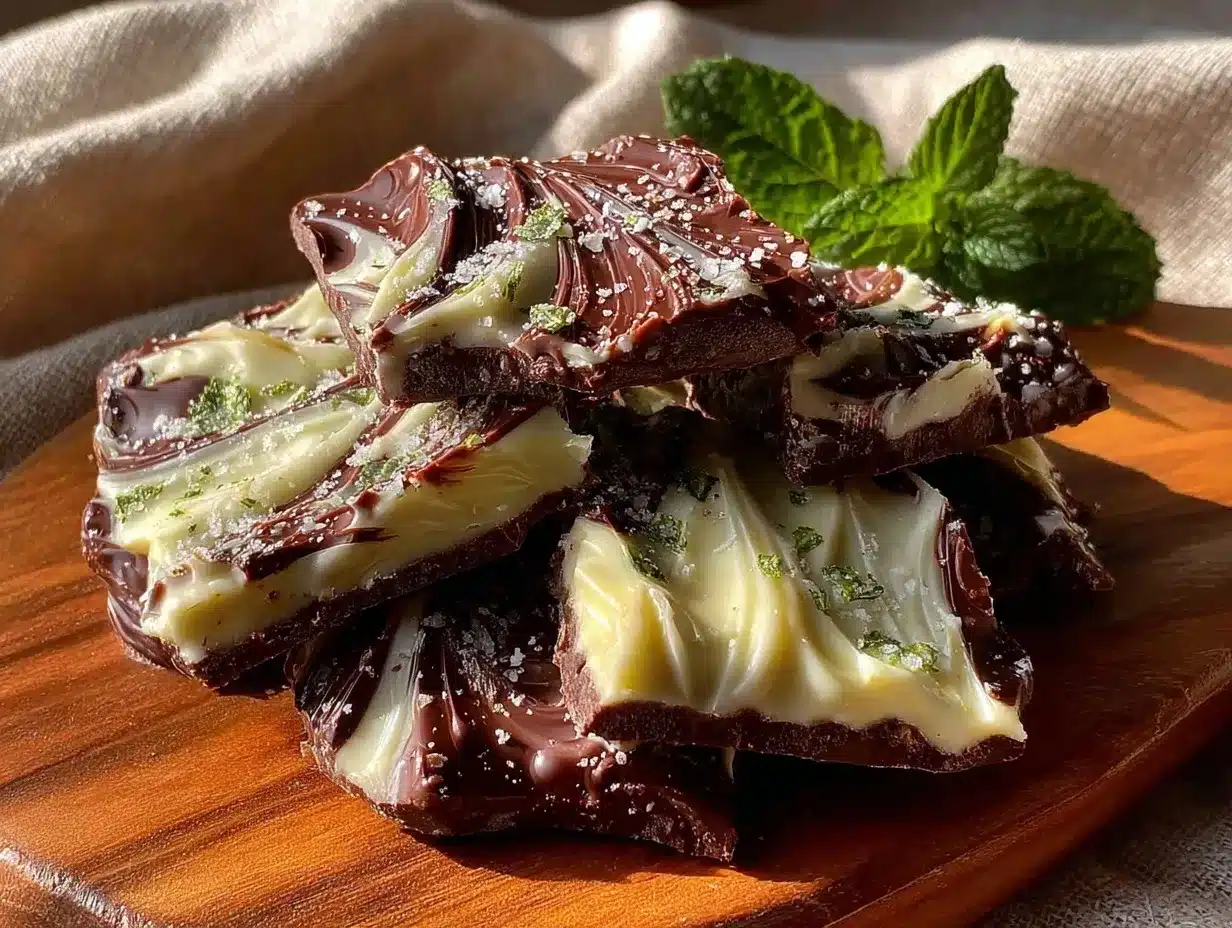
“You won’t believe how this all started,” my friend Mark said as he handed me a piece of his homemade mint chocolate bark one chilly Thursday evening. Honestly, I was expecting something ordinary—just another chocolate treat tossed together—but what I got was pure magic. It was late, and he’d been experimenting in his tiny kitchen after work, trying to impress a last-minute guest. The white chocolate swirls looked like delicate brush strokes against the rich dark base, and the cool mint flavor hit me like a fresh breeze. I remember the crunch, the melt-in-your-mouth sensation, and how I almost forgot to thank him because I was busy sneaking another piece.
Maybe you’ve had a chocolate bark that was just “meh,” or maybe you shy away from making it yourself because it seems tricky or too fancy. Well, this mint chocolate bark with white chocolate swirls is different. It’s simple, surprisingly quick, and frankly, a bit addictive. I’ve made a mess or two while swirling the white chocolate—once even forgot to add the peppermint extract (talk about a bummer!)—but every batch has been a little celebration. Whether you’re a chocolate lover or someone who’s just in it for the minty freshness, this recipe is worth your time. It’s the kind of treat you want to share, but maybe keep a few pieces hidden for yourself.
So, if you’re ready to try a dessert that’s as fun to make as it is to eat, let me walk you through this delightful mint chocolate bark recipe that’s sure to become your new favorite easy homemade dessert.
Why You’ll Love This Recipe
Let me tell you why this mint chocolate bark recipe stands out. After testing multiple batches (and yes, eating way too much chocolate in the process), I nailed a version that’s both straightforward and impressive. Here’s what makes it a winner:
- Quick & Easy: Ready in under 30 minutes, perfect for busy days or last-minute dessert cravings.
- Simple Ingredients: No need for specialty stores; you likely have most of these in your pantry.
- Perfect for Gifting: Looks fancy with the white chocolate swirls but requires minimal effort—ideal for holiday treats or party favors.
- Crowd-Pleaser: Mint and chocolate is a classic combo that kids and adults rave about alike.
- Unbelievably Delicious: The creamy white chocolate swirls balance the rich dark chocolate and refreshing mint, creating a texture and flavor combo that’s pure comfort.
What sets this apart from other bark recipes? It’s the little things—like using high-quality dark chocolate for that perfect snap, and a touch of peppermint extract that’s not overpowering but just right. Plus, the swirling technique isn’t just pretty; it lets you get creative with how much white chocolate you want in each bite. Honestly, it’s a dessert that feels special but doesn’t stress you out. You’ll close your eyes with the first bite and maybe even find yourself planning when to make it again. Trust me, this bark sticks around in my kitchen (and my heart) for all the right reasons.
What Ingredients You Will Need
This mint chocolate bark recipe calls for simple, wholesome ingredients that combine to make a bold flavor and satisfying texture. Most of these are pantry staples, and substitutions are easy if you’re tweaking for diet or preference.
- Dark chocolate chips or bars (10 oz / 280 g): I recommend brands like Ghirardelli or Lindt for best texture and flavor. Use 70% cocoa for a rich but not too bitter taste.
- White chocolate chips or bars (5 oz / 140 g): Choose high-quality white chocolate, such as Callebaut or Baker’s, for smooth melting and sweet swirls.
- Unsalted butter (1 tablespoon / 14 g): Adds silkiness to the dark chocolate when melted.
- Peppermint extract (1 teaspoon): The star of the recipe—fresh, not artificial. I like McCormick’s pure peppermint extract.
- Crushed peppermint candies or candy canes (1/2 cup / 60 g): For that satisfying crunch and extra minty pop. You can swap with chopped Andes mints if preferred.
- Sea salt (a pinch): Just a little to balance sweetness (optional but highly recommended).
If you want a dairy-free version, swap butter for coconut oil and use dairy-free chocolate chips. For a gluten-free treat, this recipe is naturally safe as long as your chocolates are certified gluten-free.
Equipment Needed
- Baking sheet: A rimmed baking sheet works best for spreading the bark evenly.
- Parchment paper or silicone baking mat: Essential to prevent sticking and easy clean-up.
- Microwave-safe bowls or double boiler: For melting chocolates gently. I prefer the double boiler method for better control but microwaving in short bursts works well too.
- Spoon or offset spatula: To spread and swirl the chocolates.
- Small mixing bowl: To stir peppermint extract into melted dark chocolate.
If you don’t have a double boiler, a heatproof bowl over a pot of simmering water will do. Silicone mats are reusable and a bit more eco-friendly than parchment paper, plus they help prevent cracking during cooling. I’ve tried spreading the bark on a regular baking sheet without lining it, and trust me—it’s a sticky mess. So, don’t skip the lining!
Preparation Method
- Prepare your workspace (5 minutes): Line a baking sheet with parchment paper or a silicone mat. Have your crushed peppermint candies ready in a bowl.
- Melt the dark chocolate (5-7 minutes): Using a double boiler or microwave, melt the dark chocolate chips with the unsalted butter. If microwaving, heat in 30-second intervals, stirring well each time to avoid burning. The mixture should be smooth and glossy.
- Add peppermint extract (1 minute): Stir the peppermint extract into the melted dark chocolate until fully combined. This step is crucial for that minty flavor punch, so don’t skip it!
- Spread the dark chocolate (3 minutes): Pour the dark chocolate mixture onto the prepared baking sheet. Use a spatula or back of a spoon to spread it evenly to about 1/4-inch (6 mm) thickness. Look for a smooth surface but don’t stress minor imperfections—they add charm.
- Melt the white chocolate (5 minutes): In a separate bowl, melt the white chocolate chips using the same method as the dark chocolate. Stir until silky smooth.
- Swirl the white chocolate (3-5 minutes): Drizzle the melted white chocolate over the dark chocolate layer in thin streams. Using a toothpick, skewer, or butter knife, gently swirl the white chocolate into the dark. Don’t over-mix; you want distinct swirls that look like marbled art.
- Add crushed peppermint candies and sea salt (1 minute): Sprinkle the crushed peppermint evenly over the top, pressing lightly so they stick. Finish with a tiny pinch of sea salt for balance.
- Chill until set (30-45 minutes): Place the baking sheet in the refrigerator for the bark to harden completely. Avoid the freezer since quick freezing can cause chocolate to bloom (a whitish film).
- Break into pieces and serve (2 minutes): Once firm, lift the bark off the parchment and break into irregular pieces. Store leftovers in an airtight container in a cool place or fridge.
Pro tip: If your white chocolate thickens too fast while swirling, warm it gently again but don’t overheat or it will seize. Also, don’t rush chilling; letting the bark set slowly helps keep that beautiful glossy finish.
Cooking Tips & Techniques
Working with chocolate can be a bit intimidating, but here are some tips I picked up over several batches to make your mint chocolate bark foolproof:
- Temperatures matter: Chocolate melts best slowly. If microwaving, go low and slow with short bursts and constant stirring to avoid scorching.
- Use quality chocolate: It makes a huge difference in flavor and texture. Cheap chocolate can taste waxy and won’t set properly.
- Swirling technique: Don’t overdo it or you’ll end up with a muddy color. Light, deliberate strokes with a toothpick create the prettiest pattern.
- Mint extract caution: It’s potent, so add gradually and taste the melted chocolate before adding more. Too much can be overpowering.
- Crushing candy: Use a rolling pin or heavy pan to crush peppermint candies, but keep some bigger bits for texture contrast.
- Timing: Multitasking helps here—melt dark chocolate while prepping candies, then melt white chocolate while spreading the dark layer.
I remember once rushing and adding peppermint extract after the bark had cooled—big mistake. The flavor didn’t infuse properly. So, timing really is key. Also, patience during the chilling phase pays off; rushing leads to cracked or dull bark.
Variations & Adaptations
This mint chocolate bark recipe is versatile enough to tweak for different diets and tastes. Here are some ideas:
- Dairy-Free Version: Swap butter for coconut oil and use dairy-free dark and white chocolates. The coconut flavor adds a subtle tropical twist.
- Nutty Crunch: Add chopped toasted almonds or pistachios on top for extra crunch and nutty depth.
- Spicy Mint: Sprinkle a pinch of cayenne or chili powder over the bark before chilling for a surprising kick alongside the mint.
- Seasonal Fruit: In warmer months, add dried cranberries or freeze-dried raspberries for a tart contrast that pairs beautifully with mint.
- Chocolate Swap: Use milk chocolate instead of dark for a sweeter, creamier version—perfect for kids.
Once, I tried stirring in crushed peppermint bark right into the melted dark chocolate before spreading. It made the bark a bit denser and more textured, which was a fun change. Don’t be afraid to experiment and find your favorite twist!
Serving & Storage Suggestions
This mint chocolate bark tastes best served at room temperature, allowing the chocolate to melt gently on your tongue. Arrange the pieces on a festive platter for parties or pack them in pretty cellophane bags as edible gifts. Pair with a hot cup of peppermint tea or a rich mocha for a cozy treat.
To store, keep the bark in an airtight container. It stays fresh at room temperature for up to two weeks in a cool, dry place. For longer storage, refrigerate for up to a month or freeze for 2-3 months. When reheating, avoid microwaving directly; instead, let the bark come to room temperature naturally to preserve texture and sheen.
Over time, the flavors actually mellow and deepen, especially the peppermint. So if you make a batch ahead of time, you might notice it tastes even better the next day (if it lasts that long!).
Nutritional Information & Benefits
Here’s a ballpark estimate per serving (about 1 oz / 28 g):
- Calories: 150-170
- Fat: 11g (mostly from chocolate and butter)
- Sugar: 13g
- Protein: 1-2g
- Fiber: 1-2g (from dark chocolate)
Dark chocolate is known for its antioxidants and potential heart health benefits when enjoyed in moderation. Peppermint extract adds a refreshing zing and may aid digestion. This recipe is gluten-free naturally and can be adapted for dairy-free diets. Just be mindful of potential allergens if you add nuts or use certain chocolate brands.
From a wellness perspective, this bark is a treat that satisfies sweet cravings without too many complicated ingredients. It’s a little indulgence that feels homemade and thoughtful—perfect for those moments when you want comfort without guilt.
Conclusion
So, there you have it: a mint chocolate bark recipe that’s easy, delicious, and just a bit fancy-looking. It’s the kind of homemade dessert that fits right in at holiday gatherings, casual get-togethers, or even quiet nights when you deserve a treat. Customize it with your favorite mix-ins or keep it classic—the flexibility is part of the fun.
I love this recipe because it’s forgiving, quick, and always gets compliments (and second helpings). It’s a little reminder that sometimes simple ingredients, a bit of patience, and a splash of creativity can create something truly delightful. Give it a try, and let me know how you make it your own—because honestly, there’s no one right way to enjoy mint chocolate bark.
Go ahead, share your results or questions in the comments below. I’d love to hear about your perfect swirl or favorite add-in. Happy chocolate making!
FAQs
Can I use chocolate chips instead of bars for this recipe?
Absolutely! Chocolate chips melt well and are convenient. Just watch the melting closely to avoid burning.
How should I store mint chocolate bark to keep it fresh?
Store it in an airtight container at room temperature in a cool, dry place for up to two weeks, or refrigerate/freezer for longer storage.
What if I don’t have peppermint extract?
You can use crushed peppermint candies alone for flavor, but the extract adds a stronger minty note. Alternatively, a drop of mint oil works but use sparingly.
Can I make this bark without white chocolate swirls?
Yes! The bark will still taste great with just the dark chocolate and peppermint. The white chocolate adds visual appeal and sweetness.
How do I prevent the white chocolate from seizing while melting?
Melt it gently over low heat or in short microwave bursts, stirring often. Avoid any water contact, as moisture causes seizing.
Pin This Recipe!
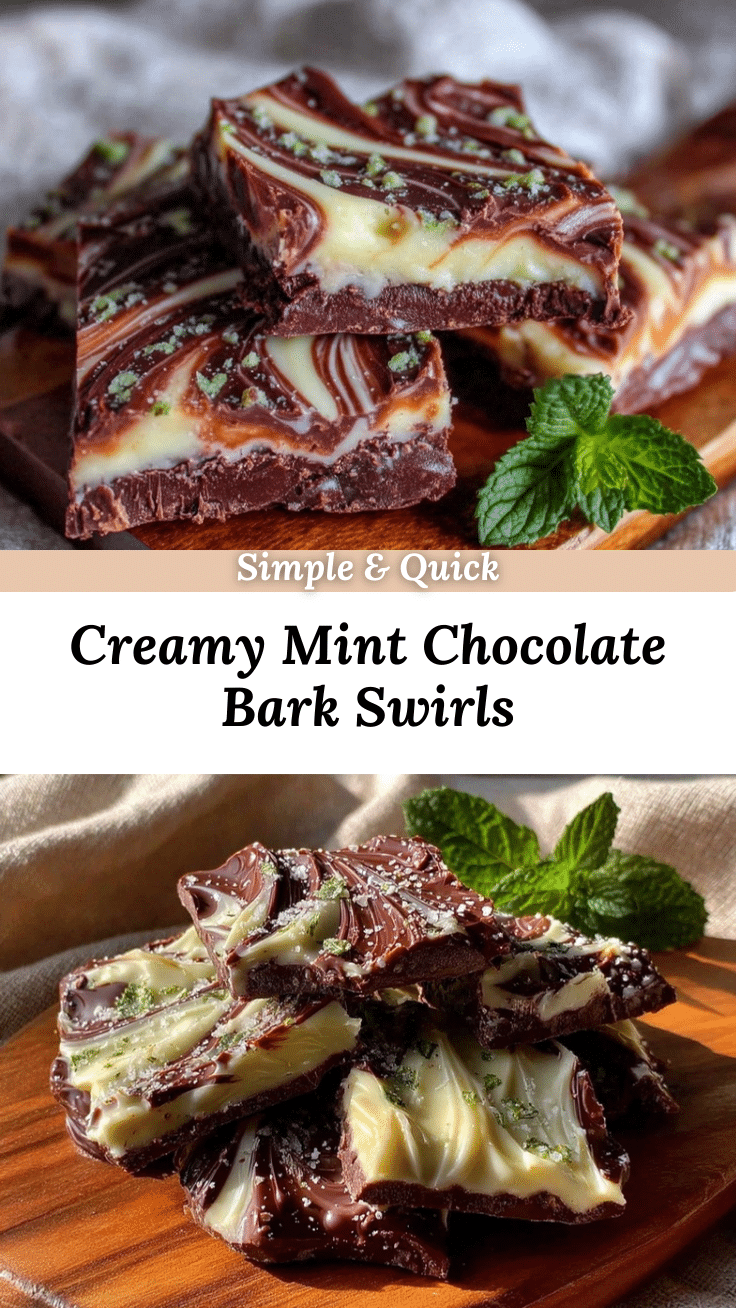
Delicious Mint Chocolate Bark Recipe Easy Homemade Dessert with White Chocolate Swirls

This mint chocolate bark features a rich dark chocolate base with creamy white chocolate swirls and refreshing peppermint flavor. It’s a quick, easy, and addictive homemade dessert perfect for gifting or enjoying yourself.
- Prep Time: 10 minutes
- Cook Time: 15 minutes
- Total Time: 45-55 minutes
- Yield: About 12 servings 1x
- Category: Dessert
- Cuisine: American
Ingredients
- 10 oz (280 g) dark chocolate chips or bars (70% cocoa recommended)
- 5 oz (140 g) white chocolate chips or bars
- 1 tablespoon (14 g) unsalted butter
- 1 teaspoon peppermint extract
- 1/2 cup (60 g) crushed peppermint candies or candy canes
- Pinch of sea salt (optional)
Instructions
- Prepare your workspace by lining a baking sheet with parchment paper or a silicone mat. Have your crushed peppermint candies ready in a bowl.
- Melt the dark chocolate chips with the unsalted butter using a double boiler or microwave in 30-second intervals, stirring well until smooth and glossy.
- Stir the peppermint extract into the melted dark chocolate until fully combined.
- Pour the dark chocolate mixture onto the prepared baking sheet and spread evenly to about 1/4-inch (6 mm) thickness.
- Melt the white chocolate chips in a separate bowl using the same method until silky smooth.
- Drizzle the melted white chocolate over the dark chocolate layer in thin streams and gently swirl with a toothpick or butter knife to create marbled patterns.
- Sprinkle the crushed peppermint candies evenly over the top and add a tiny pinch of sea salt.
- Chill the baking sheet in the refrigerator for 30-45 minutes until the bark is completely set.
- Once firm, lift the bark off the parchment and break into irregular pieces. Store leftovers in an airtight container in a cool place or fridge.
Notes
Use high-quality chocolate for best flavor and texture. Melt chocolate slowly to avoid burning. Swirl white chocolate gently to keep distinct patterns. Chill slowly in the refrigerator to maintain glossy finish. For dairy-free, substitute butter with coconut oil and use dairy-free chocolates. Store in airtight container at room temperature for up to two weeks or refrigerate/freezer for longer storage.
Nutrition
- Serving Size: About 1 oz (28 g) pe
- Calories: 160
- Sugar: 13
- Sodium: 20
- Fat: 11
- Saturated Fat: 7
- Carbohydrates: 15
- Fiber: 1.5
- Protein: 1.5
Keywords: mint chocolate bark, chocolate bark recipe, homemade dessert, white chocolate swirls, peppermint bark, easy chocolate dessert, holiday treats


