
Let me tell you, the smell of buttery, flaky pastry baking in the oven, mingling with the sweet scent of jam, is enough to make anyone’s mouth water. The first time I made these flaky homemade Pop-Tarts, I was instantly hooked—the kind of moment where you pause, take a deep breath, and just smile because you know you’re onto something truly special. Years ago, when I was knee-high to a grasshopper, my grandma would pull out something similar from her oven, but honestly, nothing beats making them from scratch yourself.
I stumbled upon this recipe during a rainy weekend, trying to recreate that nostalgic breakfast treat I loved as a kid without all the processed stuff. My family couldn’t stop sneaking them off the cooling rack (and I can’t really blame them). Honestly, these Pop-Tarts are dangerously easy to make, and they provide pure, nostalgic comfort—perfect for brightening up your Pinterest cookie board or adding a sweet treat for your kids’ school lunchboxes. You know what’s even better? They store so well, making them a staple for family gatherings or last-minute breakfast emergencies.
After testing this flaky homemade Pop-Tarts recipe multiple times (in the name of research, of course), it’s become a go-to in my house. Whether you want to impress guests or just crave a warm, flaky pastry that feels like a warm hug, you’re going to want to bookmark this one.
Why You’ll Love This Recipe
Having whipped up flaky homemade Pop-Tarts more times than I can count, I can honestly say this recipe ticks all the boxes for a perfect breakfast treat. Here’s why you’ll fall for it, too:
- Quick & Easy: Comes together in under 45 minutes—perfect for busy mornings or weekend brunches.
- Simple Ingredients: No fancy grocery trips needed; you probably already have everything in your pantry and fridge.
- Perfect for Any Occasion: Great for cozy breakfasts, school snacks, or even a sweet addition to your brunch table.
- Crowd-Pleaser: Kids and adults alike rave about the flaky crust and sweet filling combo.
- Unbelievably Delicious: The texture is next-level flaky thanks to a simple technique of cutting cold butter into the dough—trust me, it makes all the difference.
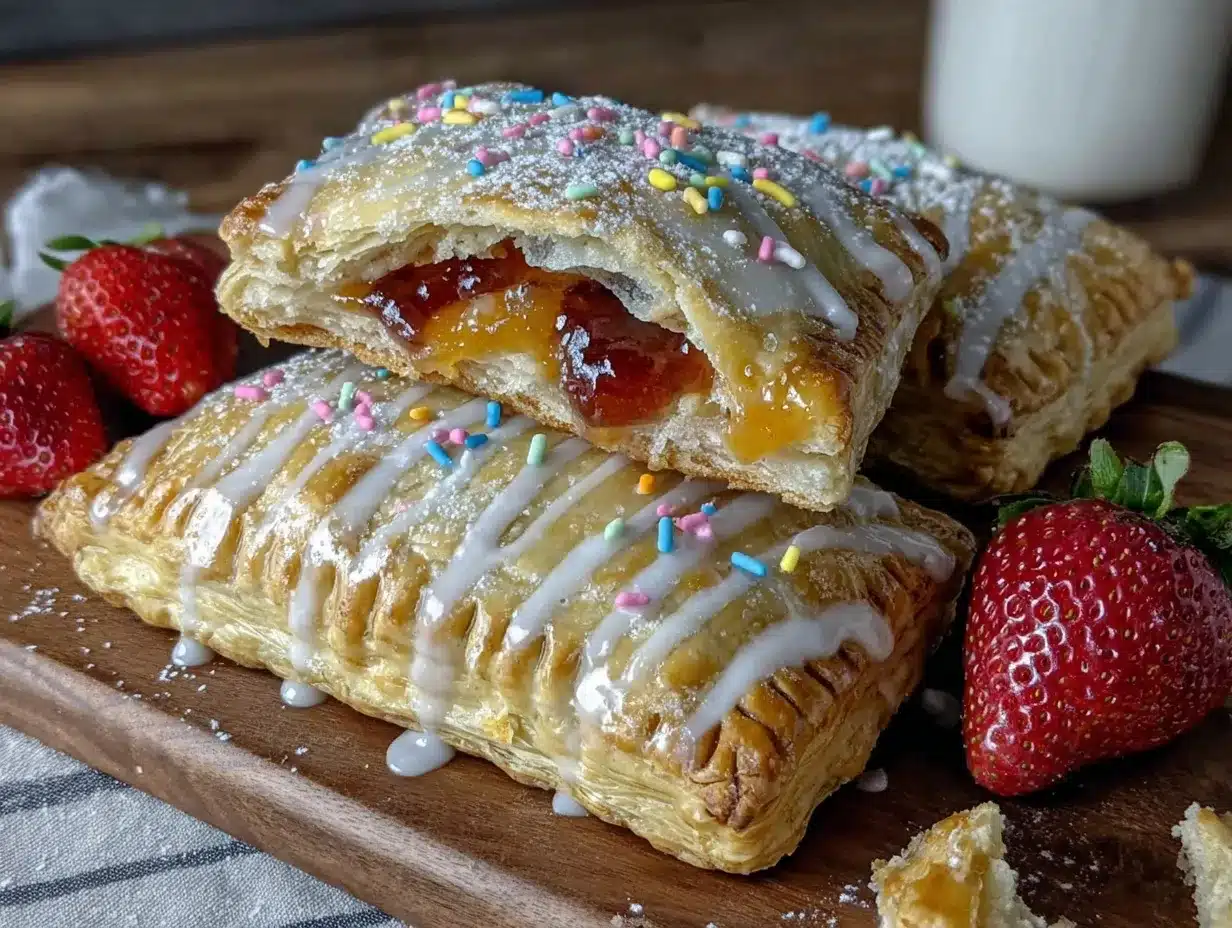
What makes this recipe stand out from the rest? It’s the little things—like folding the dough just right, sealing the edges tightly, and using your favorite homemade or store-bought jam for that burst of flavor inside. The balance between buttery crust and sweet filling isn’t just good—it’s the kind of breakfast that makes you close your eyes after the first bite. It’s classic comfort food done right, with a touch of homemade love that store-bought just can’t match.
What Ingredients You Will Need
This flaky homemade Pop-Tarts recipe uses simple, wholesome ingredients to deliver bold flavor and satisfying texture without the fuss. Most of these ingredients are pantry staples, making it super accessible for any home cook.
- For the Pastry Dough:
- 2 1/2 cups (320g) all-purpose flour (I recommend King Arthur for best texture)
- 1 tsp granulated sugar (adds a touch of sweetness)
- 1 tsp salt
- 1 cup (225g) unsalted butter, cold and cubed (essential for that flaky texture!)
- 1/2 cup (120ml) ice-cold water
- For the Filling:
- 1/2 cup (160g) fruit jam or preserves (strawberry, raspberry, or apricot work beautifully; homemade or store-bought)
- For the Egg Wash:
- 1 large egg, beaten (for that golden, shiny finish)
- Optional Toppings:
- Sprinkles or coarse sugar (for a festive touch)
- Powdered sugar for dusting
If you want to make these gluten-free, swapping the all-purpose flour for a 1:1 gluten-free baking blend works well. Also, if you’re dairy-free, try using a plant-based butter substitute like Earth Balance to keep that flaky texture intact. For jam, feel free to experiment with seasonal flavors—blueberry in summer, maybe apple butter in fall. The possibilities are endless!
Equipment Needed
- A large mixing bowl to combine your dough ingredients
- A pastry cutter or two forks to cut the cold butter into the flour (or your fingers if you like getting hands-on!)
- Rolling pin to roll out the dough evenly
- Baking sheet lined with parchment paper for easy cleanup and even baking
- A sharp knife or pizza cutter to slice the dough into rectangles
- A fork for sealing the edges of your Pop-Tarts
- Pastry brush for applying the egg wash
If you don’t have a pastry cutter, a food processor can speed things up, just pulse the butter and flour until crumbly. I’ve tried both and honestly, using your fingers works fine too—just be sure to keep the butter cold! For budget-friendly options, a rolling pin can be replaced with a clean bottle, and parchment paper can be swapped with a silicone baking mat.
Preparation Method
- Mix Dry Ingredients: In a large bowl, whisk together 2 1/2 cups (320g) all-purpose flour, 1 tsp sugar, and 1 tsp salt.
- Cut in Butter: Add 1 cup (225g) cold, cubed unsalted butter. Use a pastry cutter or two forks to cut the butter into the flour until the mixture resembles coarse crumbs with some pea-sized pieces remaining. This helps create that flaky texture. Take your time here—if the butter melts, the dough won’t be as tender.
- Add Ice Water: Gradually pour in 1/2 cup (120ml) ice-cold water, stirring gently with a fork until the dough starts to come together. You might not need all the water—add it slowly. When the dough holds together but isn’t sticky, it’s perfect.
- Form Dough Disks: Divide the dough in half, shape each half into a flat disk about 1 inch thick. Wrap tightly in plastic wrap and chill in the fridge for at least 30 minutes. This step is crucial—it firms up the butter and relaxes the gluten.
- Roll Out Dough: On a lightly floured surface, roll one dough disk into a rectangle about 12 inches by 9 inches (30cm x 23cm), roughly 1/8 inch (3mm) thick. Keep the dough moving to avoid sticking.
- Cut Rectangles: Using a sharp knife or pizza cutter, cut the dough into 3×4 rectangles (about 3 inches x 4 inches or 7.5cm x 10cm). Repeat with the second dough disk.
- Add Filling: Place a tablespoon of jam in the center of half the rectangles, spreading slightly but leaving a small border to seal.
- Seal Pop-Tarts: Brush the edges of the jam-filled rectangles with a little water or beaten egg, then top with a plain dough rectangle. Press edges together gently, then crimp with a fork to seal completely. This keeps the filling inside and gives that classic look.
- Apply Egg Wash: Lightly brush the tops with beaten egg for a golden finish. If you want, sprinkle coarse sugar or sprinkles on top for extra flair.
- Chill Again: Place the assembled Pop-Tarts on a parchment-lined baking sheet and chill for 15 minutes in the fridge. This helps keep their shape while baking.
- Bake: Preheat your oven to 375°F (190°C). Bake the Pop-Tarts for 20-25 minutes or until golden brown and crisp.
- Cool & Serve: Let cool on a wire rack for at least 10 minutes before enjoying. The filling will be hot, so patience is key!
If your dough becomes too sticky while rolling, pop it back in the fridge for a few minutes. Also, watch the edges as they bake—if they brown too fast, tent with foil to avoid burning. This method has given me consistent flaky, golden Pop-Tarts every time.
Cooking Tips & Techniques
Honestly, flaky homemade Pop-Tarts are a breeze if you keep a few tricks in mind. First, keep your butter ice cold—that’s the secret to layers and flakiness. When mixing the dough, don’t overwork it; overhandling develops gluten, making the crust tough instead of tender.
One time, I rushed the chilling step and ended up with dough that spread too much in the oven—lesson learned! Give the dough that rest in the fridge—it’s worth the wait. Also, sealing the edges properly is crucial; if you skip this, jam leaks everywhere, and cleaning up sticky ovens is no fun.
Timing is key—while the Pop-Tarts bake, prep your morning coffee or set the table. If you have multiple trays, rotate them halfway through baking for even color. If you want that classic shiny finish, don’t skip the egg wash; it makes a big difference in presentation.
Variations & Adaptations
Feel free to customize these flaky homemade Pop-Tarts to suit your taste or dietary needs. Here are a few variations I’ve tried and loved:
- Savory Twist: Swap out jam for cream cheese mixed with cooked bacon bits or sautéed spinach for a breakfast Pop-Tart that’s a little less sweet but just as flaky.
- Gluten-Free Version: Use a gluten-free baking blend and plant-based butter to make these friendly for gluten sensitivities without sacrificing texture.
- Seasonal Flavors: In fall, try apple-cinnamon preserves or pumpkin butter. Summer calls for fresh berry jams, which you can even make yourself!
For a different cooking method, these Pop-Tarts can be lightly toasted after baking to bring out extra crunch. Just be cautious with the filling—it can bubble and get hot quickly.
Serving & Storage Suggestions
Serve your homemade Pop-Tarts warm or at room temperature. They’re perfect paired with a hot cup of coffee, tea, or even a glass of cold milk for the kids. Presentation-wise, dust with powdered sugar for a sweet touch or add colorful sprinkles for a festive vibe.
Store leftover Pop-Tarts in an airtight container at room temperature for up to two days. For longer storage, keep them in the fridge for up to a week or freeze for up to two months. To reheat, pop them in the toaster or oven at 350°F (175°C) for 5-7 minutes until warm and crispy again.
Flavors often deepen after a day, so if you can wait, letting them rest wrapped overnight can make them even better. Just reheat gently, and you’ll get that fresh-baked taste all over again.
Nutritional Information & Benefits
Each homemade Pop-Tart contains roughly 200-250 calories, depending on the filling and size. Thanks to the use of real butter and simple ingredients, these Pop-Tarts offer a satisfying treat without artificial additives or preservatives common in store-bought versions.
The fruit jam provides a dose of antioxidants and natural sweetness, while the homemade dough avoids excess sugars and unhealthy fats. For those watching carbs, swapping in a low-carb flour blend and sugar-free jam can make this recipe fit various diets. Just a heads-up: these Pop-Tarts do contain gluten and dairy unless you use the substitutions mentioned earlier.
From a personal wellness perspective, making these at home means you know exactly what’s inside—no surprises or hidden ingredients—just pure, flaky, homemade goodness that fuels your morning better than any boxed alternative.
Conclusion
Flaky homemade Pop-Tarts are a delightful way to start your day or surprise your family with a nostalgic treat that feels both special and comforting. This recipe is straightforward enough for beginners but delivers that “wow” factor in taste and texture that keeps everyone coming back for more. Feel free to customize fillings and toppings to match your mood or the season—after all, cooking should be fun and flexible!
I love this recipe because it brings back warm memories while creating new ones every time I bake. Don’t hesitate to share your own twists or questions in the comments below—I’d love to hear how your flaky homemade Pop-Tarts turn out. Give this recipe a try, and you might just find your new favorite breakfast staple!
FAQs About Flaky Homemade Pop-Tarts
Can I use store-bought pie crust instead of making dough from scratch?
Yes, store-bought pie crust can save time, but it might not be as flaky or buttery as homemade dough. If you’re in a pinch, it works fine, just watch the baking time closely.
How do I prevent the filling from leaking during baking?
Make sure to seal the edges well by pressing with a fork and brushing the edges with water or egg wash before sealing. Chilling the assembled Pop-Tarts before baking also helps them hold their shape better.
Can I freeze the Pop-Tarts before baking?
Absolutely! Freeze them on a baking sheet until firm, then transfer to a freezer bag. Bake straight from frozen, adding a few extra minutes to the baking time.
What’s the best jam to use for these Pop-Tarts?
Use your favorite fruit jam or preserves—strawberry, raspberry, and apricot are classics. Homemade jams add a fresh touch, but good-quality store-bought versions work great too.
Can these Pop-Tarts be made vegan?
Yes! Use a plant-based butter substitute and swap the egg wash for a mixture of almond milk and maple syrup or simply brush with plant-based milk for a golden finish.
Pin This Recipe!
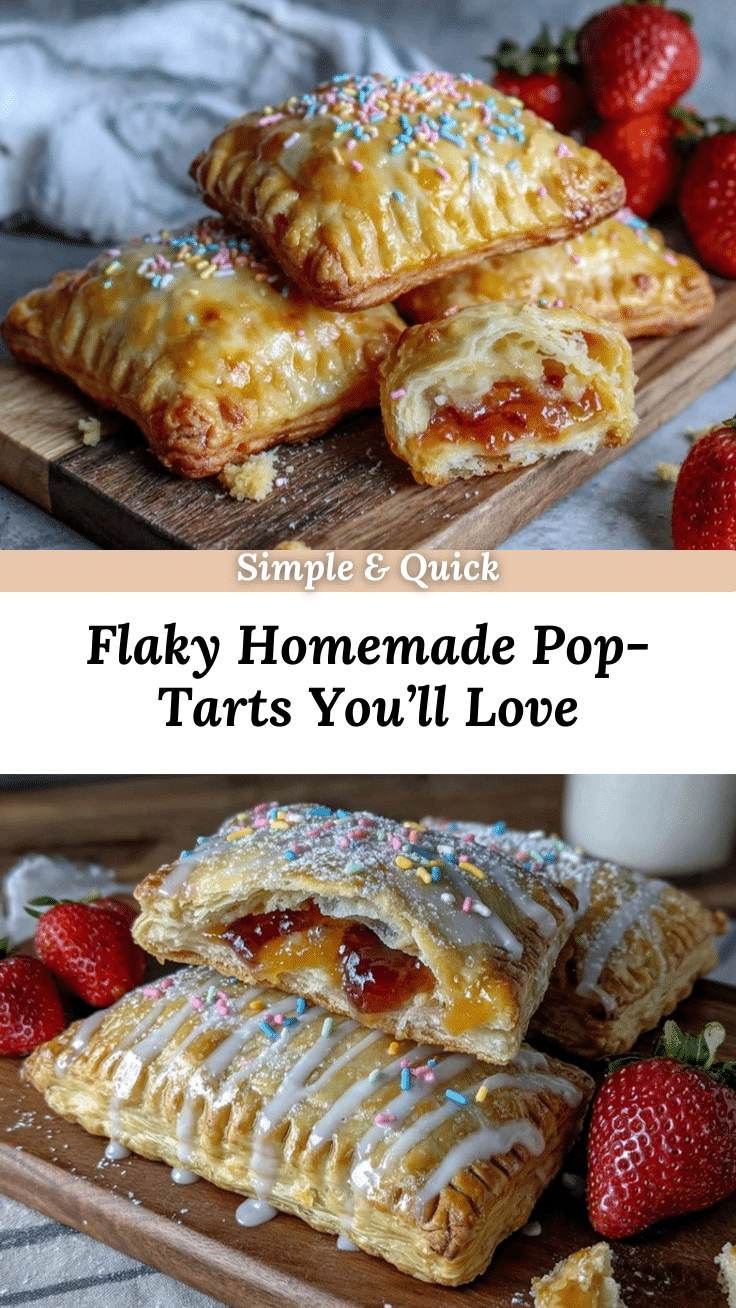
Flaky Homemade Pop-Tarts Recipe Easy Step-by-Step for Perfect Breakfast

A nostalgic and easy-to-make recipe for flaky homemade Pop-Tarts with buttery crust and sweet jam filling, perfect for breakfast or snacks.
- Prep Time: 15 minutes
- Cook Time: 25 minutes
- Total Time: 45 minutes
- Yield: 12 Pop-Tarts (about 6 servings) 1x
- Category: Breakfast
- Cuisine: American
Ingredients
- 2 1/2 cups (320g) all-purpose flour
- 1 tsp granulated sugar
- 1 tsp salt
- 1 cup (225g) unsalted butter, cold and cubed
- 1/2 cup (120ml) ice-cold water
- 1/2 cup (160g) fruit jam or preserves (strawberry, raspberry, or apricot)
- 1 large egg, beaten (for egg wash)
- Optional: Sprinkles or coarse sugar for topping
- Optional: Powdered sugar for dusting
Instructions
- In a large bowl, whisk together 2 1/2 cups all-purpose flour, 1 tsp sugar, and 1 tsp salt.
- Add 1 cup cold, cubed unsalted butter. Use a pastry cutter or two forks to cut the butter into the flour until the mixture resembles coarse crumbs with some pea-sized pieces remaining.
- Gradually pour in 1/2 cup ice-cold water, stirring gently with a fork until the dough starts to come together. Add water slowly until dough holds together but isn’t sticky.
- Divide the dough in half, shape each half into a flat disk about 1 inch thick. Wrap tightly in plastic wrap and chill in the fridge for at least 30 minutes.
- On a lightly floured surface, roll one dough disk into a rectangle about 12 inches by 9 inches, roughly 1/8 inch thick.
- Cut the dough into 3×4 rectangles (about 3 inches x 4 inches). Repeat with the second dough disk.
- Place a tablespoon of jam in the center of half the rectangles, spreading slightly but leaving a small border to seal.
- Brush the edges of the jam-filled rectangles with a little water or beaten egg, then top with a plain dough rectangle. Press edges together gently, then crimp with a fork to seal completely.
- Lightly brush the tops with beaten egg for a golden finish. Optionally sprinkle coarse sugar or sprinkles on top.
- Place the assembled Pop-Tarts on a parchment-lined baking sheet and chill for 15 minutes in the fridge.
- Preheat oven to 375°F (190°C). Bake the Pop-Tarts for 20-25 minutes or until golden brown and crisp.
- Let cool on a wire rack for at least 10 minutes before serving.
Notes
Keep butter ice cold to ensure flakiness. Chill dough before rolling and after assembling to maintain shape. Seal edges well to prevent jam leakage. If edges brown too fast, tent with foil. Dough can be frozen before baking; add extra baking time if baking from frozen.
Nutrition
- Serving Size: 2 Pop-Tarts
- Calories: 225
- Sugar: 10
- Sodium: 180
- Fat: 12
- Saturated Fat: 7
- Carbohydrates: 28
- Fiber: 1
- Protein: 3
Keywords: Pop-Tarts, homemade Pop-Tarts, flaky pastry, breakfast recipe, jam-filled pastry, easy breakfast, nostalgic treat


