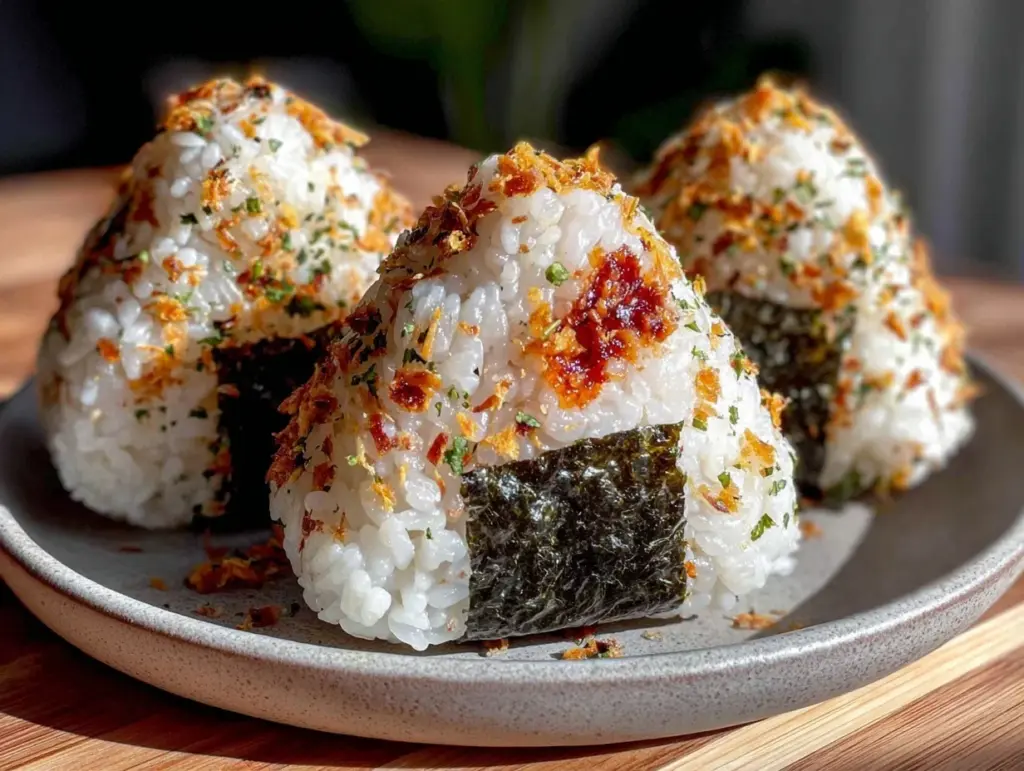
Let me tell you, the moment I shaped my first Spirited Away onigiri rice ball, the aroma of warm, vinegared rice mingled with savory fillings hit me like a nostalgic wave. The soft yet firm texture, wrapped carefully in crisp nori, immediately transports you to the cozy streets of a Japanese festival—or maybe that magical bathhouse from the movie. The first time I made these flavorful Spirited Away onigiri rice balls with savory fillings, I was instantly hooked. It was the kind of moment where you pause, take a deep breath, and just smile because you know you’re onto something truly special.
Years ago, when I was knee-high to a grasshopper, my grandma used to pack these little rice gems for our picnics, but nothing quite like the variety and bold flavors I get with this recipe. I stumbled upon this inspired take on traditional onigiri during a rainy weekend binge-watching Studio Ghibli movies and trying to recreate the magic on my plate. Honestly, I wish I’d discovered this recipe years ago—it’s dangerously easy and offers pure, nostalgic comfort.
My family couldn’t stop sneaking them off the cooling rack (and I can’t really blame them). Whether you’re looking for a sweet treat for your kids’ lunchboxes, a delightful party snack, or a way to brighten up your Pinterest cookie board with something savory and unique, these Spirited Away onigiri rice balls are perfectly suited. After testing this recipe multiple times—in the name of research, of course—they’ve become a staple for family gatherings, gifting, and those moments when you want a warm hug in food form. You’re going to want to bookmark this one!
Why You’ll Love This Recipe
Having spent countless afternoons perfecting these flavorful Spirited Away onigiri rice balls with savory fillings, I can tell you this is no ordinary snack. Here’s why this recipe stands out and why you’ll want to make it your go-to:
- Quick & Easy: Comes together in under 30 minutes, perfect for busy weeknights or last-minute cravings.
- Simple Ingredients: No fancy grocery trips needed—you likely already have everything in your pantry or fridge.
- Perfect for Any Occasion: Whether it’s a cozy lunch, potluck, or a whimsical addition to your movie night, these rice balls fit right in.
- Crowd-Pleaser: Kids, adults, and even picky eaters love the combination of savory fillings and soft rice.
- Unbelievably Delicious: The balance of seasoned rice, tender fillings, and crisp nori creates a texture and flavor combo that’s pure comfort food.
What makes this recipe different? Well, I blend just the right amount of rice vinegar and mirin into the rice for that subtle tang that wakes up your taste buds without overpowering the savory fillings. Plus, I add a little twist by mixing classic fillings like tuna-mayo with surprise elements such as pickled plum or spicy miso chicken, making each bite a new adventure. This isn’t just another onigiri recipe—it’s the best version you’ll find, tested by family and friends alike.
This recipe isn’t just good; it’s the kind that makes you close your eyes after the first bite, savoring the mix of flavors. It’s comfort food reimagined—healthier, faster, and with a dash of magic. Perfect for impressing guests without breaking a sweat or turning an ordinary meal into something memorable.
What Ingredients You Will Need
This recipe uses simple, wholesome ingredients to deliver bold flavor and satisfying texture without the fuss. Most of these are pantry staples, and substitutions are easy if needed.
- For the Rice:
- 2 cups Japanese short-grain rice (sushi rice) – rinsed and drained (I prefer Nishiki brand for best stickiness)
- 2 ½ cups water (600 ml)
- 3 tablespoons rice vinegar (adds slight tang and shine)
- 1 tablespoon sugar
- 1 teaspoon salt
- For the Savory Fillings:
- 1 can (5 oz / 140 g) tuna, drained and flaked
- 2 tablespoons Japanese mayonnaise (Kewpie is my go-to for creaminess)
- 2 tablespoons soy sauce (for flavor depth)
- 1 tablespoon miso paste (optional, for a richer filling)
- Pickled plum (umeboshi), finely chopped (adds a tart, salty punch)
- Cooked chicken thigh, shredded (seasoned with a touch of soy and mirin)
- Chopped scallions or shiso leaves for freshness
- For Assembly:
- 4-6 sheets nori (seaweed), cut into strips or squares
- Sesame seeds (toasted, optional garnish)
- Plastic wrap or onigiri mold (optional but handy)
If you want to try dairy-free, swap Japanese mayo with vegan mayo, and for gluten-free, make sure soy sauce is tamari-based. In summer, fresh cucumber or avocado chunks also make great filling swaps. If you prefer a vegetarian option, seasoned cooked mushrooms or grilled tofu work beautifully too.
Equipment Needed
- Rice cooker or a medium saucepan with lid (a rice cooker makes perfect rice, but a pot works fine)
- Mixing bowl (for seasoning rice)
- Wooden or silicone spatula (to fold rice gently without smashing)
- Onigiri mold (optional, but makes shaping easier and less messy)
- Sharp knife (for cutting nori and fillings)
- Plastic wrap (if shaping by hand, keeps rice from sticking to your fingers)
I personally like using a wooden spatula because it doesn’t crush the delicate rice grains. If you don’t have an onigiri mold, no worries—wet your hands with salted water and shape by hand, which feels oddly satisfying once you get the hang of it. For budget-friendly options, basic kitchen tools and plastic wrap work just fine without fancy gadgets.
Preparation Method
- Cook the Rice: Rinse 2 cups (380 g) of Japanese short-grain rice under cold water until the water runs clear to remove excess starch. Drain well. Add rice and 2 ½ cups (600 ml) water to your rice cooker or saucepan.
If using a pot, bring to a boil, then reduce to low, cover tightly, and cook for 18 minutes. Turn off heat and let it steam for another 10 minutes without lifting the lid. - Prepare the Seasoning: While the rice cooks, mix 3 tablespoons rice vinegar, 1 tablespoon sugar, and 1 teaspoon salt in a small bowl until dissolved.
- Season the Rice: Transfer the cooked rice to a large mixing bowl. Pour the vinegar mixture evenly over the rice. Using a wooden spatula, gently fold the rice to coat each grain without smashing. Let the rice cool to room temperature (or slightly warm) covered with a damp cloth to prevent drying.
- Make the Fillings: For tuna filling, combine drained and flaked tuna with 2 tablespoons Japanese mayonnaise and 1 tablespoon soy sauce. For miso chicken, mix shredded chicken thigh with 1 tablespoon miso paste and a splash of mirin. Prepare other fillings like chopped pickled plum or fresh scallions as desired.
- Shape the Onigiri: Wet your hands with salted water to prevent sticking. Take about ½ cup (90 g) of rice and flatten it gently in your palm. Place a teaspoon of filling in the center. Fold the rice around the filling, shaping into a triangle or oval, pressing firmly but gently.
Alternatively, use an onigiri mold lined with plastic wrap for easy shaping. Repeat with remaining rice and fillings. - Wrap with Nori: Cut nori sheets into strips or squares. Wrap each rice ball partially or fully with nori. The nori adds that lovely crunch and umami punch right before eating.
- Serve or Store: Sprinkle toasted sesame seeds on top if you like. Serve immediately or wrap individually in plastic wrap and refrigerate for up to 24 hours. For best texture, eat them the same day or gently reheat by steaming.
Quick tip: If your rice feels too sticky or mushy, try drying it slightly longer before shaping. If fillings are too wet, pat dry with paper towel to avoid soggy rice balls. The smell of vinegar-infused rice combined with savory fillings is the best cue that you’re doing it right!
Cooking Tips & Techniques
Making onigiri might seem simple, but a few tricks can make all the difference. Here’s what I’ve learned from many batches (and a few failures!):
- Rice Matters: Use Japanese short-grain rice—it’s sticky enough to hold shape but not mushy. Avoid long-grain varieties.
- Vinegar Balance: Don’t overdo the vinegar; too much can make the rice soggy or overpower the filling. The right balance brightens the flavor.
- Hand Moisture: Keep your hands moist and salted when shaping to prevent sticking and add a subtle seasoning.
- Filling Placement: Avoid overfilling. Too much filling breaks the rice ball apart. A teaspoon is usually just right.
- Wrapping Nori: Wrap nori just before serving to keep it crisp. If wrapping early, store separately to avoid sogginess.
- Multitasking: While rice cooks, prepare fillings and seasoning to streamline the process.
- Consistency: Practice makes perfect—don’t get discouraged if your first few rice balls aren’t Instagram-ready!
One time, I overfilled my onigiri with tuna mayo and ended up with a gooey mess, but that taught me to trust the process and keep fillings modest. Timing is key—shaping rice when it’s warm but not hot helps it hold together better. Also, a quick steam in the microwave wrapped in a damp towel revives day-old onigiri beautifully.
Variations & Adaptations
One of the best things about Spirited Away onigiri rice balls is their versatility. Here are some variations to try out:
- Vegetarian-Friendly: Replace meat fillings with seasoned sautéed mushrooms, grilled eggplant, or a mix of pickled veggies like takuan (pickled radish).
- Spicy Kick: Add a spoonful of spicy mayo or mix chili flakes into your tuna or chicken filling for a little heat.
- Seasonal Twist: In spring, swap fillings for fresh edamame and shiso; in winter, try a warm miso-glazed salmon filling.
- Gluten-Free: Use tamari instead of soy sauce and check mayonnaise labels for gluten content.
- Onigiri with a Twist: Try pan-frying onigiri lightly in a skillet with a bit of oil for a crispy outside — it’s a game changer!
I once tried mixing leftover kimchi into the tuna mayo filling, and it brought a tangy punch that was surprisingly addictive. Feel free to experiment with flavors that match your mood or pantry.
Serving & Storage Suggestions
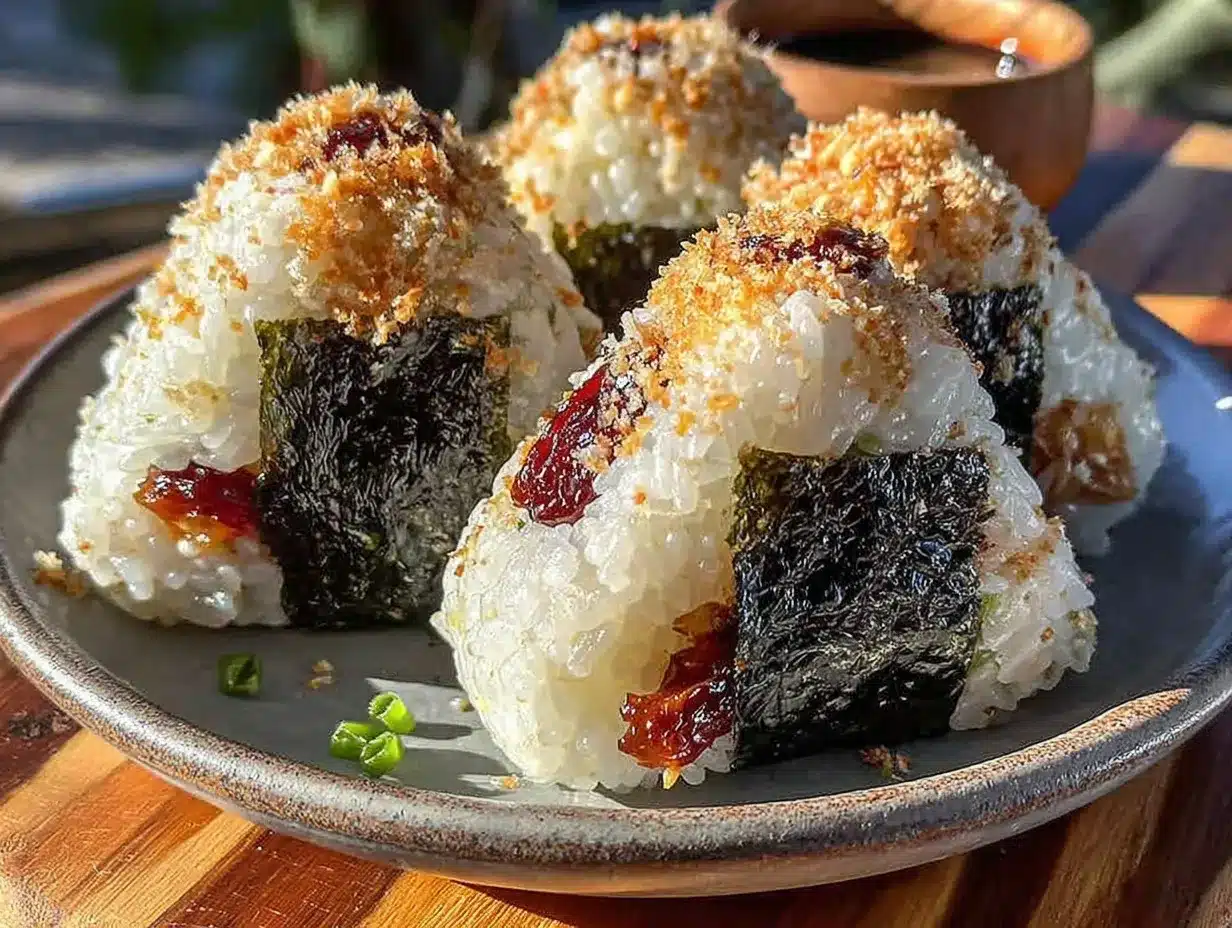
These flavorful Spirited Away onigiri rice balls are best served at room temperature or slightly warm. They make fantastic handheld snacks or a side for miso soup and pickled vegetables. For a full meal, pair them with a fresh seaweed salad or steamed edamame and green tea.
To store, wrap each onigiri tightly in plastic wrap and keep in the refrigerator for up to 24 hours. Avoid longer storage to maintain rice texture and nori crispness. If freezing, wrap well and thaw overnight in the fridge, then reheat gently with a steamer or microwave wrapped in a damp towel.
Reheating with steam helps restore the soft, fluffy texture of the rice and keeps fillings moist. Nori is best added fresh when serving to keep that lovely crunch. Flavors tend to deepen overnight, so if you’re meal prepping, these rice balls get even better the next day.
Nutritional Information & Benefits
Each Spirited Away onigiri rice ball contains approximately 180-220 calories, depending on filling choice. They offer a good balance of carbohydrates from rice, protein from tuna or chicken, and healthy fats from mayonnaise and sesame seeds.
Rice provides sustained energy, while miso and soy sauce add umami and beneficial probiotics (if unpasteurized). Incorporating pickled plum adds antioxidants and supports digestion. This recipe is naturally gluten-free if you choose tamari and dairy-free mayo, making it accessible for many dietary needs.
From a wellness perspective, these onigiri rice balls offer a satisfying, portion-controlled snack that’s gentle on the stomach and full of comforting flavors. They’re a great option for anyone needing a quick, nourishing bite without compromise.
Conclusion
Why should you try this flavorful Spirited Away onigiri rice balls recipe with savory fillings? Because it’s a blend of tradition and creativity that’s easy to master, packed with flavor, and perfect for any occasion. You can customize the fillings to suit your tastes and dietary needs, making it a versatile staple in your kitchen.
I love this recipe because it brings back memories while giving me room to play with flavors—plus, it’s a hit with everyone who tries it. Honestly, it feels like a little gift of comfort every time I make it. If you try it out, I’d love to hear how you made it your own—drop a comment or share your tweaks. And hey, don’t forget to share this with friends who need a tasty, fuss-free recipe in their life!
Happy cooking and may your onigiri adventures be as magical as Spirited Away itself!
FAQs About Spirited Away Onigiri Rice Balls
What type of rice is best for onigiri?
Japanese short-grain rice, often labeled as sushi rice, is best because it’s sticky enough to hold together but still fluffy. Avoid long-grain rice.
Can I make onigiri without an onigiri mold?
Absolutely! Wet your hands with salted water and shape the rice balls by hand. It takes a little practice but feels rewarding once you get used to it.
How do I keep nori crispy when storing onigiri?
Wrap nori separately and add it just before eating. If you wrap it too early, it can get soggy from the rice moisture.
Can I freeze onigiri rice balls?
Yes! Wrap them tightly in plastic wrap and freeze. Thaw overnight in the fridge and reheat gently by steaming or microwaving wrapped in a damp towel.
What are some easy savory fillings for beginners?
Tuna mixed with Japanese mayo and soy sauce is a classic and simple filling. Cooked chicken with miso or pickled plum are also great beginner-friendly options.
Pin This Recipe!
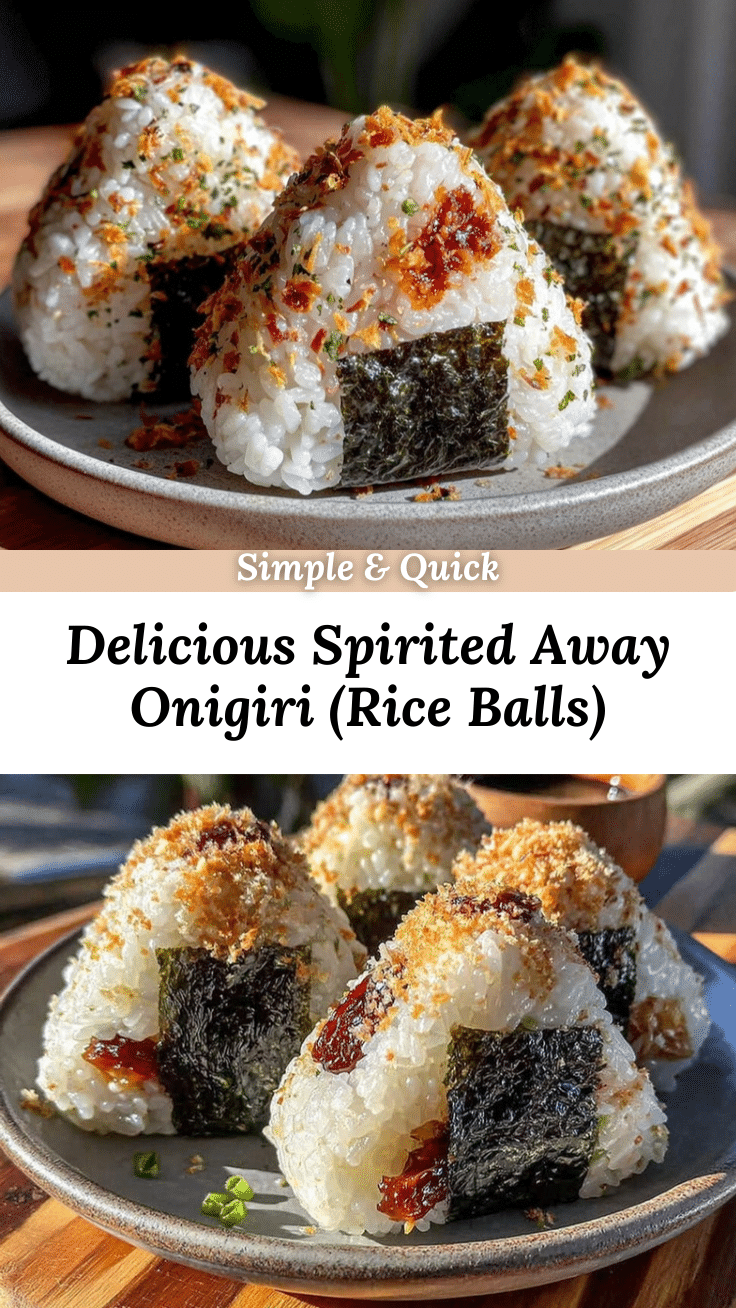
Flavorful Spirited Away Onigiri Rice Balls Recipe Easy Savory Fillings Guide
A nostalgic and easy recipe for Japanese onigiri rice balls with savory fillings inspired by Spirited Away, perfect for snacks, lunches, or gatherings.
- Prep Time: 10 minutes
- Cook Time: 28 minutes
- Total Time: 38 minutes
- Yield: 8-10 onigiri rice balls 1x
- Category: Snack
- Cuisine: Japanese
Ingredients
- 2 cups Japanese short-grain rice (sushi rice), rinsed and drained
- 2 ½ cups water (600 ml)
- 3 tablespoons rice vinegar
- 1 tablespoon sugar
- 1 teaspoon salt
- 1 can (5 oz / 140 g) tuna, drained and flaked
- 2 tablespoons Japanese mayonnaise (Kewpie recommended)
- 2 tablespoons soy sauce
- 1 tablespoon miso paste (optional)
- Pickled plum (umeboshi), finely chopped
- Cooked chicken thigh, shredded (seasoned with soy and mirin)
- Chopped scallions or shiso leaves
- 4–6 sheets nori (seaweed), cut into strips or squares
- Sesame seeds (toasted, optional garnish)
- Plastic wrap or onigiri mold (optional)
Instructions
- Rinse 2 cups (380 g) of Japanese short-grain rice under cold water until the water runs clear. Drain well.
- Add rice and 2 ½ cups (600 ml) water to a rice cooker or medium saucepan.
- If using a pot, bring to a boil, then reduce heat to low, cover tightly, and cook for 18 minutes. Turn off heat and let steam for 10 minutes without lifting the lid.
- While rice cooks, mix 3 tablespoons rice vinegar, 1 tablespoon sugar, and 1 teaspoon salt in a small bowl until dissolved.
- Transfer cooked rice to a large mixing bowl. Pour vinegar mixture evenly over rice and gently fold with a wooden spatula to coat each grain without smashing. Let cool to room temperature covered with a damp cloth.
- Prepare fillings: For tuna filling, combine drained tuna with 2 tablespoons Japanese mayonnaise and 1 tablespoon soy sauce. For miso chicken, mix shredded chicken thigh with 1 tablespoon miso paste and a splash of mirin. Prepare other fillings like chopped pickled plum or scallions as desired.
- Wet hands with salted water to prevent sticking. Take about ½ cup (90 g) of rice, flatten in palm, place a teaspoon of filling in center, and fold rice around filling shaping into triangle or oval. Alternatively, use an onigiri mold lined with plastic wrap.
- Cut nori sheets into strips or squares and wrap each rice ball partially or fully with nori.
- Optionally sprinkle toasted sesame seeds on top. Serve immediately or wrap individually in plastic wrap and refrigerate up to 24 hours. Reheat gently by steaming if desired.
Notes
Use Japanese short-grain rice for best stickiness. Keep hands moist and salted when shaping to prevent sticking. Wrap nori just before serving to keep it crisp. If rice is too sticky or mushy, dry slightly longer before shaping. Pat fillings dry if too wet to avoid soggy rice balls. Reheat day-old onigiri by steaming wrapped in a damp towel.
Nutrition
- Serving Size: 1 onigiri rice ball
- Calories: 180220
- Sugar: 2
- Sodium: 350
- Fat: 7
- Saturated Fat: 1
- Carbohydrates: 28
- Fiber: 1
- Protein: 6
Keywords: onigiri, rice balls, Japanese snack, Spirited Away recipe, savory fillings, tuna mayo, miso chicken, nori, easy onigiri


