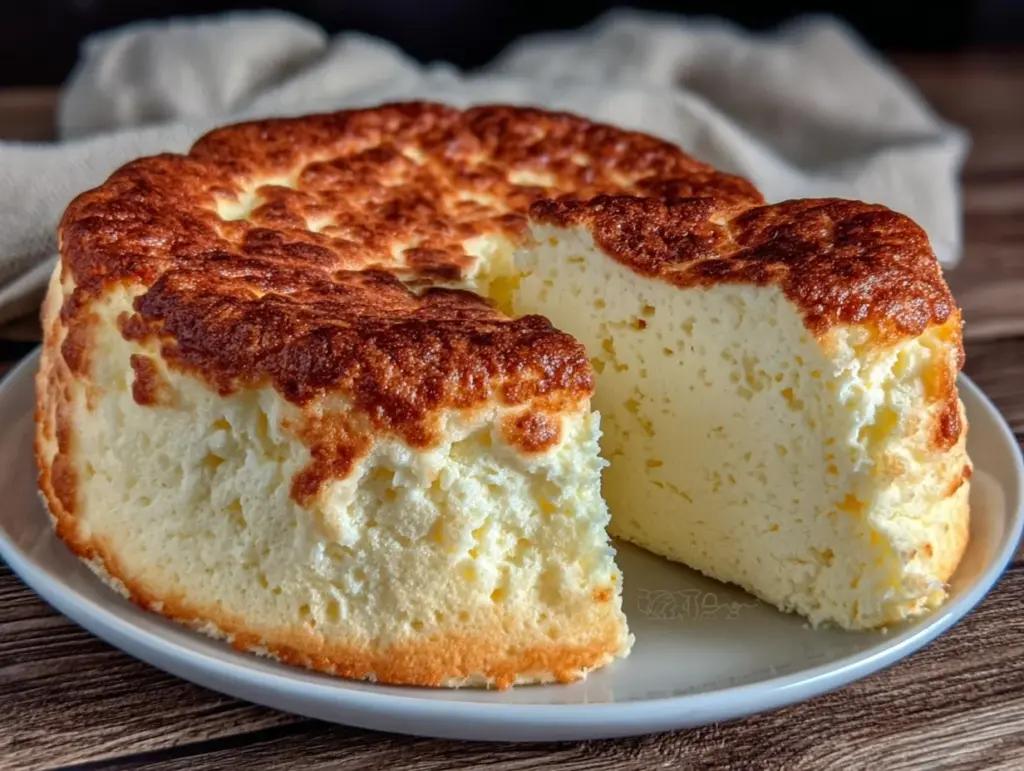
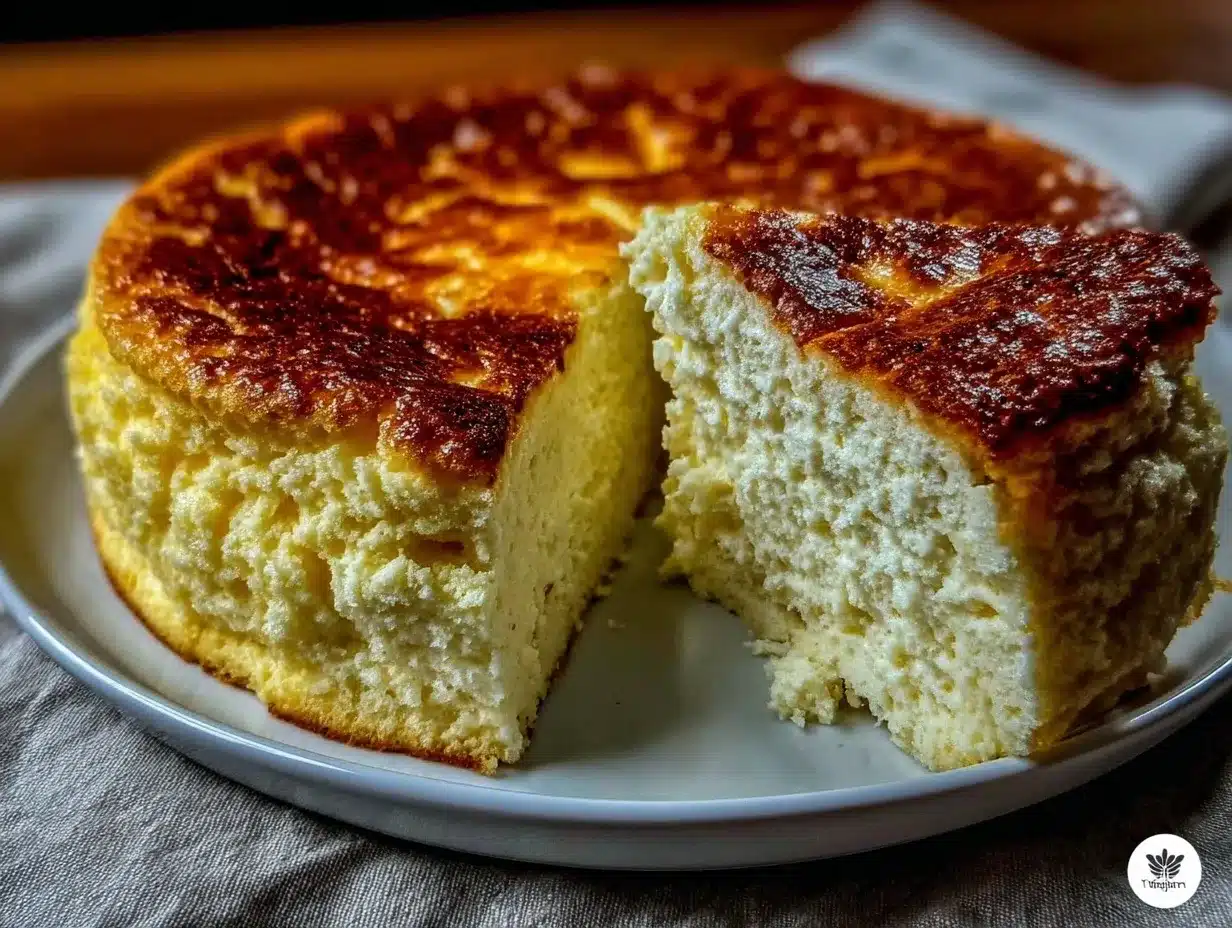
Let me tell you, the moment you slice into a Fluffy Japanese Cheesecake, the delicate scent of cream cheese and vanilla fills the air, promising a dessert experience unlike any other. The soft, jiggly texture almost dances on your tongue, melting away with a sweetness that’s just right—not too heavy, not too light. The first time I baked this melt-in-your-mouth delight, I was instantly hooked. It was one of those rare moments where you pause, take a deep breath, and just smile because you know you’re onto something truly special.
Years ago, when I was knee-high to a grasshopper, my grandma used to bring home Japanese-style cheesecakes from a local bakery during our family visits. I never imagined I’d get the hang of making it myself, but after a rainy weekend spent experimenting, I finally nailed the recipe. Honestly, I wish I’d discovered this fluffy Japanese cheesecake recipe years ago! My family couldn’t stop sneaking slices off the cooling rack (and I can’t really blame them).
This Fluffy Japanese Cheesecake with melt-in-your-mouth texture is dangerously easy to prepare and delivers pure, nostalgic comfort. Perfect for sweet treats that brighten up your Pinterest cookie board or for impressing guests at weekend brunch, this recipe has become a staple for family gatherings and heartfelt gifting. And trust me, after testing this recipe multiple times in the name of research, of course, you’re going to want to bookmark this one for whenever those cheesecake cravings hit.
Why You’ll Love This Recipe
After countless trials (and a few hilarious kitchen mishaps), I can confidently say this Fluffy Japanese Cheesecake recipe is a winner. It’s been lovingly tested in my kitchen, family-approved, and I’ve picked up some chef-tested tips along the way that make this recipe stand out.
- Quick & Easy: Comes together in under an hour, perfect for busy weeknights or last-minute dessert emergencies.
- Simple Ingredients: No fancy grocery trips needed; you likely already have everything in your pantry and fridge.
- Perfect for Any Occasion: Whether it’s a cozy dinner, birthday celebration, or a weekend treat, it fits right in.
- Crowd-Pleaser: Always gets rave reviews from kids and adults alike—there’s just something about that fluffy texture.
- Unbelievably Delicious: The balance between lightness and creamy flavor is next-level comfort food.
So, what makes this recipe different from others? It’s the careful folding technique that keeps the batter airy, combined with a gentle water bath bake that creates the signature melt-in-your-mouth texture. Plus, a touch of lemon juice brightens the richness without overpowering it. This isn’t just another cheesecake; it’s the best version I’ve found, and I promise it’ll make you close your eyes after the first bite.
What Ingredients You Will Need
This recipe uses simple, wholesome ingredients to deliver bold flavor and that satisfying fluffy texture without any fuss. Most are pantry staples, with a couple of fresh items that bring it all together.
- Cream Cheese (200g / 7 oz, softened) – I prefer Philadelphia brand for its smooth texture.
- Unsalted Butter (50g / 3.5 tbsp, softened) – adds richness, but softened to blend easily.
- Whole Milk (100ml / 3.4 fl oz) – use full-fat for best results; dairy-free milk works in a pinch.
- Eggs (4 large, separated, room temperature) – key for that airy, fluffy structure.
- Caster Sugar (100g / ½ cup) – finer sugar helps achieve the perfect meringue.
- Cake Flour (60g / ½ cup) – sifted; you can swap with cornstarch for a lighter bite.
- Cornstarch (20g / 2 tbsp) – adds extra lightness and stability.
- Lemon Juice (1 tbsp, freshly squeezed) – balances sweetness and enhances flavor.
- Vanilla Extract (1 tsp) – for subtle aromatic warmth.
- Salt (a pinch) – enhances all the flavors without being noticeable.
For seasonal twists, try adding a teaspoon of matcha powder or folding in fresh berries after baking. And if you’re gluten-free, almond flour can replace cake flour but expect a slightly denser texture. Honestly, this recipe is forgiving and works well with a few tweaks.
Equipment Needed
- 8-inch (20cm) Round Springform Pan: Essential for easy removal; if you don’t have one, a regular cake pan lined with parchment paper works.
- Electric Mixer or Stand Mixer: To whip those egg whites into a perfect meringue—hand whipping is possible but tricky.
- Mixing Bowls: Multiple sizes help keep wet and dry ingredients separate.
- Spatula: For gentle folding without deflating the batter.
- Fine Mesh Sieve: To sift flour and cornstarch for no lumps.
- Water Bath Setup: A large baking pan or roasting tray to hold the springform pan during baking to keep the cheesecake moist.
Tip: I’ve found a silicone spatula lasts longer and is easier to clean when folding delicate batters. If you’re on a budget, a sturdy metal whisk and glass bowls can do the job just fine.
Preparation Method
- Preheat your oven to 320°F (160°C). Grease and line the bottom and sides of your 8-inch springform pan with parchment paper to prevent sticking. Get your water bath ready by filling a larger pan with hot water halfway up the sides of your springform pan.
- Make the cream cheese mixture: In a heatproof bowl over simmering water (double boiler), melt the cream cheese, butter, and milk together. Stir gently until smooth and remove from heat. Let it cool slightly—warm, not hot!
- Whisk egg yolks: Add the egg yolks, lemon juice, and vanilla extract to the cream cheese mixture. Mix until fully combined and smooth. Set aside.
- Sift dry ingredients: Sift cake flour, cornstarch, and a pinch of salt together. Gradually fold them into the cream cheese mixture until just combined. Be careful not to overmix; you want a smooth batter but still airy.
- Whip egg whites: Using an electric mixer, beat egg whites until foamy. Slowly add caster sugar while continuing to whip until you reach stiff peaks. This step is crucial for that signature fluffiness.
- Fold meringue into batter: Gently fold one-third of the meringue into the cream cheese batter to lighten it. Then carefully fold in the remaining meringue in two additions. Use a spatula and fold with patience to keep as much air as possible.
- Pour and bake: Pour the batter into your prepared pan. Tap the pan lightly on the counter to release air bubbles. Place the pan into the water bath and bake for about 55–60 minutes. The top should be golden and a toothpick inserted near the center should come out mostly clean with a few moist crumbs.
- Cool gradually: Turn off the oven, crack the door open, and let the cheesecake cool inside for about 15 minutes to prevent cracking. Then remove from the oven and water bath, and let it cool completely on a wire rack. Chill in the fridge for at least 4 hours or overnight for the best texture.
Pro tip: If your cheesecake cracks, don’t fret—cover with whipped cream or dust with powdered sugar to hide imperfections. Also, the water bath is your best friend here; it keeps the cake moist and prevents drying out.
Cooking Tips & Techniques
Getting that perfect fluffy Japanese cheesecake can feel tricky at first, but a few key tricks make all the difference. First, always use room temperature eggs; cold eggs won’t whip as well, and that means less volume in your meringue. I learned this one the hard way—once tried with fridge-cold eggs, and the cake was dense as a brick!
Second, folding the meringue gently into the batter is crucial. Think of it like tucking in a delicate baby rather than stirring a stew. Overmixing deflates the air bubbles and ruins the fluffiness. Use a spatula, and fold by cutting through the middle and sweeping around the sides.
Also, don’t skip the water bath! It’s the secret to that melt-in-your-mouth texture. The steam keeps the cake moist and prevents cracking. If you don’t have a water bath, try placing a small oven-safe dish of water on the lower rack while baking.
Timing is key. Baking at a steady 320°F (160°C) ensures slow, even cooking. Too hot, and the cake might brown too fast and crack; too low, and it won’t set properly. Lastly, patience pays off—cool the cake slowly to avoid sudden temperature changes that cause cracks.
Variations & Adaptations
One of the great things about this fluffy Japanese cheesecake recipe is how easy it is to adapt. Here are a few variations I’ve tried and recommend:
- Matcha Japanese Cheesecake: Add 1–2 teaspoons of matcha powder to the dry ingredients for a lovely green tea flavor and color. It pairs beautifully with a drizzle of sweetened condensed milk.
- Berry Swirl: Fold in fresh or thawed frozen berries into the batter before baking, or swirl in a berry jam for a fruity surprise. Just be gentle to keep the batter fluffy.
- Gluten-Free Version: Swap cake flour with almond flour or a gluten-free baking mix. The texture will be slightly different but still delightfully soft.
- Dairy-Free Option: Use dairy-free cream cheese and coconut milk instead of whole milk. The flavor profile shifts slightly, but it remains wonderfully light.
I personally love the matcha twist—it feels like a little Japanese tea ceremony in every bite. Feel free to customize the sweetness or add a pinch of cinnamon for a warm touch.
Serving & Storage Suggestions
This cheesecake is best served chilled or at room temperature. I usually slice it into neat wedges and dust with powdered sugar or top with a dollop of lightly sweetened whipped cream. For a fancy touch, fresh berries on the side never disappoint.
Pair it with a cup of green tea, black coffee, or a light sparkling wine for an elegant treat. It’s a wonderful dessert to impress guests without any stress.
To store, wrap the cheesecake tightly with plastic wrap or keep it in an airtight container in the fridge. It stays fresh for up to 4 days but honestly, it rarely lasts that long in my house! You can freeze slices for up to a month; just thaw overnight in the fridge.
Reheating isn’t necessary, but if you prefer it slightly warm, pop a slice in the microwave for 10–15 seconds. The flavors mellow and deepen after a day or two, making leftovers taste even better.
Nutritional Information & Benefits
This Fluffy Japanese Cheesecake is lighter in calories and fat compared to traditional dense cheesecakes, thanks to the whipped egg whites and lower butter content. A typical slice (about 1/8 of the cake) contains approximately:
| Nutrient | Amount |
|---|---|
| Calories | 180-200 kcal |
| Protein | 6g |
| Fat | 12g |
| Carbohydrates | 15g |
| Sugar | 12g |
The cream cheese provides calcium and protein, while eggs bring essential vitamins and minerals. Using whole milk adds a touch of healthy fats that keep you satisfied without feeling heavy. This recipe is naturally gluten-containing unless substituted, and contains dairy and eggs, so keep that in mind for allergies.
From a wellness perspective, it’s a dessert that won’t weigh you down but still feels indulgent—perfect for when you want a treat that doesn’t leave you feeling overstuffed.
Conclusion
In short, this Fluffy Japanese Cheesecake with melt-in-your-mouth texture is a must-try for anyone craving a light, airy dessert that’s packed with flavor. You can make it your own with simple tweaks, and it’s guaranteed to impress friends and family alike.
Honestly, it’s one of my favorite recipes because it combines ease and elegance in a way that feels special but isn’t intimidating. I encourage you to give it a go, play around with flavors, and share your delicious results with loved ones.
If you try this recipe, please drop a comment below or share your adaptations—I love hearing how others make it their own. Happy baking, and may every bite feel like a warm, delightful hug!
FAQs
What makes Japanese cheesecake different from regular cheesecake?
Japanese cheesecake is lighter and fluffier because it incorporates whipped egg whites folded into the batter and is baked in a water bath. This creates a soft, airy texture that melts in your mouth, unlike the dense, rich texture of traditional cheesecakes.
Can I make this cheesecake without a water bath?
While a water bath helps keep the cheesecake moist and prevents cracking, if you don’t have one, placing a shallow pan of hot water on the oven’s bottom rack can mimic the effect. Baking without any moisture source might result in a drier, cracked cake.
How should I store leftover Japanese cheesecake?
Store leftovers wrapped tightly in plastic wrap or in an airtight container in the fridge for up to 4 days. You can also freeze slices for up to a month and thaw them overnight in the fridge before enjoying.
Can I prepare this recipe gluten-free?
Yes! Substitute the cake flour with almond flour or a gluten-free baking mix. The texture will be slightly different but still tender and delicious.
Why did my Japanese cheesecake crack on top?
Cracks usually happen due to rapid temperature changes or overbaking. Make sure to bake at a moderate temperature, use a water bath, and let the cake cool gradually by leaving the oven door slightly open after baking to prevent sudden cooling.
Pin This Recipe!
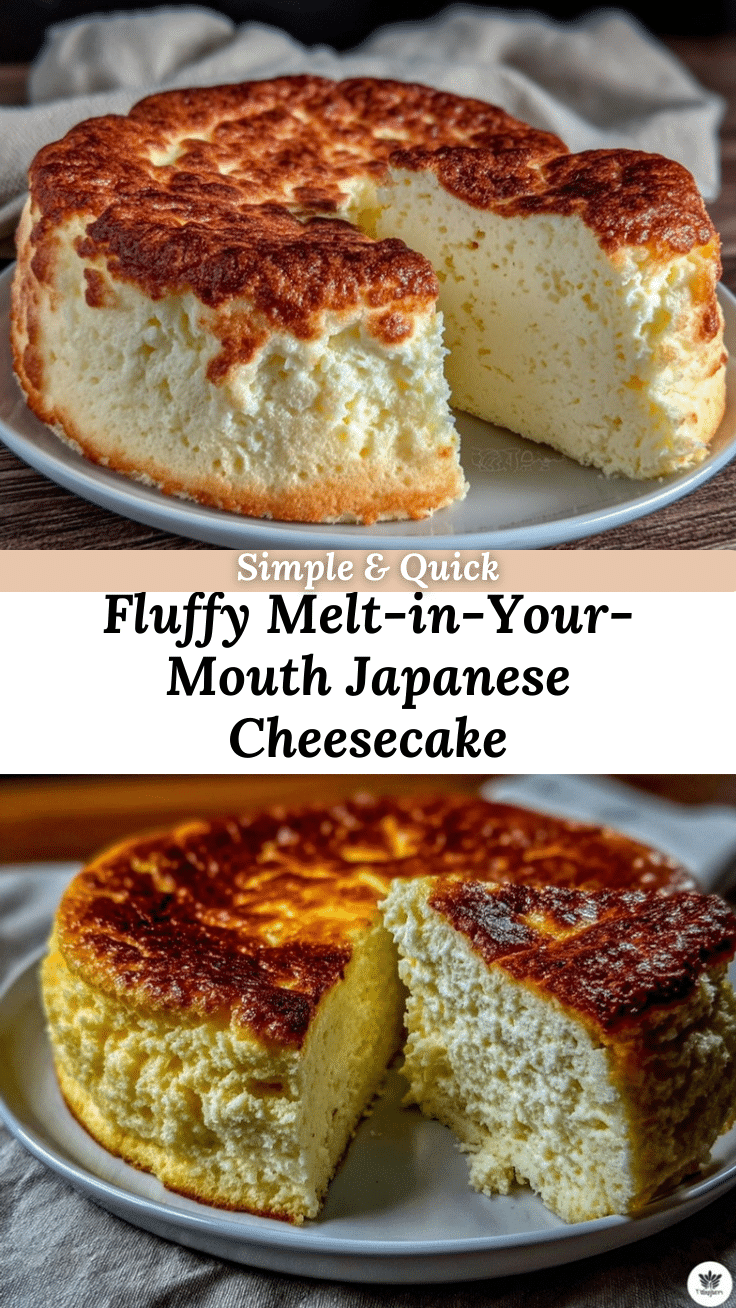
Fluffy Japanese Cheesecake
A light, airy Japanese cheesecake with a melt-in-your-mouth texture, perfect for any occasion and easy to prepare with simple ingredients.
- Prep Time: 20 minutes
- Cook Time: 55-60 minutes
- Total Time: 5 hours 15 minutes
- Yield: 8 servings 1x
- Category: Dessert
- Cuisine: Japanese
Ingredients
- 200g (7 oz) cream cheese, softened
- 50g (3.5 tbsp) unsalted butter, softened
- 100ml (3.4 fl oz) whole milk
- 4 large eggs, separated, room temperature
- 100g (½ cup) caster sugar
- 60g (½ cup) cake flour, sifted
- 20g (2 tbsp) cornstarch
- 1 tbsp freshly squeezed lemon juice
- 1 tsp vanilla extract
- Pinch of salt
Instructions
- Preheat your oven to 320°F (160°C). Grease and line the bottom and sides of your 8-inch springform pan with parchment paper. Prepare a water bath by filling a larger pan with hot water halfway up the sides of the springform pan.
- In a heatproof bowl over simmering water (double boiler), melt the cream cheese, butter, and milk together. Stir gently until smooth and remove from heat. Let it cool slightly until warm, not hot.
- Add the egg yolks, lemon juice, and vanilla extract to the cream cheese mixture. Mix until fully combined and smooth. Set aside.
- Sift cake flour, cornstarch, and a pinch of salt together. Gradually fold them into the cream cheese mixture until just combined, being careful not to overmix.
- Using an electric mixer, beat egg whites until foamy. Slowly add caster sugar while continuing to whip until stiff peaks form.
- Gently fold one-third of the meringue into the cream cheese batter to lighten it. Then carefully fold in the remaining meringue in two additions, using a spatula to keep as much air as possible.
- Pour the batter into the prepared pan. Tap the pan lightly on the counter to release air bubbles. Place the pan into the water bath and bake for 55–60 minutes until the top is golden and a toothpick inserted near the center comes out mostly clean with a few moist crumbs.
- Turn off the oven, crack the door open, and let the cheesecake cool inside for about 15 minutes to prevent cracking. Remove from the oven and water bath, then cool completely on a wire rack. Chill in the fridge for at least 4 hours or overnight for best texture.
Notes
Use room temperature eggs for best meringue volume. Fold meringue gently to keep batter airy. Use a water bath to keep cheesecake moist and prevent cracking. Cool cheesecake gradually to avoid cracks. If cracks appear, cover with whipped cream or powdered sugar. Variations include adding matcha powder, fresh berries, or using almond flour for gluten-free.
Nutrition
- Serving Size: 1 slice (1/8 of cake
- Calories: 190
- Sugar: 12
- Fat: 12
- Carbohydrates: 15
- Protein: 6
Keywords: Japanese cheesecake, fluffy cheesecake, melt-in-your-mouth dessert, easy cheesecake recipe, light cheesecake, water bath cheesecake


