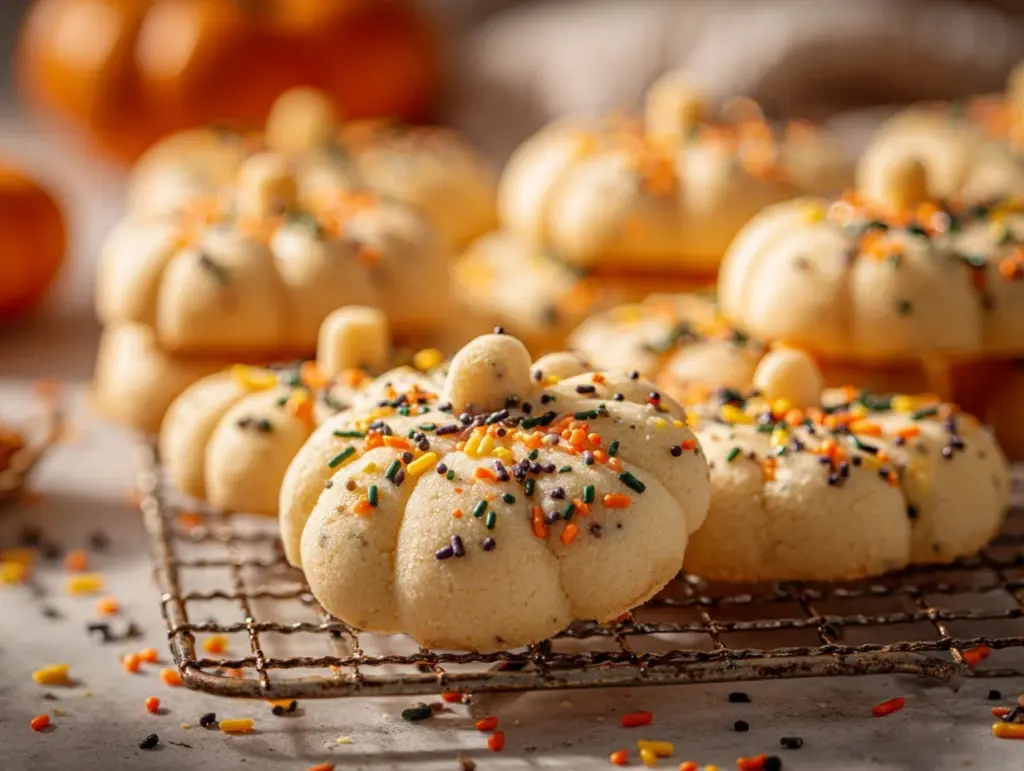
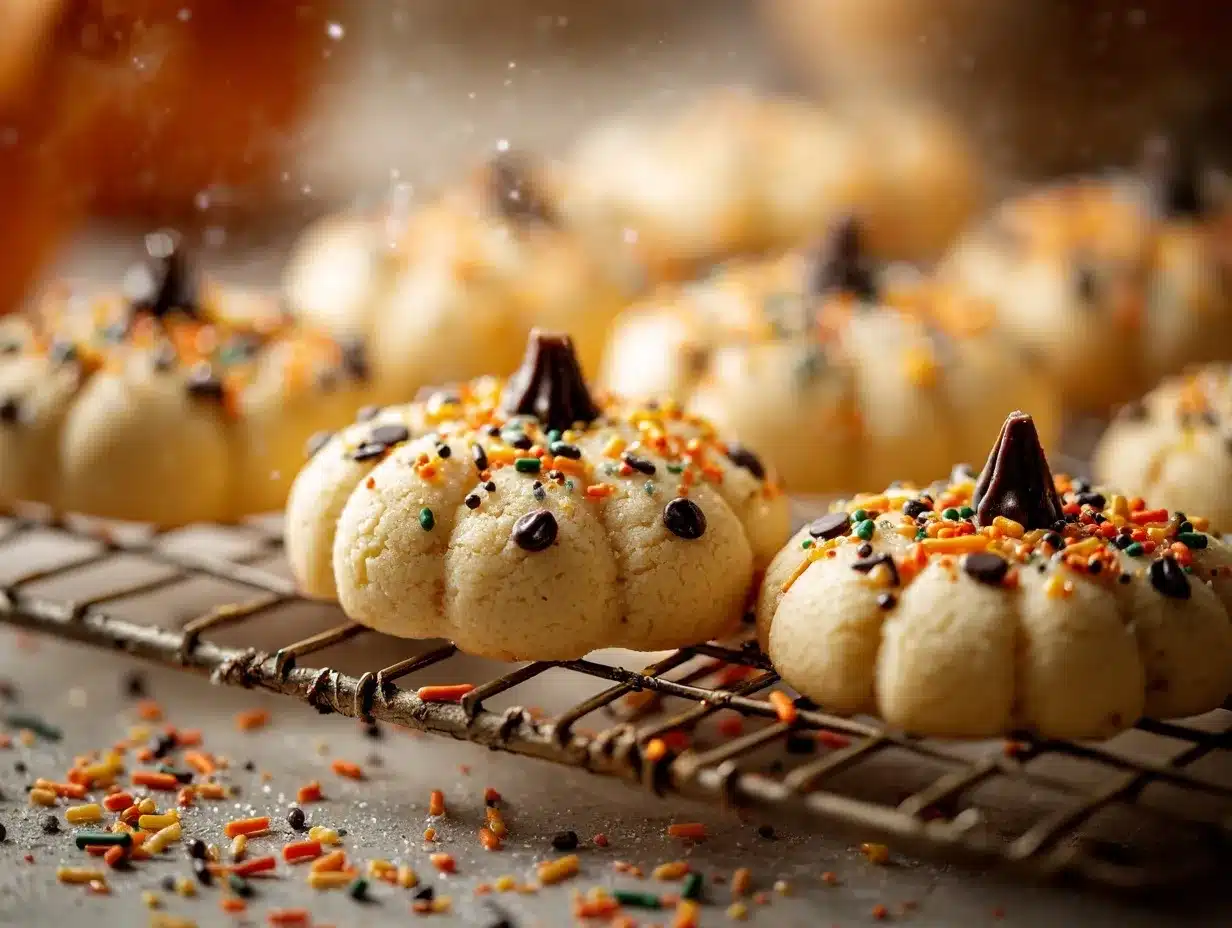
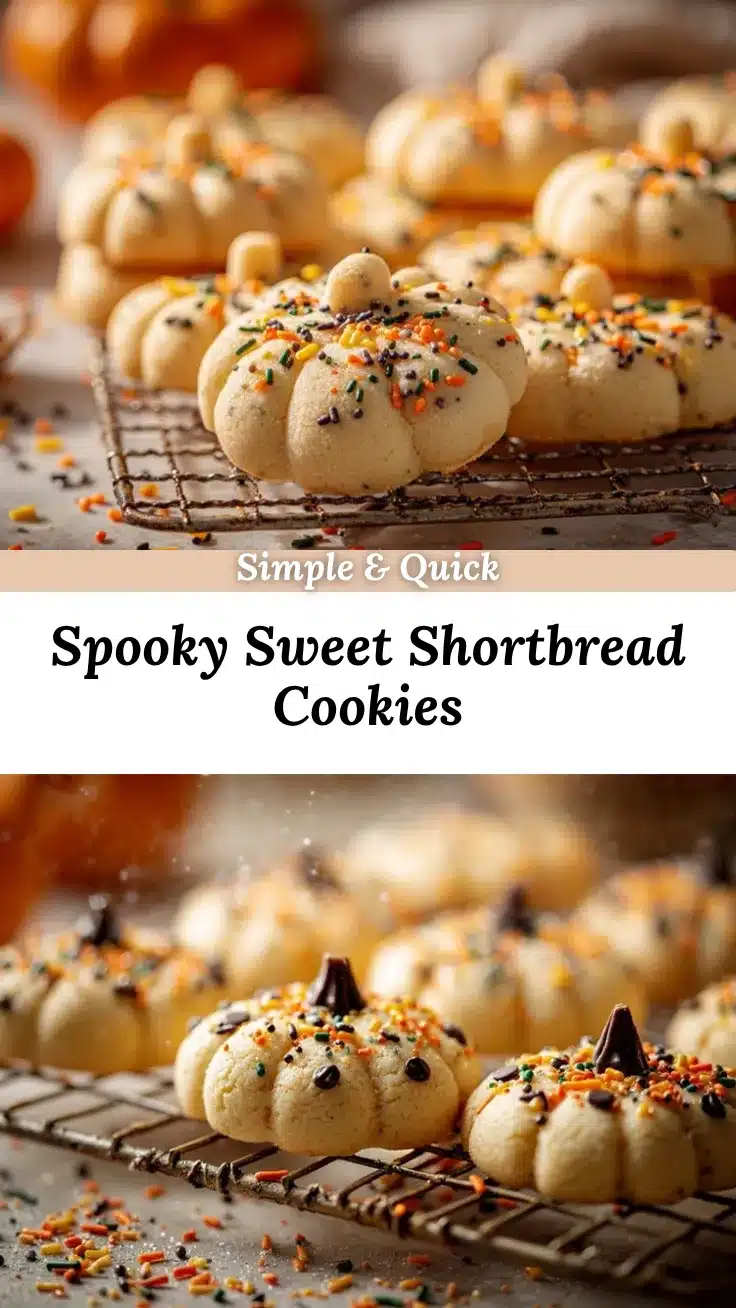
The buttery aroma of freshly baked shortbread cookies combined with the spooky excitement of Halloween is truly magical. Picture this: delicate, melt-in-your-mouth cookies decorated with vibrant orange pumpkins, cute ghosts, and eerie spiderwebs. These Halloween shortbread cookies are not only fun to make but also the ultimate treat for any Halloween party or cozy night in. I’ve tested this recipe in my kitchen numerous times, tweaking every detail to ensure it’s foolproof and downright delicious. Whether you’re hosting a big bash or simply baking for the kids, this recipe is your ticket to festive cookie perfection!
Why You’ll Love This Recipe
- Quick & Easy: These cookies come together in just under an hour, including decorating time. No complicated steps or fancy techniques needed!
- Perfect for Halloween Parties: Whether it’s a school event or a neighborhood gathering, these cookies steal the show with their spooky designs.
- Customizable Decorations: Let your creativity shine—use food coloring, sprinkles, or edible markers to create your own Halloween masterpieces.
- Simple Ingredients: You likely already have everything in your pantry, making this recipe stress-free and budget-friendly.
- Fun for All Ages: Baking and decorating these cookies is a delightful activity for kids and adults alike. It’s the perfect way to get everyone in the Halloween spirit.
One of my favorite things about this recipe is how it strikes the perfect balance between buttery richness and a crumbly texture. Plus, the decorating possibilities are endless, making it a great way to showcase your artistic side. Trust me, these cookies will have everyone asking for the recipe!
What Ingredients You Will Need
This recipe uses classic shortbread ingredients to create a buttery, tender cookie base that’s ideal for decorating. Here’s what you’ll need:
- Unsalted butter (softened): Adds richness and creates that melt-in-your-mouth texture.
- Granulated sugar: Sweetens the cookies perfectly without overpowering the buttery flavor.
- Vanilla extract: Enhances the flavor and gives the cookies a subtle warmth.
- All-purpose flour: Provides structure and creates the classic crumbly texture.
- Salt: Balances the sweetness and enhances the overall flavor.
- Food coloring (optional): Orange, black, and green for festive Halloween designs.
- Royal icing: For decorating the cookies with spooky shapes and designs.
- Sprinkles or edible glitter (optional): Adds an extra festive touch!
If you’re looking to make this recipe gluten-free, simply swap the all-purpose flour for a 1:1 gluten-free baking flour. You can also experiment with natural food colorings or leave the cookies au naturel for a minimalist look.
Equipment Needed
Good news: you don’t need fancy tools to make these Halloween shortbread cookies! Here’s what you’ll need:
- Mixing bowls: One large bowl for the cookie dough and smaller bowls for icing.
- Electric mixer: A hand or stand mixer works great for creaming the butter and sugar.
- Rolling pin: To roll out the shortbread dough evenly.
- Halloween cookie cutters: Pumpkins, ghosts, bats—get creative with shapes!
- Baking sheets: Line these with parchment paper for easy cleanup.
- Piping bags and tips: For detailed icing designs, though you can use zip-top bags if you don’t have piping bags.
If you don’t have cookie cutters, no worries—use a knife to cut out simple shapes or roll the dough into balls and flatten them for a rustic look. And if you’re icing-free, these cookies are just as tasty plain!
Preparation Method
- Make the dough: In a large mixing bowl, cream together 1 cup (230g) unsalted butter and 1/2 cup (100g) granulated sugar until light and fluffy (about 2-3 minutes). Add 1 teaspoon vanilla extract and mix until combined.
- Add the dry ingredients: Gradually add 2 cups (250g) all-purpose flour and 1/4 teaspoon salt to the butter mixture, mixing just until a soft dough forms. Avoid overmixing to maintain a tender texture.
- Chill the dough: Wrap the dough in plastic wrap and refrigerate for 30 minutes. This helps the dough firm up, making it easier to roll out.
- Roll and cut: Preheat your oven to 325°F (160°C). Roll out the dough on a lightly floured surface to about 1/4-inch thickness. Use Halloween-themed cookie cutters to cut out shapes, then transfer them to a parchment-lined baking sheet.
- Bake: Bake the cookies for 12-15 minutes, or until the edges are just starting to turn golden. Let them cool completely before decorating.
- Decorate: Prepare royal icing and divide it into bowls. Add food coloring to create spooky Halloween hues, then use piping bags to decorate your cookies. Add sprinkles or edible glitter for extra flair!
Pro tip: If your dough cracks while rolling, let it sit at room temperature for 5-10 minutes to soften slightly. And don’t forget to have fun with the decorations—there’s no wrong way to make these cookies festive!
Cooking Tips & Techniques
- Keep it cool: Chilling the dough is key to maintaining precise shapes after baking.
- Don’t overbake: Shortbread cookies should be pale with slightly golden edges. Overbaking can make them dry.
- Test your icing: Adjust the consistency of your royal icing with water or powdered sugar until it’s easy to pipe but not runny.
- Use gel food coloring: Gel colors give vibrant shades without altering the icing’s texture.
- Batch decorations: If you’re making a large batch, divide the icing and decorations into manageable portions to avoid feeling overwhelmed.
From my experience, the biggest mistake is rushing through the decorating. Take your time—it’s all part of the fun!
Variations & Adaptations
These cookies are incredibly versatile! Here are some ways to adapt the recipe:
- Gluten-free: Substitute all-purpose flour with gluten-free baking flour for a celiac-friendly treat.
- Dairy-free: Use plant-based butter for a dairy-free version. It works just as well!
- Seasonal swap: Change the decorations for other holidays like Christmas or Valentine’s Day.
- Chocolate dip: Skip the icing and dip the cookies in melted chocolate for a decadent twist.
- Spiced shortbread: Add a pinch of cinnamon or nutmeg to the dough for a warm, autumnal flavor.
Last Halloween, I made a batch with dark chocolate spiderwebs using a toothpick to swirl the design—it was a huge hit!
Serving & Storage Suggestions
Here’s how to serve and store your Halloween shortbread cookies:
- Serving: Arrange the cookies on a festive platter surrounded by mini pumpkins or Halloween-themed napkins. Serve them at room temperature with a glass of milk or hot cocoa.
- Storage: Store undecorated cookies in an airtight container at room temperature for up to 1 week. Decorated cookies can be stored in a single layer to avoid smudging.
- Freezing: Freeze undecorated cookies for up to 3 months. Thaw at room temperature before decorating.
- Reheating: Shortbread doesn’t need reheating, but if you prefer them warm, pop them in the oven at 300°F (150°C) for 2-3 minutes.
The flavors of these cookies deepen slightly after a day or two, making them even more irresistible!
Nutritional Information & Benefits
While these cookies are more about indulgence than health, here’s a quick breakdown:
- Calories: Approximately 140 per cookie (depends on size and decorations).
- Fat: Butter provides healthy fats and a satisfying richness.
- Gluten-free option: Perfect for those with gluten sensitivities.
- Customizable sugar levels: You can adjust the sugar in the royal icing for less sweetness.
These cookies are a great way to treat yourself while celebrating the season. Just don’t eat the whole batch in one sitting—though I wouldn’t blame you if you tried!
Conclusion
These Halloween shortbread cookies are the perfect blend of buttery goodness and festive fun. Whether you’re baking for a party or enjoying a creative afternoon with the kids, this recipe offers endless possibilities for spooky decorations and delicious treats. I personally love making these every October—it’s become a tradition that gets everyone excited for Halloween.
If you try this recipe, I’d love to hear how it turned out! Leave a comment below or share your decorated cookies on social media—I can’t wait to see your creations. Happy baking, and have a spook-tacular Halloween!
FAQs
Can I make these cookies ahead of time?
Yes! You can bake the cookies a day or two in advance and decorate them when you’re ready.
What’s the best way to store decorated cookies?
Store them in a single layer in an airtight container to prevent smudging or sticking.
Can I use store-bought icing instead of homemade?
Absolutely! Store-bought icing works great if you’re short on time.
How do I prevent the dough from sticking while rolling?
Lightly flour your work surface and rolling pin to keep the dough from sticking.
What if I don’t have Halloween cookie cutters?
You can use a knife to cut out simple shapes or even make round cookies and decorate them with Halloween designs.
Pin This Recipe!
Halloween Shortbread Cookies Recipe Easy Party Treats
These buttery, melt-in-your-mouth Halloween shortbread cookies are fun to make and perfect for any Halloween party or cozy night in. Decorate them with spooky designs for a festive treat everyone will love!
- Prep Time: 15 minutes
- Cook Time: 15 minutes
- Total Time: 1 hour
- Yield: 24 cookies 1x
- Category: Dessert
- Cuisine: American
Ingredients
- 1 cup (230g) unsalted butter, softened
- 1/2 cup (100g) granulated sugar
- 1 teaspoon vanilla extract
- 2 cups (250g) all-purpose flour
- 1/4 teaspoon salt
- Food coloring (optional): orange, black, and green
- Royal icing
- Sprinkles or edible glitter (optional)
Instructions
- In a large mixing bowl, cream together 1 cup (230g) unsalted butter and 1/2 cup (100g) granulated sugar until light and fluffy (about 2-3 minutes). Add 1 teaspoon vanilla extract and mix until combined.
- Gradually add 2 cups (250g) all-purpose flour and 1/4 teaspoon salt to the butter mixture, mixing just until a soft dough forms. Avoid overmixing to maintain a tender texture.
- Wrap the dough in plastic wrap and refrigerate for 30 minutes to firm up.
- Preheat your oven to 325°F (160°C). Roll out the dough on a lightly floured surface to about 1/4-inch thickness. Use Halloween-themed cookie cutters to cut out shapes, then transfer them to a parchment-lined baking sheet.
- Bake the cookies for 12-15 minutes, or until the edges are just starting to turn golden. Let them cool completely before decorating.
- Prepare royal icing and divide it into bowls. Add food coloring to create spooky Halloween hues, then use piping bags to decorate your cookies. Add sprinkles or edible glitter for extra flair!
Notes
Chilling the dough is essential for maintaining precise shapes after baking. Use gel food coloring for vibrant shades without altering the icing texture. Take your time with decorating for the best results.
Nutrition
- Serving Size: 1 cookie
- Calories: 140
- Sugar: 7
- Sodium: 50
- Fat: 8
- Saturated Fat: 5
- Carbohydrates: 16
- Protein: 1
Keywords: Halloween cookies, shortbread cookies, festive treats, Halloween desserts, spooky cookies


