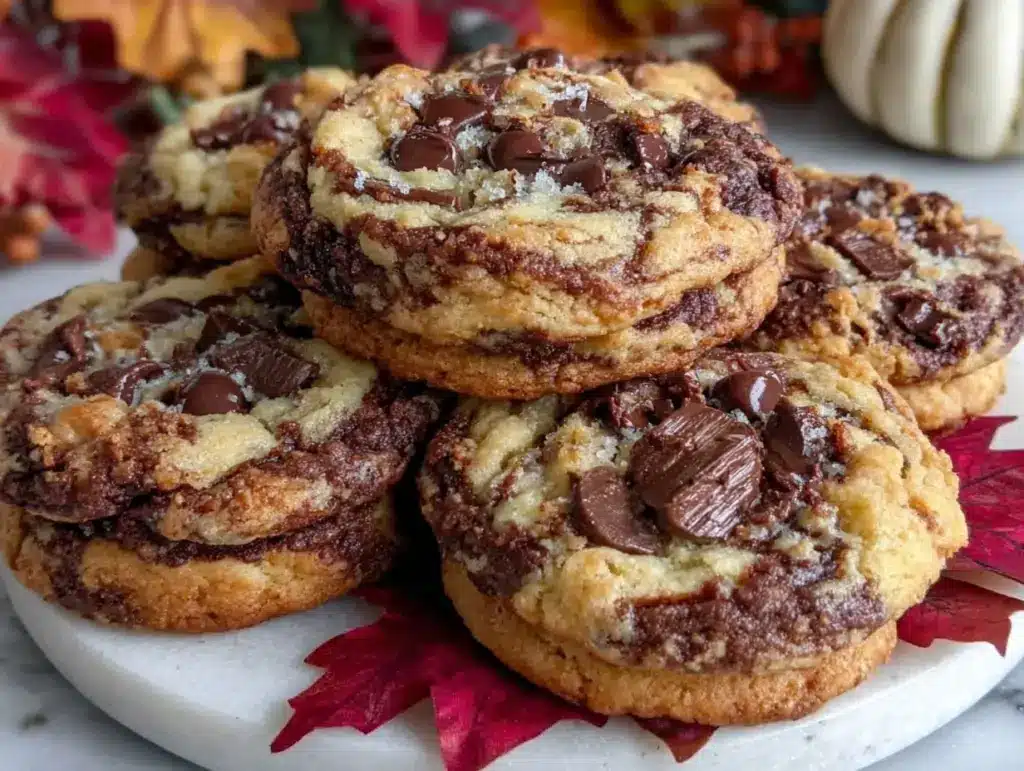
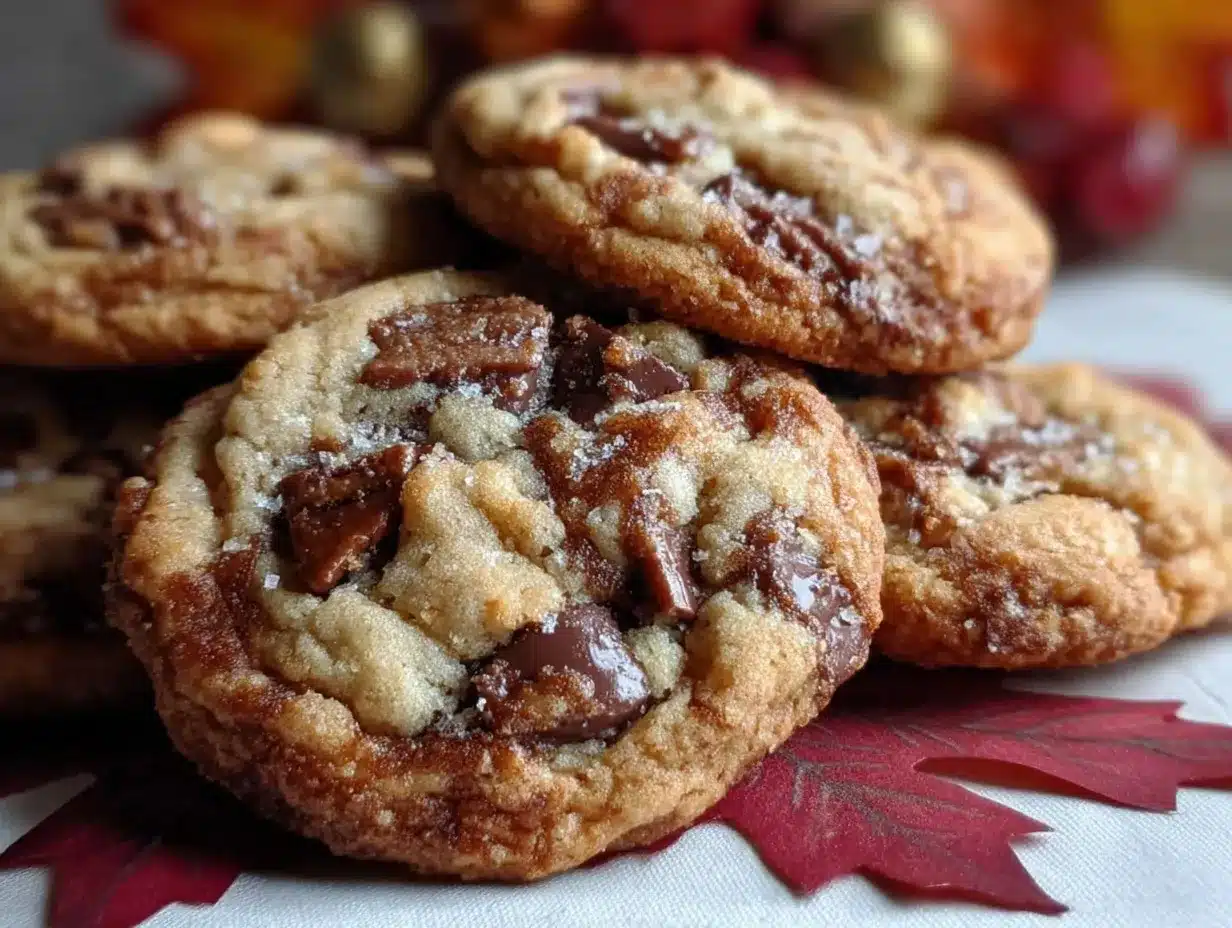
Let me tell you, the sweet aroma of warm chocolate and vanilla swirling together as these marble chocolate chip cookies bake is one of those magical smells that can fill your whole house. It’s like a hug from the oven—rich chocolate ribbons dancing with classic cookie dough, and those pockets of gooey chocolate chips just waiting to melt in your mouth. The first time I made these, it was a chilly November afternoon and I was craving something that felt like pure, nostalgic comfort. I remember pausing, taking in the sight of the marbled dough, and just smiling because I knew I’d stumbled onto something truly special.
These cookies have a little bit of everything: the chewy edges you dream about, a soft center that practically begs you to sneak an extra bite, and a swirl of chocolate that looks almost too pretty to eat (almost!). My grandma used to bake chocolate chip cookies every Thanksgiving, and I always wished she’d tried mixing in a bit of cocoa—so that’s exactly what I did. It’s the sort of recipe you wish you’d had in your back pocket years ago, especially for fall bake sales or those cozy, last-minute gatherings.
Honestly, my family couldn’t stop sneaking them off the cooling rack (and I can’t really blame them). There’s something about the marbled look—kids get wide-eyed, grown-ups get nostalgic, and everyone ends up reaching for seconds. These are dangerously easy to whip up, yet the results are impressive enough to brighten up your Pinterest cookie board or make you the star of Thanksgiving dessert. Whether you’re baking for a crowd or just need a sweet treat for yourself, these marble chocolate chip cookies feel like a warm hug every single time. I tested this recipe more times than I care to admit (in the name of research, of course), and now it’s a staple for family gatherings, gifting, and those rainy weekends when comfort food is a must. You’re going to want to bookmark this one—I promise!
Why You’ll Love This Marble Chocolate Chip Cookie Recipe
You know what? These marble chocolate chip cookies aren’t just your ordinary fall bake—they’re a step above, thanks to a few tried-and-true tricks I’ve picked up along the way. After baking batch after batch (sometimes two in a day, not gonna lie), I’ve honed this recipe to make sure every cookie comes out perfectly cozy, marbled, and loaded with chocolate chips. Here’s why you’re going to love these:
- Quick & Easy: Comes together in under 30 minutes, so you can satisfy those cookie cravings even on busy weeknights or when you need a last-minute Thanksgiving treat.
- Simple Ingredients: No fancy trips to specialty stores—just good old pantry staples that make prep a breeze.
- Perfect for Thanksgiving & Fall: These cookies bring just the right amount of warmth and comfort to your holiday table or autumn potluck.
- Crowd-Pleaser: Kids and adults alike can’t resist the marbled look and gooey chocolate chips. Expect rave reviews and requests for the recipe!
- Unbelievably Delicious: That mix of vanilla and chocolate dough, dotted with melty chips, makes for an addictive texture and flavor combo.
What makes these cookies stand out? It’s the simple technique of swirling chocolate and vanilla doughs together—not just for looks, but for a perfect balance in every bite. I use a dash of espresso powder in the chocolate dough to deepen the flavor (don’t worry, it doesn’t taste like coffee—it just amps up the chocolatey goodness). The mix of semi-sweet and dark chocolate chips adds layers of richness, and the dough stays soft for days (if you can manage to keep them around that long!).
This recipe isn’t just good—it’s the kind of cookie that makes you close your eyes after the first bite, savoring every swirl of chocolate and vanilla. It feels like classic comfort food, reimagined for the holidays: faster, a touch healthier, but with all the soul-soothing satisfaction you crave. Whether you’re aiming to impress guests without any stress or just want to turn a simple afternoon into something memorable, these marble chocolate chip cookies always deliver.
What Ingredients You Will Need
This marble chocolate chip cookie recipe uses simple, wholesome ingredients that come together for bold flavor and that signature swirl. Most of these are pantry staples, and you can easily swap a few things to suit your taste or dietary needs. Here’s what you’ll need:
- For the Vanilla Dough:
- 1 cup (226g) unsalted butter, softened (adds richness and helps with chewy texture)
- ¾ cup (150g) granulated sugar
- ¾ cup (150g) packed light brown sugar
- 2 large eggs, room temperature
- 2 tsp pure vanilla extract (I love Nielsen-Massey for extra flavor)
- 2½ cups (320g) all-purpose flour (King Arthur works great)
- 1 tsp baking soda
- ½ tsp kosher salt
- For the Chocolate Dough:
- 1 cup (226g) unsalted butter, softened
- ¾ cup (150g) granulated sugar
- ¾ cup (150g) packed light brown sugar
- 2 large eggs, room temperature
- 1½ cups (195g) all-purpose flour
- ¾ cup (70g) unsweetened cocoa powder (Dutch-process for deeper color)
- 1 tsp baking soda
- ½ tsp kosher salt
- 1 tsp espresso powder (optional, but highly recommended for boosting chocolate flavor)
- Chocolate Chips:
- 1 cup (170g) semi-sweet chocolate chips
- ½ cup (85g) dark chocolate chips (or more semi-sweet, if you prefer)
Ingredient Notes & Substitutions:
- Butter: You can swap for vegan butter for dairy-free cookies.
- Flour: Use a 1:1 gluten-free baking blend if you need gluten-free treats. Almond flour will make cookies softer, but works for gluten-free needs.
- Sugars: If you like a deeper flavor, use dark brown sugar.
- Chocolate Chips: Swap in milk chocolate or add white chocolate chips for extra flair.
- Espresso Powder: Leave it out if you don’t have it, but trust me—it makes a difference.
- Eggs: Flax eggs work for a vegan version (1 tbsp ground flaxseed + 2½ tbsp water per egg).
If it’s fall and you’ve got extra spices on hand, a dash of cinnamon in the vanilla dough is a nice touch. For Thanksgiving, I sometimes add chopped pecans or walnuts—just for crunch.
Equipment Needed
You don’t need any fancy gadgets for these marble chocolate chip cookies—just a few kitchen basics. Here’s what I use every time (and a few tips if you’re working with a tight budget or limited tools):
- Mixing Bowls: At least two large bowls for mixing the separate doughs. If you’re short on bowls, wash and dry in between.
- Electric Mixer: A hand mixer works perfectly, though a stand mixer makes things even easier. You can mix by hand if you’re feeling strong!
- Measuring Cups & Spoons: For accurate measurements. I prefer metal cups—they last forever.
- Rubber Spatula: For scraping down the sides and swirling the doughs together.
- Baking Sheets: Two help you bake in batches without waiting around.
- Parchment Paper: Keeps cookies from sticking and makes cleanup a breeze. Silicone baking mats work too.
- Cookie Scoop: For consistent size (I use a medium scoop, but a tablespoon works in a pinch).
- Wire Rack: For cooling the cookies evenly and quickly.
Honestly, I’ve made these cookies with just a bowl and a wooden spoon before—no mixer, no scoop, just a little elbow grease. If you use silicone mats, be sure to wash them well between batches so the cookies don’t pick up any off flavors. And parchment paper can be reused for a second batch (frugality for the win!).
How to Make Marble Chocolate Chip Cookies
Ready to get baking? Here’s my step-by-step guide to creating those irresistible marble chocolate chip cookies. I always keep the process simple—no fuss, no fancy tricks, just a few well-tested steps for perfect cookies every time.
- Preheat & Prep:
- Preheat your oven to 350°F (175°C).
- Line two baking sheets with parchment paper or silicone mats.
- Set out all ingredients so everything’s at room temperature.
- Make the Vanilla Dough:
- In a large bowl, cream together 1 cup (226g) unsalted butter, ¾ cup (150g) granulated sugar, and ¾ cup (150g) light brown sugar until light and fluffy (about 2-3 minutes).
- Beat in 2 eggs and 2 tsp vanilla extract until well combined.
- In a separate bowl, whisk together 2½ cups (320g) all-purpose flour, 1 tsp baking soda, and ½ tsp salt.
- Gradually add dry ingredients to the wet, mixing until just combined. Do not overmix.
- Make the Chocolate Dough:
- Repeat the above steps in another bowl with 1 cup (226g) butter, ¾ cup (150g) granulated sugar, ¾ cup (150g) light brown sugar, 2 eggs.
- Stir in 1½ cups (195g) flour, ¾ cup (70g) cocoa powder, 1 tsp baking soda, ½ tsp salt, and 1 tsp espresso powder.
- Mix until just combined—don’t worry if the dough seems a bit thicker; that’s normal.
- Add Chocolate Chips:
- Fold 1 cup (170g) semi-sweet chocolate chips and ½ cup (85g) dark chocolate chips into both doughs, dividing them evenly.
- Marble the Doughs:
- Take a spoonful of vanilla dough and a spoonful of chocolate dough, gently press them together in your hand.
- Give the dough a few gentle turns—don’t overmix or you’ll lose the swirls.
- Roll into balls (about 2 tbsp or 35g per cookie) and place on baking sheets spaced 2 inches (5cm) apart.
- For extra marbling, twist the dough balls once more before placing them down.
- Bake:
- Bake for 10-12 minutes, until edges are set but centers look slightly underbaked. (The smell is your cue!)
- If you like crispier cookies, add 1-2 more minutes.
- If cookies spread too much, chill dough balls for 15 minutes before baking.
- Cool & Enjoy:
- Let cookies cool on the baking sheet for 5 minutes, then transfer to a wire rack.
- The marbled look will set as cookies cool—don’t rush this step.
- Store in an airtight container once fully cooled.
Troubleshooting:
- If dough is sticky, chill for 30 minutes.
- For thicker cookies, use cold butter or chill dough balls before baking.
- Dark spots in marbling? Totally normal—just means you swirled them perfectly.
I like to scoop all the dough balls at once, then marble them right before baking for the best swirls. Don’t stress if your cookies look a bit different each time—it’s part of the charm!
Pro Tips & Techniques for Perfect Marble Chocolate Chip Cookies
I’ve made my share of cookie blunders, so I’m all about sharing the little tricks that make a big difference. Here are some tips I’ve learned—sometimes the hard way!
- Use Room Temperature Ingredients: Butter and eggs blend best at room temperature. If you forget, pop eggs in warm water for five minutes.
- Don’t Overmix: Once you add the flour, mix just until combined—too much mixing equals tough cookies.
- Chill the Dough (if needed): If your kitchen is warm or dough feels sticky, a short chill will help cookies hold their shape.
- Swirl, Don’t Blend: The trick to marbling is gentle swirling. Overmixing turns your dough gray; under-mixing gives bold, beautiful streaks.
- Watch Your Bake Time: Underbaked centers mean soft, chewy cookies. Edges should be just golden—don’t wait for the whole cookie to look set.
- Rotate Baking Sheets: If baking two sheets at once, swap rack positions halfway through for even browning.
- Don’t Skimp on Chips: More chocolate chips means more gooey bites. But don’t overload—too many and your cookies might spread too much.
- Let Them Cool: Patience pays off. Cooling on the sheet lets the cookies finish baking without drying out.
I’ve forgotten to chill my dough more times than I can count—those batches always spread too much. If your cookies flatten out, don’t sweat it. Just call them “crispy marbled chips” and enjoy the snack! For multitasking, scoop all the dough balls first, then marble and bake in batches. Consistency comes from using a cookie scoop and keeping your dough portions even. Trust me, a little practice and these cookies will turn out bakery-perfect every time.
Variations & Adaptations
One of my favorite things about marble chocolate chip cookies is how easy it is to switch things up. Here are some tasty variations and adaptations you can try:
- Dietary Swaps: For gluten-free cookies, use a 1:1 gluten-free flour blend. Vegan butter and flax eggs work well for dairy-free/vegan treats.
- Seasonal Flavors: Add 1 tsp cinnamon or pumpkin pie spice to the vanilla dough for a fall twist. Chopped dried cranberries or pecans are great for Thanksgiving.
- Flavor Boosts: Mix in white chocolate chips, butterscotch chips, or even peanut butter chips for extra layers of sweetness.
- Different Cooking Methods: Make cookie bars by pressing marbled dough into a parchment-lined pan and baking for 20-25 minutes, then cutting into squares.
- Allergen Substitutions: Use sunflower seed butter for nut-free cookies, or coconut oil instead of butter for those with dairy allergies.
Personally, I love adding a handful of chopped walnuts to the chocolate dough for crunch. One Thanksgiving, I tried swirling in a little orange zest—wow, that bright citrus flavor with chocolate was a hit. If your crowd loves spice, a pinch of cayenne in the chocolate dough adds a subtle warmth. Don’t be afraid to play—these cookies are forgiving and fun!
Serving & Storage Suggestions
These marble chocolate chip cookies are best enjoyed fresh from the oven, but they hold up beautifully for days—making them perfect for Thanksgiving and fall gatherings. Here’s how to serve and store them:
- Serving Temperature: Serve warm for gooey centers, or at room temperature for a chewy texture. If you want melty chips, microwave a cookie for 10 seconds.
- Presentation: Stack cookies on a rustic wooden board or pile them in a pretty basket lined with a fall-themed napkin. They look gorgeous on a dessert platter with other autumn treats!
- Pairings: These cookies go perfectly with hot cocoa, apple cider, or a cold glass of milk. For a sophisticated twist, try with espresso or a dessert wine.
- Storage: Keep cookies in an airtight container at room temperature for up to 5 days. They stay soft and chewy!
- Freezing: Freeze cooled cookies in a zip-top bag for up to 2 months. Thaw at room temperature or warm briefly in the oven.
- Reheating: Pop cookies in the microwave for 10-15 seconds to revive that fresh-baked taste. Or warm in an oven at 300°F (150°C) for 3-5 minutes.
Honestly, I find the flavors deepen after a day or two—the chocolate gets richer and the vanilla mellows. If you’re planning ahead for Thanksgiving, bake these cookies a day early and let them sit (if you can resist!).
Nutritional Information & Benefits
Here’s the scoop on what you’re eating when you reach for a marble chocolate chip cookie:
- Estimated Values (per cookie):
- Calories: ~180
- Fat: 8g
- Carbs: 24g
- Protein: 2g
- Sugar: 14g
- Health Benefits:
- Cocoa powder adds antioxidants and a little iron.
- Dark chocolate chips have less sugar and more fiber than milk chocolate.
- Optional nuts add heart-healthy fats and protein.
- Dietary Notes:
- Contains wheat, dairy, eggs, and may contain traces of nuts if added.
- Can be made gluten-free or dairy-free with simple swaps.
From a wellness perspective, these cookies are definitely a treat—but with good-quality chocolate, a bit of protein from eggs, and options for allergen-friendly adaptations, you can enjoy them as part of a balanced Thanksgiving spread. Moderation, as always!
Conclusion
If you’re looking for a cozy, crowd-pleasing cookie to make your Thanksgiving or fall baking extra memorable, you just can’t go wrong with these marble chocolate chip cookies. They’re easy, beautiful, and packed with that classic homemade flavor—plus, the marbled look is a guaranteed Pinterest hit. Customize them with your favorite chips, nuts, or spices, and make them truly yours.
Personally, these cookies have become a staple in my kitchen, especially when I need something quick but impressive. I love the way the chocolate and vanilla swirl together—each bite is a little surprise. Give them a try, and let me know how you make them your own!
Ready to bake? Drop a comment below if you have questions or if you’ve tried a fun variation. Share this recipe with your holiday crew or pin it for later—trust me, you’ll want it handy for every cozy fall moment. Happy baking—may your cookies be marbled and your Thanksgiving full of sweet memories!
Frequently Asked Questions
Can I make marble chocolate chip cookies ahead for Thanksgiving?
Absolutely! Bake them the day before and store in an airtight container. The flavors actually get richer after a day, and they stay soft and chewy.
What’s the best way to get that perfect marble swirl?
Gently press the vanilla and chocolate doughs together, twist lightly, and roll without overmixing. Too much mixing will blend the colors—so keep it casual!
Can I freeze marble chocolate chip cookie dough?
Yes—form the marbled dough balls and freeze them on a tray. Once solid, transfer to a bag and freeze for up to 2 months. Bake straight from frozen, adding 2 minutes to the bake time.
What if I don’t have espresso powder for the chocolate dough?
No worries—you can skip it or use instant coffee granules for a similar effect. It just adds depth to the chocolate flavor, but the cookies are tasty either way!
How can I make these cookies gluten-free?
Just swap the all-purpose flour for a 1:1 gluten-free blend. The texture may be a bit softer, but the marbling and flavor will shine through just the same.
Pin This Recipe!

Marble Chocolate Chip Cookies: Easy Cozy Recipe for Thanksgiving Bakes
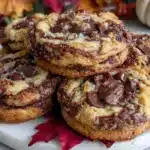
These marble chocolate chip cookies combine swirls of rich chocolate and classic vanilla dough, loaded with gooey chocolate chips for a cozy, crowd-pleasing treat perfect for Thanksgiving and fall gatherings. Quick to make and beautiful to serve, they offer chewy edges, soft centers, and a nostalgic flavor everyone will love.
- Prep Time: 15 minutes
- Cook Time: 12 minutes
- Total Time: 27 minutes
- Yield: 24 cookies 1x
- Category: Dessert
- Cuisine: American
Ingredients
- 1 cup unsalted butter, softened (for vanilla dough)
- 3/4 cup granulated sugar (for vanilla dough)
- 3/4 cup packed light brown sugar (for vanilla dough)
- 2 large eggs, room temperature (for vanilla dough)
- 2 teaspoons pure vanilla extract
- 2 1/2 cups all-purpose flour (for vanilla dough)
- 1 teaspoon baking soda (for vanilla dough)
- 1/2 teaspoon kosher salt (for vanilla dough)
- 1 cup unsalted butter, softened (for chocolate dough)
- 3/4 cup granulated sugar (for chocolate dough)
- 3/4 cup packed light brown sugar (for chocolate dough)
- 2 large eggs, room temperature (for chocolate dough)
- 1 1/2 cups all-purpose flour (for chocolate dough)
- 3/4 cup unsweetened cocoa powder (Dutch-process recommended)
- 1 teaspoon baking soda (for chocolate dough)
- 1/2 teaspoon kosher salt (for chocolate dough)
- 1 teaspoon espresso powder (optional, for chocolate dough)
- 1 cup semi-sweet chocolate chips
- 1/2 cup dark chocolate chips
Instructions
- Preheat oven to 350°F (175°C). Line two baking sheets with parchment paper or silicone mats.
- Make the vanilla dough: In a large bowl, cream together 1 cup butter, 3/4 cup granulated sugar, and 3/4 cup light brown sugar until light and fluffy (2-3 minutes). Beat in 2 eggs and 2 teaspoons vanilla extract until well combined.
- In a separate bowl, whisk together 2 1/2 cups flour, 1 teaspoon baking soda, and 1/2 teaspoon salt. Gradually add dry ingredients to wet, mixing until just combined.
- Make the chocolate dough: In another bowl, cream together 1 cup butter, 3/4 cup granulated sugar, and 3/4 cup light brown sugar. Beat in 2 eggs. Stir in 1 1/2 cups flour, 3/4 cup cocoa powder, 1 teaspoon baking soda, 1/2 teaspoon salt, and 1 teaspoon espresso powder. Mix until just combined.
- Fold chocolate chips evenly into both doughs.
- Marble the doughs: Take a spoonful of vanilla dough and a spoonful of chocolate dough, gently press together, and give a few gentle turns to swirl. Roll into balls (about 2 tablespoons each) and place on baking sheets 2 inches apart.
- Bake for 10-12 minutes, until edges are set but centers look slightly underbaked.
- Let cookies cool on the baking sheet for 5 minutes, then transfer to a wire rack to cool completely.
- Store in an airtight container once fully cooled.
Notes
For gluten-free cookies, use a 1:1 gluten-free flour blend. Vegan butter and flax eggs work for dairy-free/vegan adaptations. Add cinnamon or pumpkin pie spice for a fall twist, or chopped nuts for crunch. Chill dough if sticky or for thicker cookies. Cookies freeze well for up to 2 months.
Nutrition
- Serving Size: 1 cookie
- Calories: 180
- Sugar: 14
- Sodium: 120
- Fat: 8
- Saturated Fat: 5
- Carbohydrates: 24
- Fiber: 2
- Protein: 2
Keywords: marble chocolate chip cookies, Thanksgiving cookies, fall baking, easy cookie recipe, marbled cookies, chocolate chip cookies, holiday dessert, cozy cookies


