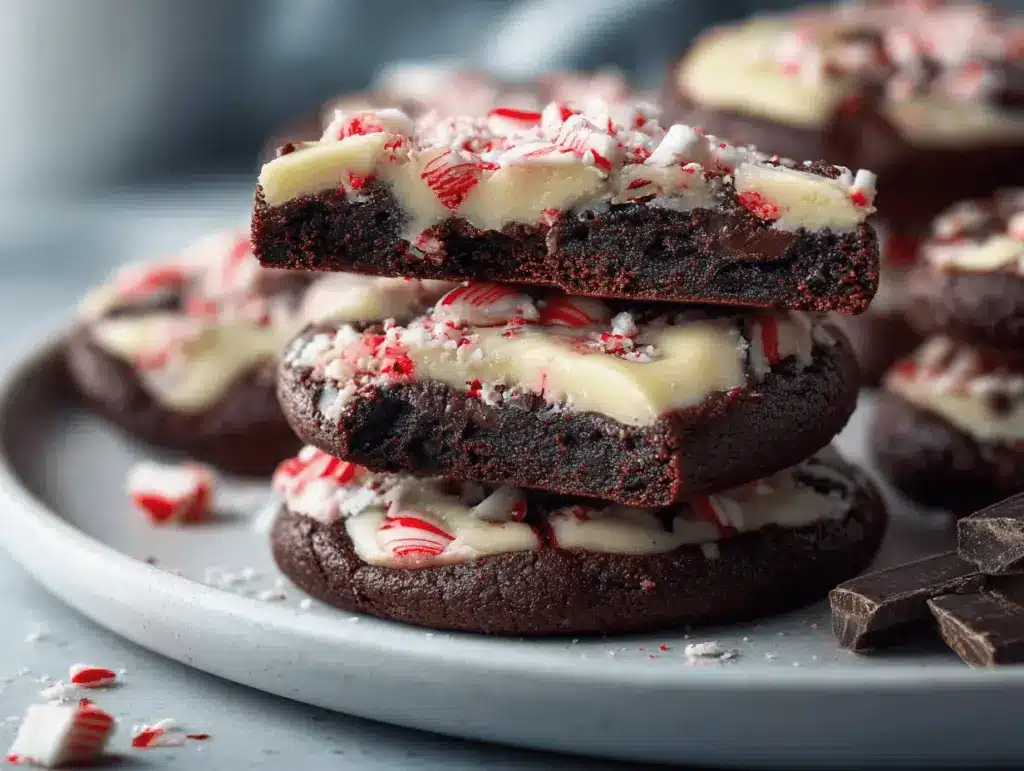
The first time I baked a batch of peppermint bark cookies, the whole kitchen filled with the scent of melted chocolate and cool peppermint—it was like stepping right into a winter wonderland. There’s just something about these cookies that screams the holidays. Maybe it’s the shimmery crushed candy canes twinkling on top, or the way each bite offers that satisfying snap of chocolate and the soft, buttery cookie underneath. Honestly, these are the cookies I make when I want to wow a crowd with zero stress, and they’ve become a December tradition in my house.
Let’s face it: holiday baking can get overwhelming (I’ve been there, covered in flour with timers going off everywhere). But peppermint bark cookies are my secret weapon. They’re bright, festive, and way easier than they look. I came across the idea when I was trying to combine my love of classic peppermint bark with the coziness of homemade cookies. After a few batches—okay, maybe a dozen—I finally got the texture just right: crisp edges, tender centers, and plenty of creamy chocolate.
This peppermint bark cookies recipe is perfect for cookie exchanges, classroom parties, or just cozying up with a mug of hot cocoa. Whether you’re a peppermint fanatic or just need a sweet treat that looks as good as it tastes, you’ll love how simple and fun these are to make. Plus, the kids can help decorate (just be prepared for a little extra sprinkle of candy canes on the floor). If you’re looking for a festive holiday treat that delivers big flavor and instant holiday cheer, these peppermint bark cookies are about to become your new go-to.
Why You’ll Love This Peppermint Bark Cookies Recipe
I’ve tested a lot of holiday cookies over the years, but peppermint bark cookies have truly earned their spot at the top of my Christmas cookie list. Here’s why I think you’ll be reaching for this recipe again and again:
- Quick & Easy: These cookies come together in under an hour, start to finish. No chilling the dough, no complicated steps—just mix, bake, and decorate.
- Simple Ingredients: You probably already have most of the basics in your pantry, with just a couple of festive add-ins like peppermint extract and candy canes.
- Perfect for Every Occasion: Whether you’re headed to a holiday potluck, hosting a cookie swap, or just need something sweet for family movie night, these cookies fit right in.
- Crowd-Pleaser: Kids and adults both love the classic combo of chocolate and peppermint. I’ve brought these to parties and watched them disappear faster than any other cookie!
- Unbelievably Delicious: The buttery cookie base, silky chocolate coating, and crunchy peppermint topping make for an unbeatable, festive treat. They’re as photogenic as they are tasty—perfect for sharing on Pinterest or Instagram.
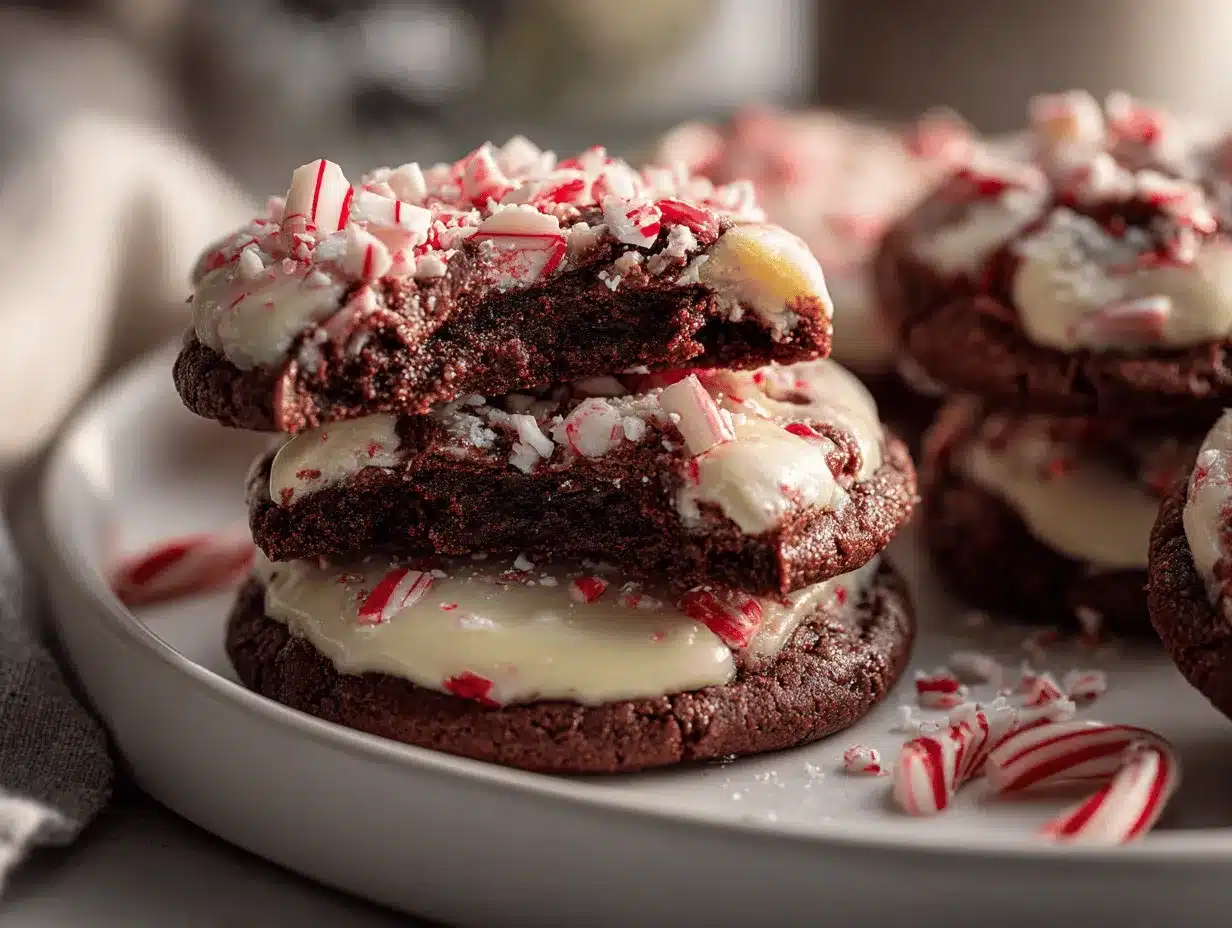
What sets this peppermint bark cookies recipe apart? For starters, I use both white and semi-sweet chocolate for that classic bark vibe, and a hint of peppermint extract in the dough itself—so you get flavor in every bite, not just on top. I also like to bake the cookies until just golden at the edges, so they stay soft inside (no dry, crumbly cookies here!).
This is my go-to for last-minute gatherings, because they look like you spent hours on them. Honestly, there’s a little magic in pulling together something so cheerful and festive with so little fuss. If you’re looking for a new holiday tradition, or just a way to bring a little extra sparkle to your cookie tray, you’re in the right place. I hope you love these peppermint bark cookies as much as my family does!
What Ingredients You Will Need
This recipe uses simple, wholesome ingredients to deliver bold holiday flavor and that classic peppermint bark crunch. Nothing fancy or hard to find—just good, honest baking staples and a few festive additions. Here’s what you’ll need:
- For the Cookie Dough:
- 1 cup (2 sticks; 226g) unsalted butter, softened (room temperature makes creaming easier)
- 1 cup (200g) granulated sugar
- 1 large egg (room temperature for best texture)
- 1 tsp pure vanilla extract
- 1/2 tsp peppermint extract (don’t overdo it—a little goes a long way!)
- 2 1/2 cups (312g) all-purpose flour
- 1/2 tsp baking powder
- 1/4 tsp salt
- For the Topping:
- 6 oz (170g) semi-sweet chocolate, chopped or chips (I like Ghirardelli for a glossy finish)
- 6 oz (170g) white chocolate, chopped or chips (good-quality white chocolate melts best)
- 1/2 cup (about 5-6) candy canes, crushed (use a rolling pin or food processor; don’t worry if some pieces are bigger)
Ingredient tips:
- Butter: Use unsalted, so you can control the saltiness. If you only have salted, just skip the added salt.
- Peppermint Extract: Make sure it’s peppermint, not spearmint! Too much can taste like toothpaste, so measure carefully.
- Flour: For gluten-free, swap in a 1:1 gluten-free blend (like King Arthur or Bob’s Red Mill).
- Chocolate: You can use chocolate chips or bars. Bars melt more smoothly, but chips are super convenient.
- Candy Canes: Store-brand is fine. If you’re feeling fancy, use peppermint candies instead.
If you’re missing something, don’t stress. You can swap in coconut oil for some of the butter (about 1/4 cup, melted), or use a dairy-free butter substitute for a vegan version. Sometimes I add a pinch of espresso powder to the chocolate for depth—totally optional, but kind of fun.
Equipment Needed
You don’t need a bunch of fancy gadgets to make peppermint bark cookies. Here’s the lineup—and a few tips from my kitchen:
- Electric Mixer: Stand mixer or handheld both work. I’ve made these by hand with a sturdy wooden spoon, but your arm might get tired!
- Mixing Bowls: At least two—one for the dough, one for melting chocolate (microwave-safe).
- Baking Sheets: Two is ideal, so you can work in batches. Line with parchment for easy cleanup.
- Cooling Rack: Helps the chocolate set evenly. If you don’t have one, just let the cookies cool on parchment.
- Rolling Pin: For crushing candy canes. A heavy can of beans works in a pinch.
- Microwave or Double Boiler: For melting chocolate. I usually use the microwave in 20-second bursts.
- Cookie Cutter: Round, about 2.5 inches, or just use a glass. No cutter? Drop spoonfuls for rustic “bark” shapes.
My favorite hack: If you don’t have parchment, lightly grease your baking sheet with butter. And if you’re short on bowls, just rinse and reuse as you go. Honestly, these cookies don’t demand perfection—just enthusiasm and a little holiday spirit!
How to Make Peppermint Bark Cookies
-
Cream the Butter and Sugar:
In a large bowl, beat together 1 cup (226g) unsalted butter and 1 cup (200g) granulated sugar on medium speed until light and fluffy, about 2-3 minutes. You want the mixture to look pale—this step helps the cookies stay soft. -
Add the Egg and Flavors:
Beat in 1 large egg, 1 tsp vanilla extract, and 1/2 tsp peppermint extract. Scrape down the bowl once or twice so everything gets well blended. -
Mix the Dry Ingredients:
In a separate bowl, whisk together 2 1/2 cups (312g) all-purpose flour, 1/2 tsp baking powder, and 1/4 tsp salt. Add to the wet ingredients in two batches, mixing on low just until combined. Don’t overmix—stop as soon as you see the dough come together. The dough should be soft, but not sticky. -
Shape and Bake:
Preheat your oven to 350°F (175°C). Roll the dough out on a lightly floured surface to about 1/4-inch (6mm) thick. Cut out cookies with a 2.5-inch round cutter. Place on lined baking sheets, about 1 inch apart. Bake for 10-12 minutes, until the edges are just turning golden. Cookies will look pale in the center, but they’ll continue to set as they cool. -
Cool:
Remove from oven and let the cookies sit on the baking sheet for 2 minutes, then transfer to a wire rack to cool completely. If you move them too soon, they might break (I’ve made that mistake!). -
Melt the Chocolates:
In separate microwave-safe bowls, melt 6 oz (170g) semi-sweet chocolate and 6 oz (170g) white chocolate in 20-second bursts, stirring after each, until smooth. (A double boiler works, too.) If the chocolate is too thick, add a teaspoon of coconut oil to thin. -
Dip and Decorate:
Dip each cooled cookie halfway into the semi-sweet chocolate, then place back on parchment. Drizzle with melted white chocolate using a fork or piping bag. Sprinkle with crushed candy canes while the chocolate is still wet. -
Set:
Let cookies sit at room temperature until the chocolate hardens, about 30 minutes. If you’re in a hurry, pop the tray in the fridge for 10 minutes.
Prep tip: If your kitchen is warm, the chocolate will take longer to set. I usually prep the toppings while the cookies cool, so everything flows smoothly. If you notice the dough getting too soft as you cut, just pop it in the fridge for 10 minutes. And if some cookies break—no worries! Crumble them over ice cream for an epic sundae.
Cooking Tips & Techniques
Making peppermint bark cookies isn’t rocket science, but a few pro tips can save you from classic holiday baking mishaps.
- Don’t Overbake: The edges should look just barely golden. If you wait for the whole cookie to brown, they’ll be tough (learned that the hard way—crunchy cookies aren’t the vibe here).
- Chill Dough if Needed: If your dough gets sticky, 10 minutes in the fridge works wonders. Cold dough holds its shape better, especially for cut-outs.
- Use Good Chocolate: High-quality chocolate melts smoother and tastes richer. I’ve tried store brands and premium ones—there’s a noticeable difference.
- Crushing Candy Canes: Put them in a zip-top bag and use a rolling pin. Beware: it gets loud! Some bigger pieces are fine, but avoid powder—they melt too quickly on the hot chocolate.
- Multitasking: Melt chocolate while cookies bake or cool. Set up your toppings assembly line for stress-free decorating.
- Consistency: If your chocolate sets too fast, re-warm as needed. If it’s too thick, a drop of coconut oil brings it back to drizzling texture.
One time, I used peppermint oil instead of extract (super strong stuff)—the cookies tasted like mouthwash. So trust me: stick with extract and measure carefully. And always taste your chocolate before decorating, especially if you’re using a new brand. There’s nothing worse than beautiful cookies that taste “off.”
Variations & Adaptations
The best part about peppermint bark cookies? They’re totally customizable! Here are some of my favorite spins:
- Gluten-Free: Swap the all-purpose flour for a 1:1 gluten-free baking blend. I’ve used Bob’s Red Mill and King Arthur—both work great. The dough might be a touch crumblier, but the flavor is spot on.
- Vegan: Use vegan butter and a flax egg (1 tbsp flaxseed meal + 2.5 tbsp water, mixed and left to sit for 5 minutes). Choose dairy-free chocolate chips—Enjoy Life is my go-to.
- Double Chocolate: Add 1/4 cup (25g) unsweetened cocoa powder to the dough for a chocolate base. The rich, intense flavor is perfect for serious chocoholics.
- Seasonal Touches: Mix in 1/2 cup finely chopped dried cranberries or mini marshmallows for a holiday twist. Around Valentine’s, swap the peppermint for raspberry extract and use pink sprinkles instead of candy canes.
- Nut-Free: This recipe is naturally nut-free, but always check your chocolate and candy canes if allergies are a concern.
Personally, I love making a “hot cocoa” version: I sprinkle mini marshmallows and a pinch of sea salt over the chocolate. My family can’t get enough! Don’t be afraid to play around and make these cookies your own—they’ll be delicious no matter how you mix things up.
Serving & Storage Suggestions
Peppermint bark cookies are best served at room temperature, where the chocolate has a slight snap but isn’t rock-hard. Arrange them on a festive platter, and sprinkle a little extra crushed peppermint for that “snow-dusted” look. They pair perfectly with hot cocoa, coffee, or even a glass of cold milk (Santa-approved!).
For parties, stack them in clear jars or cellophane bags tied with ribbon—makes a gorgeous homemade gift. If you’re making them ahead, store in an airtight container at room temperature for up to 5 days. For longer storage, freeze in single layers between parchment paper (up to 2 months). Thaw at room temp before serving.
When reheating, skip the microwave—it can melt the chocolate unevenly. Instead, let frozen cookies sit on the counter for 30-60 minutes. As the flavors mingle, the peppermint gets a little more mellow and dreamy. Honestly, they taste even better on day two!
Nutritional Information & Benefits
Each peppermint bark cookie (based on a batch of 24) has about 190 calories, 3g protein, 9g fat, and 25g carbs. They’re a treat, for sure, but there are a few wellness perks to enjoy:
- Peppermint: Naturally refreshing, and may help with digestion.
- Dark Chocolate: Offers antioxidants and a bit of feel-good magnesium.
- Allergen Notes: Recipe is nut-free and easily adapted for gluten-free or dairy-free diets, as mentioned above.
As someone who tries to balance treats with nutrition, I love that these cookies are easy to make in smaller or larger batches. And since they’re so rich, one or two is all you need to satisfy that holiday sweet tooth!
Conclusion
If you’re searching for a festive, crowd-pleasing treat, this peppermint bark cookies recipe really does tick all the boxes. It’s easy enough for a weeknight, impressive enough for a holiday platter, and adaptable for almost any dietary need. I love how they look on my cookie trays—sparkly, chocolatey, and totally irresistible.
Don’t be afraid to make these peppermint bark cookies your own—try different chocolates, sprinkles, or shapes. Every batch I bake has its own personality, and honestly, that’s half the fun. I hope these cookies become a holiday tradition in your home, just like they have in mine.
If you try this recipe, leave a comment below or share your version on Pinterest or Instagram (tag me, I’d love to see your creations!). Happy baking, and may your season be filled with peppermint, chocolate, and lots of joy!
Frequently Asked Questions
How do I keep the chocolate on my peppermint bark cookies from getting streaky?
Make sure your melted chocolate is completely smooth before dipping. If you see streaks, it might be from water or overheating. Stir constantly and melt in short intervals. Using high-quality chocolate helps a lot, too!
Can I make peppermint bark cookies ahead of time?
Absolutely! Bake the cookies up to three days ahead, then decorate before serving. You can also freeze undecorated cookies for up to two months and add the toppings fresh.
What’s the best way to crush candy canes for topping?
Place unwrapped candy canes in a zip-top bag, seal, and crush with a rolling pin or heavy pan. Some chunks are fine—just avoid turning them into dust, or they’ll melt into the chocolate.
Can I skip the peppermint extract?
You can, but you’ll lose that signature flavor. If you prefer, use vanilla only, or try orange or almond extract for a twist.
How do I store leftover peppermint bark cookies?
Keep cookies in an airtight container at room temperature for up to five days, or freeze for longer storage. Place parchment between layers to prevent sticking. Let them thaw at room temp before enjoying.
Pin This Recipe!
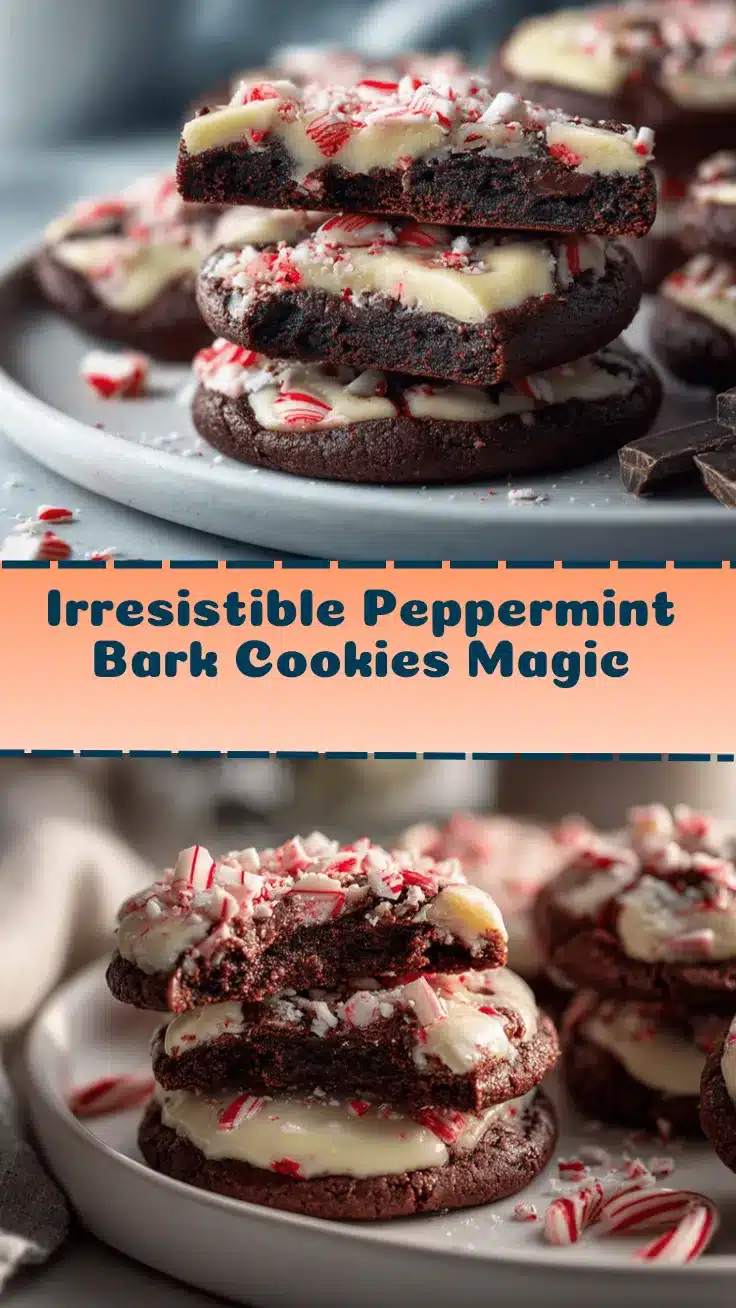
Peppermint Bark Cookies

These peppermint bark cookies combine a buttery, tender cookie base with a glossy chocolate coating and a festive sprinkle of crushed candy canes. They’re easy to make, perfect for holiday gatherings, and deliver classic peppermint bark flavor in every bite.
- Prep Time: 20 minutes
- Cook Time: 12 minutes
- Total Time: 45 minutes
- Yield: 24 cookies 1x
- Category: Dessert
- Cuisine: American
Ingredients
- 1 cup (2 sticks; 226g) unsalted butter, softened
- 1 cup (200g) granulated sugar
- 1 large egg
- 1 tsp pure vanilla extract
- 1/2 tsp peppermint extract
- 2 1/2 cups (312g) all-purpose flour
- 1/2 tsp baking powder
- 1/4 tsp salt
- 6 oz (170g) semi-sweet chocolate, chopped or chips
- 6 oz (170g) white chocolate, chopped or chips
- 1/2 cup (about 5-6) candy canes, crushed
Instructions
- In a large bowl, beat together butter and granulated sugar on medium speed until light and fluffy, about 2-3 minutes.
- Beat in the egg, vanilla extract, and peppermint extract. Scrape down the bowl to ensure everything is well blended.
- In a separate bowl, whisk together flour, baking powder, and salt. Add to the wet ingredients in two batches, mixing on low just until combined. Do not overmix.
- Preheat oven to 350°F (175°C). Roll dough out on a lightly floured surface to about 1/4-inch thick. Cut out cookies with a 2.5-inch round cutter. Place on lined baking sheets about 1 inch apart.
- Bake for 10-12 minutes, until edges are just turning golden. Centers will look pale.
- Remove from oven and let cookies sit on the baking sheet for 2 minutes, then transfer to a wire rack to cool completely.
- In separate microwave-safe bowls, melt semi-sweet chocolate and white chocolate in 20-second bursts, stirring after each, until smooth. (Or use a double boiler.)
- Dip each cooled cookie halfway into the semi-sweet chocolate, then place back on parchment. Drizzle with melted white chocolate using a fork or piping bag. Sprinkle with crushed candy canes while chocolate is still wet.
- Let cookies sit at room temperature until chocolate hardens, about 30 minutes, or refrigerate for 10 minutes to speed up setting.
Notes
For gluten-free cookies, substitute a 1:1 gluten-free flour blend. For vegan, use vegan butter and a flax egg, and dairy-free chocolate. Chill dough if it becomes too soft. Use high-quality chocolate for best results. Store cookies in an airtight container at room temperature for up to 5 days or freeze for up to 2 months.
Nutrition
- Serving Size: 1 cookie
- Calories: 190
- Sugar: 14
- Sodium: 60
- Fat: 9
- Saturated Fat: 5
- Carbohydrates: 25
- Fiber: 1
- Protein: 3
Keywords: peppermint bark cookies, holiday cookies, Christmas cookies, chocolate peppermint cookies, easy holiday treats, festive cookies, cookie exchange, peppermint dessert


