Introduction
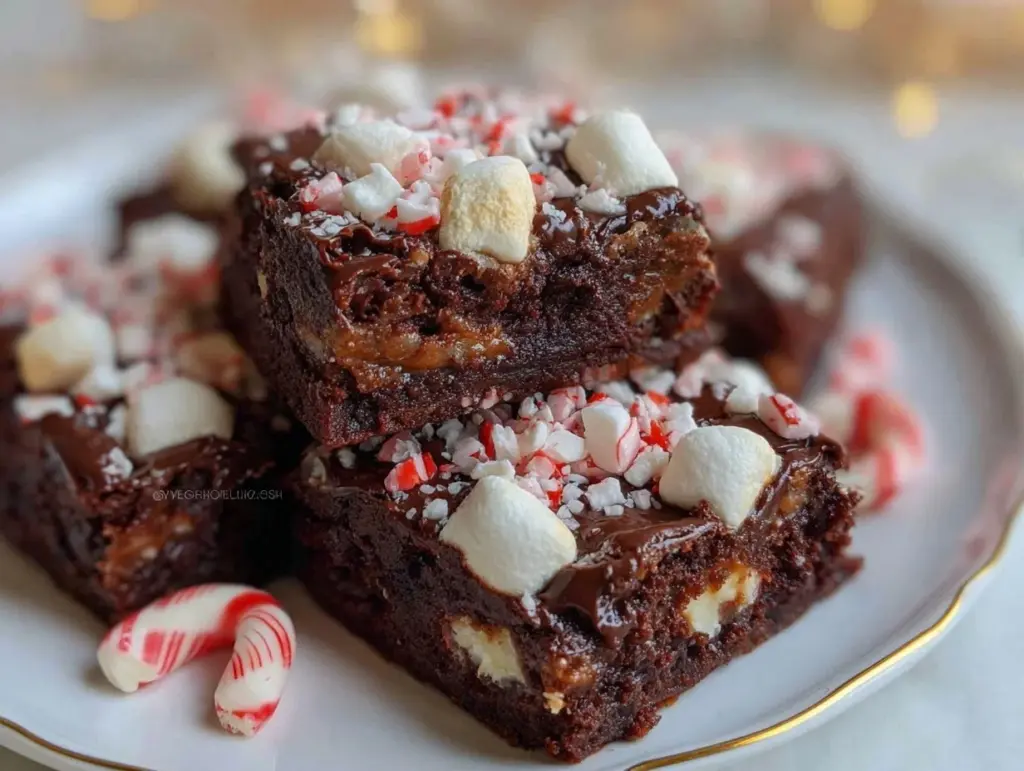
Let me tell you, the moment the scent of melted chocolate and cool peppermint fills my kitchen, it’s pure holiday magic. The aroma is like stepping into a winter wonderland—rich cocoa swirls with that unmistakable, cozy peppermint rush. The first time I pulled a pan of these Peppermint Hot Cocoa Cookie Bars from the oven, my whole house felt warmer (even though the windows were frosted over and my kids were bundled up like marshmallows). I was instantly hooked, and honestly, that first bite was the kind of moment where you pause, take a deep breath, and just smile because you know you’re onto something truly special.
Years ago, when I was knee-high to a grasshopper, hot cocoa was the ultimate comfort—especially when my grandma added a peppermint stick and let us swirl it until our mugs were creamy and sweet. Fast-forward to a chilly Saturday before Christmas, and there I was, trying to capture that same nostalgia in a cookie bar for our annual holiday bake sale. You know what? These bars deliver that pure, nostalgic comfort—dangerously easy to whip up, and so good folks start “sampling” them before you even finish slicing.
My family couldn’t stop sneaking them off the cooling rack (and I can’t really blame them). These Peppermint Hot Cocoa Cookie Bars became a staple for gifting, potlucks, and cozy movie nights. Truthfully, I wish I’d stumbled upon this recipe years ago—it’s the kind that brightens up your Pinterest cookie board and brings out the kid in everyone. I tested these bars more times than I care to admit (in the name of research, of course), and every single batch felt like a warm hug. You’re going to want to bookmark this one—it’s the perfect sweet treat for your holiday table, and it might just become your new tradition.
Why You’ll Love This Recipe
If you’re searching for a knockout holiday treat, let me share why these Peppermint Hot Cocoa Cookie Bars are the answer. Over years of baking, I’ve learned that the best recipes aren’t just tasty—they’re reliable, fuss-free, and a little bit magical. Here’s why these bars stand out in my kitchen and at every gathering:
- Quick & Easy: These come together in under 30 minutes, perfect for last-minute holiday cravings or busy weeknights when you need something festive fast.
- Simple Ingredients: Everything you need is likely already in your pantry—no fancy grocery runs required. Just cocoa, chocolate chips, peppermint, and pantry staples.
- Perfect for the Holidays: Whether it’s a Christmas party, cookie exchange, or cozy snow day, these bars fit the bill. They look adorable on dessert platters and taste even better straight from the pan.
- Crowd-Pleaser: Kids love the gooey chocolate and crunchy peppermint bits, and adults always ask for the recipe. Honestly, I’ve never had leftovers.
- Unbelievably Delicious: The texture is a dreamy cross between a fudgy brownie and a chewy cookie, with just the right hit of peppermint for sparkle. It’s comfort food with a holiday twist.
What makes this recipe different? For starters, I blend cocoa powder with melted chocolate for a deeper flavor (trust me, it’s worth the extra step). The touch of peppermint extract is just enough—never overpowering, always refreshing. And that sprinkle of crushed candy canes on top? It’s a game-changer for crunch and color.
If you’ve ever wanted the flavor of peppermint hot cocoa but in a bar you can hold (and maybe sneak from the fridge late at night), this is it. I’ve tested and tweaked this recipe to make sure it’s as easy as possible without losing the soul-soothing satisfaction that only chocolate and peppermint can deliver. Whether you’re impressing guests or making a simple moment memorable, these bars are the kind that make you close your eyes after the first bite. Warm, festive, and totally irresistible.
What Ingredients You Will Need
This recipe uses simple, wholesome ingredients to deliver bold flavor and satisfying texture without the fuss. Most of these are pantry staples, and a few festive extras bring the holiday magic. Here’s what you’ll need for your Peppermint Hot Cocoa Cookie Bars:
- For the Cookie Bar Base:
- 1 cup (226g) unsalted butter, softened (adds richness and chew)
- 1 1/4 cups (250g) granulated sugar (for sweetness and a tender crumb)
- 2 large eggs, room temperature (helps bind everything together)
- 2 teaspoons pure vanilla extract (for depth of flavor)
- 1/2 teaspoon peppermint extract (use more for a bolder mint flavor)
- Dry Ingredients:
- 2 cups (250g) all-purpose flour (I recommend King Arthur for reliable results)
- 1/2 cup (50g) unsweetened cocoa powder (Dutch process for richer taste, if possible)
- 1 teaspoon baking powder
- 1/2 teaspoon salt (balances the sweetness)
- Mix-Ins & Toppings:
- 1 cup (170g) semi-sweet chocolate chips (Ghirardelli is my go-to)
- 1/2 cup (100g) mini marshmallows (for that classic hot cocoa vibe)
- 1/3 cup (50g) crushed peppermint candies or candy canes (adds crunch and sparkle)
- Optional: 1/2 cup (80g) white chocolate chips (for a creamy twist)
Ingredient Tips:
- If you need gluten-free bars, swap in your favorite 1:1 gluten-free flour blend.
- For dairy-free, use vegan butter and dairy-free chocolate chips. I’ve tested with Earth Balance and Enjoy Life chips, and they work well.
- No peppermint extract? You can use a few drops of peppermint oil, but go easy—it’s strong stuff!
- Want extra fudgy bars? Add 1 tablespoon of brewed coffee to the batter (it boosts the chocolate flavor without tasting like coffee).
- Seasonal swap: In summer, try crushed chocolate mint cookies instead of candy canes for a fun twist.
All the ingredients come together for a festive treat that’s easy to customize. I love using what’s on hand—sometimes that means switching up the chocolates or adding extra marshmallows. These bars forgive a little improvising!
Equipment Needed
You really don’t need much to whip up these Peppermint Hot Cocoa Cookie Bars, which makes them perfect for busy bakers and last-minute holiday plans. Here’s what I reach for every time:
- 9×13-inch (23x33cm) baking pan (glass or metal both work—I prefer metal for even browning)
- Large mixing bowl and medium mixing bowl
- Electric mixer or sturdy whisk (a hand mixer saves time, but you can mix by hand in a pinch)
- Rubber spatula (for scraping down the bowl and smoothing the batter)
- Measuring cups and spoons (accuracy counts, especially with cocoa powder)
- Small offset spatula (optional, but handy for spreading batter evenly)
- Parchment paper or nonstick spray (for easy clean-up and no sticking)
If you don’t have a 9×13-inch pan, you can use two 8×8-inch pans—just watch the baking time, as they’ll cook a bit faster. I’ve made these with budget-friendly tools from my local grocery store, and they turn out great. For specialty equipment, I always hand-wash my spatulas to keep them in good shape (learned that the hard way after melting one in the dishwasher). No need for expensive gadgets—just reliable basics.
Preparation Method
Ready to make a batch of Peppermint Hot Cocoa Cookie Bars? Here’s my step-by-step method, with plenty of tips and troubleshooting notes to guarantee success:
- Prep the Pan: Line your 9×13-inch (23x33cm) pan with parchment paper, leaving some overhang for easy lifting. Spray lightly with nonstick spray. (If you skip parchment, make sure to grease the pan well.)
- Preheat the Oven: Set your oven to 350°F (175°C). Let it warm up while you mix the batter—temperature matters for even baking!
- Cream Butter and Sugar: In a large mixing bowl, beat 1 cup (226g) softened butter with 1 1/4 cups (250g) granulated sugar until light and fluffy (about 2-3 minutes with a hand mixer). The mixture should look pale and creamy—if it’s grainy, keep mixing.
- Add Eggs and Extracts: Beat in 2 large eggs, one at a time, mixing well after each addition. Add 2 teaspoons vanilla extract and 1/2 teaspoon peppermint extract. Scrape down the sides as needed. (Don’t worry if the mixture looks slightly curdled—it’ll smooth out with flour.)
- Combine Dry Ingredients: In a medium bowl, whisk together 2 cups (250g) flour, 1/2 cup (50g) cocoa powder, 1 teaspoon baking powder, and 1/2 teaspoon salt. Make sure there are no lumps; cocoa tends to clump.
- Mix Batter: Gradually add dry ingredients to the wet mixture, mixing on low speed or by hand until just combined. Avoid overmixing—stop as soon as no streaks remain.
- Fold in Mix-Ins: Gently stir in 1 cup (170g) chocolate chips, 1/2 cup (100g) mini marshmallows, and 1/2 cup (80g) white chocolate chips if using. The dough will be thick and sticky. (Tip: Use a spatula to press mix-ins evenly throughout.)
- Spread Batter: Transfer the batter to the prepared pan. Use a spatula to spread evenly into corners. Sprinkle 1/3 cup (50g) crushed peppermint candies on top, pressing lightly so they stick.
- Bake: Place pan in the center of the oven. Bake for 22-28 minutes, or until the edges are set and a toothpick inserted in the center comes out mostly clean (a few moist crumbs are okay). (Watch closely after 20 minutes—overbaking = dry bars.)
- Cool: Remove from oven and let cool in the pan for 15 minutes. Then lift bars out using parchment overhang and cool completely on a wire rack. (If you cut too soon, they’ll crumble—patience pays off.)
- Slice and Serve: Once cool, slice into 24 squares. For clean edges, use a sharp knife wiped between cuts. (And don’t be surprised if the peppermint bits make the knife sticky—just wipe as needed.)
Troubleshooting:
- Bar too dry? Double-check oven temp and don’t overbake.
- Too gooey? Let them cool longer—they firm up as they sit.
- Marshmallows melt into pockets—that’s normal and delicious!
Personal tip: I always make these a day ahead for parties. The flavors settle overnight, and the bars slice easier. If you want smaller pieces for a cookie tray, cut each square in half. These bars are forgiving, fuss-free, and perfect for holiday multitasking!
Cooking Tips & Techniques
Over the years, I’ve picked up a few tricks for getting Peppermint Hot Cocoa Cookie Bars just right. Let’s face it, not every batch comes out perfect—sometimes you learn the hard way. Here’s what I’ve learned:
- Room Temperature Ingredients: Butter and eggs blend smoother when not cold. I set them out an hour before baking (or cheat with a bowl of warm water for eggs).
- Don’t Overmix: Once you add flour, mix just until combined. Overmixing makes bars tough instead of tender.
- Even Spreading: The batter is thick—don’t worry, just use a spatula to coax it into the corners. Uneven batter means uneven baking.
- Watch the Bake Time: Ovens vary. Start checking at 22 minutes. If the edges pull away and the center is barely set, you’re golden.
- Marshmallow Magic: Marshmallows melt into gooey pockets—don’t worry, that’s the hot cocoa magic. If you prefer less goo, sprinkle marshmallows on top in the last 5 minutes.
- Peppermint Crunch: Crush candy canes in a zip-top bag with a rolling pin. Big chunks are pretty, but too many can make slicing tough. I aim for a mix of dust and small bits.
- Personal Failures: Once, I forgot the salt. The bars tasted flat—don’t skip it! Another time, I used too much peppermint extract. Whoa, toothpaste vibes! Measure carefully.
Timing is everything. I usually prep the pan and mix dry ingredients while the butter softens. Multitasking keeps things moving (and you’re less likely to forget steps). Consistency comes from measuring carefully and using parchment paper for easy lifting. Every batch is a little different—embrace the quirks. These bars are meant to bring joy, not stress!
Variations & Adaptations
One of the best things about these Peppermint Hot Cocoa Cookie Bars is how adaptable they are. Here are a few favorite twists I’ve tried over the years (and some tips for making them work for everyone):
- Gluten-Free: Swap in a 1:1 gluten-free baking flour. I’ve used Bob’s Red Mill with great results—no one could tell the difference.
- Vegan/Dairy-Free: Use vegan butter (like Earth Balance), flax eggs (1 tablespoon flaxseed meal + 2.5 tablespoons water per egg), and dairy-free chocolate chips. Marshmallows should be gelatin-free (Dandies are my pick).
- Extra Chocolate: Stir in 1/2 cup (80g) chopped dark chocolate for richer flavor. Or drizzle melted chocolate over cooled bars for a bakery-style finish.
- Seasonal Flavors: Try orange extract instead of peppermint for a “chocolate orange” vibe. In spring, swap peppermint for lemon zest and white chocolate chips.
- Nutty Crunch: Add 1/2 cup (60g) chopped toasted walnuts or pecans for texture and depth.
- Allergen Substitutions: If nut-free is needed, skip nuts and double-check marshmallow ingredients. Soy-free butter and chips are widely available now.
My favorite personal variation? Swapping half the cocoa powder for malted milk powder—kids go wild for the “milkshake” flavor. Sometimes, I’ll sprinkle festive sprinkles on top for extra color. Don’t be afraid to play around with mix-ins and extracts to suit your taste (or what’s left in your pantry). These bars forgive a little improvising!
Serving & Storage Suggestions
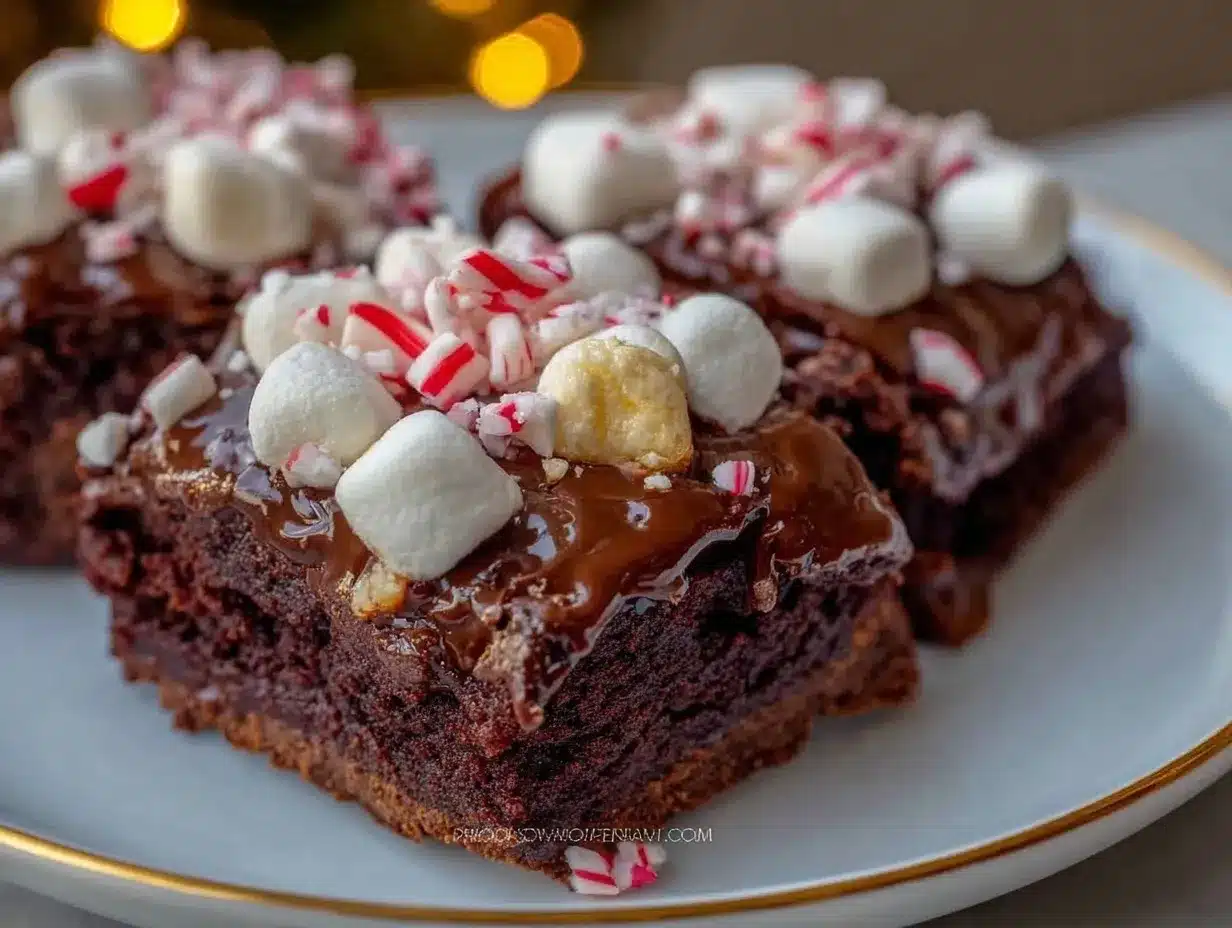
These Peppermint Hot Cocoa Cookie Bars are best served slightly warm or at room temperature. I love presenting them on a holiday platter, dusted with a little extra crushed peppermint for sparkle. For Pinterest-worthy presentation, you can drizzle with melted chocolate and sprinkle with mini marshmallows—kids adore the gooey topping!
Pair these bars with mugs of hot cocoa, coffee, or even a festive peppermint mocha. They’re a hit at cookie exchanges, holiday brunches, and as a sweet treat for family movie night. If you’re serving them at a party, slice into small squares for bite-sized perfection.
Storage:
- Store bars in an airtight container at room temperature for up to 4 days. They stay soft and chewy!
- For longer storage, freeze bars (separated by parchment) in a zip-top bag for up to 2 months. Thaw at room temperature.
- Reheat individual bars in the microwave for 10-15 seconds for that just-baked gooeyness.
The flavors deepen as they sit overnight—if you can wait that long. Honestly, these bars rarely last past day two in my house. They’re perfect for gifting, too—just wrap in cellophane and tie with a ribbon for instant holiday cheer!
Nutritional Information & Benefits
Here’s a quick look at the estimated nutrition per bar (based on 24 servings):
- Calories: 185
- Fat: 9g
- Carbohydrates: 25g
- Protein: 2g
- Sugar: 18g
The cocoa powder brings antioxidants, and peppermint adds a refreshing twist that can help settle a holiday-stressed tummy. Using semi-sweet chocolate chips instead of milk chocolate keeps the sugar in check, and you can adjust mix-ins to suit your dietary needs. These bars can be made gluten-free or dairy-free with simple swaps (see above).
Potential allergens include wheat, eggs, dairy, and soy (depending on chocolate chips and marshmallows). Always check labels if serving to friends with sensitivities. From a wellness perspective, I see these bars as a festive treat—perfect for sharing joy and sweet comfort during the hectic holiday season.
Conclusion
If you want a holiday treat that makes your kitchen smell like peppermint and chocolate heaven, these Peppermint Hot Cocoa Cookie Bars are the way to go. They’re easy, festive, and absolutely delicious—plus, you can tweak them to fit your family’s favorites or dietary needs. Honestly, I love how they bring a little nostalgia and a lot of smiles every time I bake a batch.
Don’t be afraid to play with the recipe—add extra marshmallows, swap chocolates, or toss in nuts if you like. That’s the beauty of homemade treats. I hope you enjoy these bars as much as my family does (and maybe make them your new holiday classic). If you give them a try, let me know in the comments what twists you added or who you shared them with. Share this recipe with friends, pin it for later, and happy holiday baking!
Wishing you warmth, sweetness, and plenty of peppermint joy this season!
FAQs
Can I make these Peppermint Hot Cocoa Cookie Bars ahead of time?
Absolutely! The bars actually taste better the next day as the flavors meld. Store them in an airtight container until you’re ready to serve.
How do I crush candy canes without making a mess?
Place candy canes in a zip-top bag and use a rolling pin to smash them. Some peppermint dust is normal, and it looks pretty sprinkled on top!
Can I use milk chocolate instead of semi-sweet?
Sure! Milk chocolate makes the bars sweeter and creamier. If you prefer a richer flavor, stick with semi-sweet or dark chocolate chips.
What’s the best way to cut the bars cleanly?
Let the bars cool completely, then use a sharp knife wiped clean between cuts. If the topping sticks, just wipe the blade and keep going.
Are these bars kid-friendly for school parties?
Yes, kids love them! Just check for nut or peppermint candy allergies before serving at school events.
Pin This Recipe!
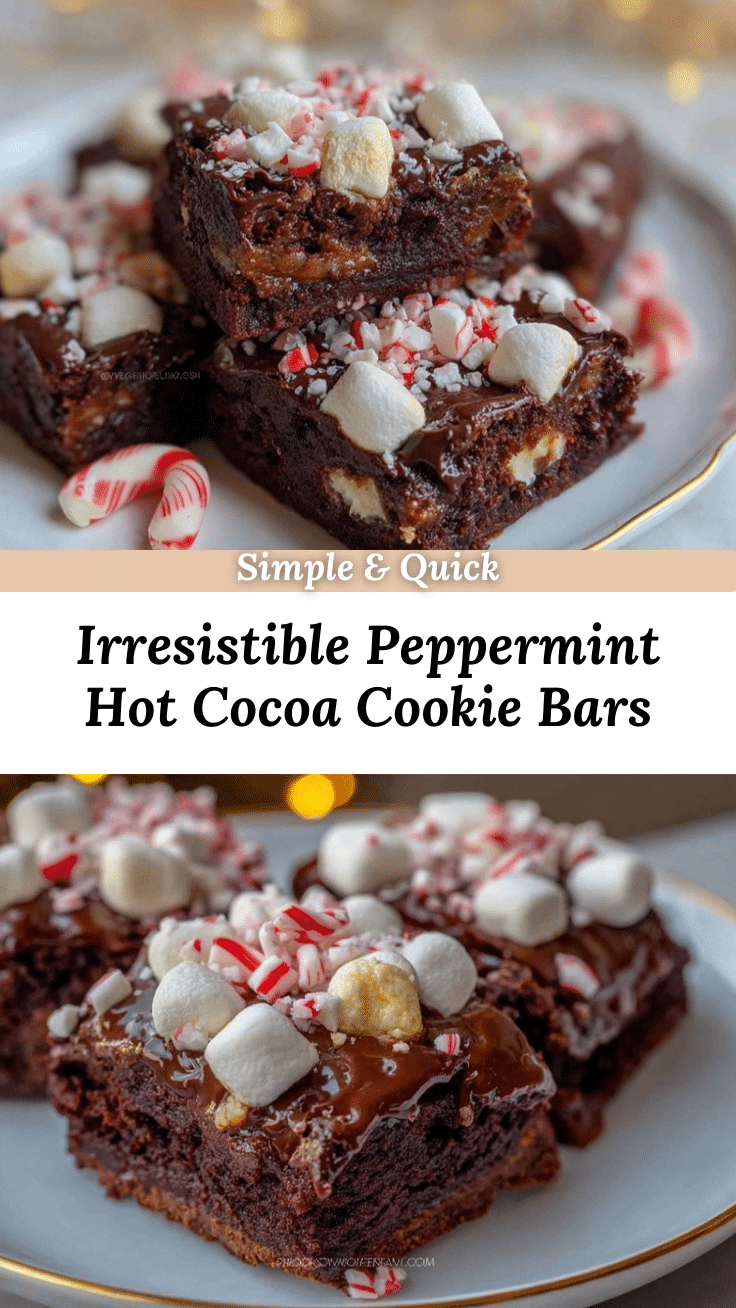
Peppermint Hot Cocoa Cookie Bars
These Peppermint Hot Cocoa Cookie Bars combine the nostalgic flavors of hot cocoa and peppermint in a chewy, fudgy cookie bar perfect for the holidays. Quick to make and crowd-pleasing, they’re ideal for gifting, parties, or cozy nights in.
- Prep Time: 15 minutes
- Cook Time: 22-28 minutes
- Total Time: 40-45 minutes
- Yield: 24 bars 1x
- Category: Dessert
- Cuisine: American
Ingredients
- 1 cup (226g) unsalted butter, softened
- 1 1/4 cups (250g) granulated sugar
- 2 large eggs, room temperature
- 2 teaspoons pure vanilla extract
- 1/2 teaspoon peppermint extract
- 2 cups (250g) all-purpose flour
- 1/2 cup (50g) unsweetened cocoa powder (Dutch process preferred)
- 1 teaspoon baking powder
- 1/2 teaspoon salt
- 1 cup (170g) semi-sweet chocolate chips
- 1/2 cup (100g) mini marshmallows
- 1/3 cup (50g) crushed peppermint candies or candy canes
- Optional: 1/2 cup (80g) white chocolate chips
Instructions
- Line a 9×13-inch baking pan with parchment paper, leaving some overhang for easy lifting. Spray lightly with nonstick spray.
- Preheat oven to 350°F (175°C).
- In a large mixing bowl, beat softened butter with granulated sugar until light and fluffy (about 2-3 minutes).
- Beat in eggs, one at a time, mixing well after each. Add vanilla and peppermint extracts. Scrape down sides as needed.
- In a medium bowl, whisk together flour, cocoa powder, baking powder, and salt until no lumps remain.
- Gradually add dry ingredients to wet mixture, mixing on low speed or by hand until just combined. Do not overmix.
- Gently fold in chocolate chips, mini marshmallows, and white chocolate chips if using.
- Spread batter evenly into prepared pan. Sprinkle crushed peppermint candies on top, pressing lightly.
- Bake for 22-28 minutes, or until edges are set and a toothpick inserted in the center comes out mostly clean.
- Cool in pan for 15 minutes, then lift bars out using parchment and cool completely on a wire rack.
- Slice into 24 squares with a sharp knife wiped clean between cuts. Serve and enjoy!
Notes
For gluten-free bars, use a 1:1 gluten-free flour blend. For dairy-free, substitute vegan butter and dairy-free chocolate chips. Marshmallows melt into gooey pockets—this is normal and delicious! Bars slice best when fully cooled. Store in an airtight container for up to 4 days or freeze for up to 2 months. For extra chocolate, drizzle melted chocolate over cooled bars.
Nutrition
- Serving Size: 1 bar (1/24th of rec
- Calories: 185
- Sugar: 18
- Sodium: 90
- Fat: 9
- Saturated Fat: 5
- Carbohydrates: 25
- Fiber: 2
- Protein: 2
Keywords: peppermint, hot cocoa, cookie bars, holiday dessert, Christmas, easy baking, chocolate, marshmallow, festive treats


