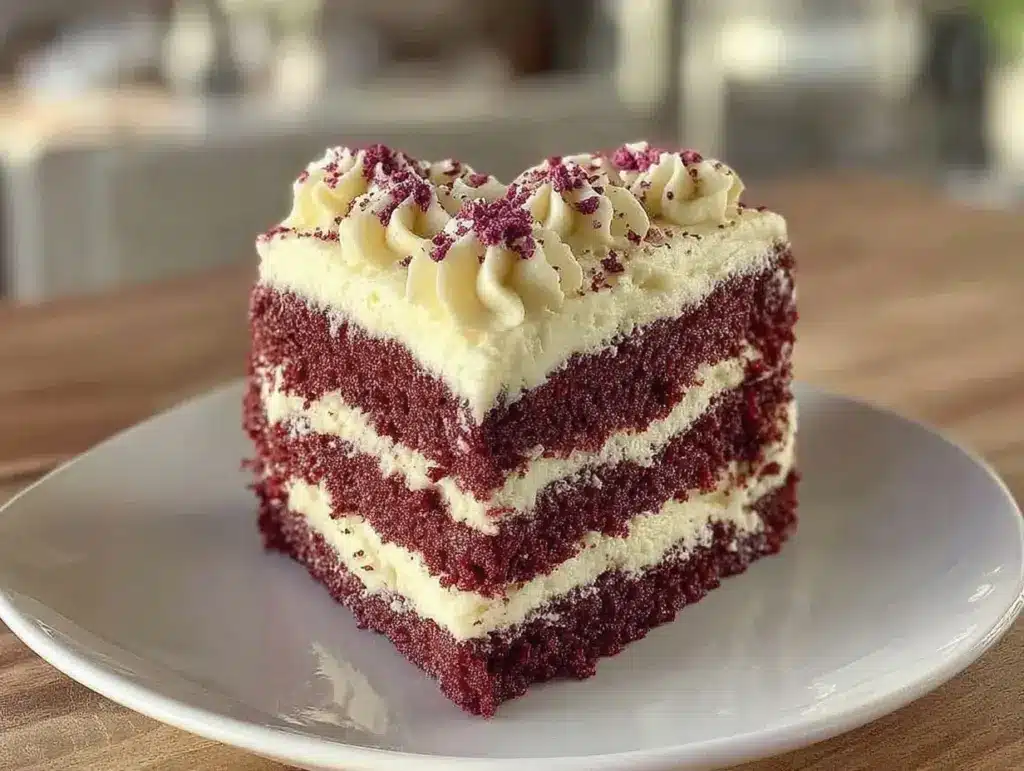
“I wasn’t expecting much when my friend handed me that heart-shaped cake pan last Valentine’s Day,” I confessed to myself as I pulled out the ingredients from my cluttered pantry. The plan was simple: a quick bake to impress a last-minute guest. But as the oven timer dinged and the aroma of cocoa and vanilla filled the kitchen, I realized this was no ordinary cake. This perfect red velvet heart-shaped layer cake with cream cheese frosting turned out to be one of those rare kitchen successes that felt like a warm hug on a chilly evening.
Let me tell you, the journey wasn’t without its hiccups. I almost forgot the buttermilk and had to improvise with a dash of lemon juice and milk. The batter was a bit thicker than I expected, and the red color seemed subtle at first. But when I sliced into the layers, that bright, velvety red peeked through, making the whole thing look like a bakery masterpiece. Maybe you’ve been there—rushing, improvising, and somehow ending up with something delightful. Honestly, this recipe stayed with me because it’s both a showstopper and surprisingly doable.
Whether you’re baking for a loved one, a special occasion, or just because you crave a slice of something sweet and comforting, this heart-shaped red velvet cake brings all the right flavors and textures. The cream cheese frosting? Oh, that’s the magic touch—smooth, tangy, and sweet enough to balance the rich cake layers. So, if you’re ready for a baking adventure that feels personal and a little bit special, this recipe might just become your new favorite.
Why You’ll Love This Recipe
After testing countless versions and tweaking measurements, I can say this red velvet heart-shaped layer cake recipe hits all the right notes. Here’s why it stands out:
- Quick & Easy: From start to finish, it takes under 1.5 hours, making it a great choice for last-minute celebrations or sweet cravings.
- Simple Ingredients: No need to hunt for fancy items; most are everyday pantry staples like cocoa powder, buttermilk, and vinegar.
- Perfect for Romantic Occasions: Its heart shape and rich colors make it a natural for Valentine’s Day, anniversaries, or just showing someone you care.
- Crowd-Pleaser: Friends and family have consistently asked for seconds, which says a lot given how picky some of them can be!
- Unbelievably Delicious: The cake has a moist, tender crumb with a hint of cocoa that pairs beautifully with the tangy cream cheese frosting.
What really makes this recipe different? The secret is in balancing the acidity with just the right amount of buttermilk and vinegar, giving the cake that signature tang and moistness. Plus, the frosting is whipped to airy perfection—not too sweet, just creamy—thanks to a small splash of vanilla and a pinch of salt. So this isn’t just another red velvet cake; it’s the one that’ll have you closing your eyes after the first bite and reaching for more.
What Ingredients You Will Need
This recipe relies on a handful of simple, wholesome ingredients to create that classic red velvet flavor and texture. Most of these are pantry staples, but a couple are key to getting the perfect crumb and color.
- For the Cake Batter:
- All-purpose flour – 2 ½ cups (315g), sifted (for a light crumb)
- Granulated sugar – 1 ½ cups (300g)
- Cocoa powder – 2 tablespoons (unsweetened, for that subtle chocolate note)
- Baking soda – 1 teaspoon
- Salt – ½ teaspoon
- Buttermilk – 1 cup (240ml), room temperature (or make your own with milk + lemon juice)
- Vegetable oil – 1 cup (240ml) (I prefer neutral oils like canola for moistness)
- Large eggs – 2, room temperature
- White vinegar – 1 tablespoon (helps react with baking soda for a tender crumb)
- Vanilla extract – 2 teaspoons (pure extract makes a difference)
- Red food coloring – 2 tablespoons (liquid or gel; I like gel for vibrant color without extra liquid)
- For the Cream Cheese Frosting:
- Cream cheese – 8 oz (225g), softened (I recommend Philadelphia brand for smooth texture)
- Unsalted butter – ½ cup (115g), softened (adds richness)
- Powdered sugar – 4 cups (480g), sifted (for smooth, lump-free frosting)
- Vanilla extract – 1 teaspoon
- Pinch of salt (balances sweetness)
Ingredient Tips: If you’re out of buttermilk, just stir 1 tablespoon of white vinegar or lemon juice into a cup of milk and let it sit for 5 minutes. For a dairy-free frosting, swap cream cheese and butter for vegan alternatives and use coconut sugar instead of powdered sugar. In summer, a handful of fresh raspberries between layers adds a delicious tart contrast.
Equipment Needed
To make this perfect red velvet heart-shaped layer cake, you’ll need some basic kitchen tools, plus a couple of special items that make the process smoother.
- Heart-shaped cake pans (two 8-inch/20 cm pans recommended) – If you don’t have heart-shaped pans, round pans work fine; just slice the layers into a heart shape afterward.
- Mixing bowls – One large and one medium-sized
- Electric mixer or stand mixer – Helpful for whipping the frosting and batter evenly; a hand whisk works but requires more elbow grease.
- Measuring cups and spoons – Accurate measurements matter here for texture and flavor balance.
- Rubber spatula – For folding and scraping down the bowl
- Cooling racks – To let the cakes cool completely before frosting
- Offset spatula or butter knife – For spreading the cream cheese frosting smoothly
- Wire whisk – Useful for mixing dry ingredients and smoothing frosting
- Toothpick or cake tester – To check doneness
Pro Tip: If you don’t own heart-shaped pans, you can create a makeshift heart by cutting a round cake in half and arranging the halves into a heart shape on a platter, then frost to seal. Also, if you’re on a budget, silicone pans are a great alternative – they’re non-stick and easier to clean. Just remember to lower the oven temperature by about 25°F (15°C) as silicone pans conduct heat differently.
Preparation Method
- Preheat the oven and prepare pans: Set your oven to 350°F (175°C). Grease the two 8-inch heart-shaped pans lightly with butter or non-stick spray, then dust with flour and tap out the excess. This helps the cakes release easily.
- Mix dry ingredients: In a large bowl, sift together 2 ½ cups (315g) all-purpose flour, 2 tablespoons cocoa powder, 1 teaspoon baking soda, and ½ teaspoon salt. Whisk to combine evenly. Set aside.
- Combine wet ingredients: In a separate bowl, beat 1 ½ cups (300g) granulated sugar with 1 cup (240ml) vegetable oil until smooth. Add 2 large eggs one at a time, beating well after each addition. Stir in 1 teaspoon vanilla extract, 1 tablespoon white vinegar, and 2 tablespoons red food coloring until the mixture is uniform in color.
- Add buttermilk: Slowly mix in 1 cup (240ml) room temperature buttermilk to the wet ingredients. The batter should be smooth and slightly thick but pourable. If it seems too thick, a splash of extra buttermilk can help.
- Combine wet and dry: Gradually add the dry ingredients to the wet mixture, folding gently with a rubber spatula. Avoid overmixing; stir just until no dry streaks remain. Overmixing can make the cake dense.
- Pour batter into pans: Divide the batter evenly between the two prepared pans. Use a spatula to smooth the tops. Tap the pans gently on the counter to release any air bubbles.
- Bake: Place pans in the oven and bake for 28-32 minutes. Check doneness by inserting a toothpick in the center; it should come out clean or with a few moist crumbs attached. Avoid opening the oven door frequently—it can cause the cakes to sink.
- Cool completely: Let the cakes cool in the pans for 15 minutes, then turn them out onto wire racks. Cool fully before frosting to prevent the cream cheese frosting from melting.
- Make the cream cheese frosting: Beat 8 oz (225g) softened cream cheese and ½ cup (115g) softened unsalted butter together until smooth and creamy, about 3-4 minutes. Gradually add 4 cups (480g) powdered sugar, beating on low speed to avoid a sugar cloud, then increase speed until fluffy. Add 1 teaspoon vanilla extract and a pinch of salt; mix until combined.
- Assemble the cake: Place one cake layer on your serving plate. Spread a generous layer of frosting over the top. Carefully place the second layer on top, aligning the heart shapes. Use the remaining frosting to cover the top and sides of the cake. For a smooth finish, dip your spatula in warm water, shake off excess, and gently glide over the frosting.
- Chill before serving: Refrigerate the cake for at least 30 minutes to let the frosting set. This also helps the flavors meld beautifully.
Tip: If frosting seems too soft, chill it for 15 minutes before spreading. Also, keep a damp paper towel handy to wipe any spills—trust me, frosting can get messy!
Cooking Tips & Techniques
Getting this red velvet cake just right took some trial and error, so here are some tips that I’ve picked up along the way:
- Measuring flour: Spoon and level your flour instead of scooping directly from the bag. Too much flour can dry out the cake.
- Room temperature ingredients: Eggs, buttermilk, and cream cheese should be at room temp for smooth mixing and even baking.
- Food coloring: Gel food coloring works better than liquid for vibrant color without thinning the batter.
- Don’t overmix: Once wet and dry are combined, mix just enough to incorporate. Overmixing causes toughness.
- Use fresh baking soda: This recipe relies on the reaction between baking soda and vinegar for lift; stale soda means flat cake.
- Frosting texture: Beat cream cheese and butter thoroughly for a creamy base. Add powdered sugar gradually to avoid a gritty texture.
- Chilling the cake: A chilled cake slices cleaner and frosting holds its shape better.
- Multitasking: While the cakes bake, prepare the frosting to save time and keep momentum.
- Test with toothpick: Insert near the center to avoid false positives near edges.
Honestly, I learned the hard way how much patience matters with cream cheese frosting. Trying to frost warm cake? Disaster. Wait it out, and the results will reward you.
Variations & Adaptations
This red velvet cake is versatile, and you can tweak it in several ways to suit your tastes or dietary needs:
- Gluten-Free Version: Use a 1:1 gluten-free baking flour blend instead of all-purpose flour. The texture is slightly different but still delicious.
- Vegan Adaptation: Swap eggs for flax eggs (2 tablespoons flaxseed meal + 6 tablespoons water), use plant-based buttermilk, vegan butter, and vegan cream cheese.
- Chocolate Twist: Add ½ cup (90g) mini chocolate chips between layers or swirl some melted dark chocolate into the batter for an extra chocolate punch.
- Berry Filling: Spread a thin layer of raspberry jam or fresh berry compote between cake layers for tangy contrast.
- Spiced Red Velvet: Add ½ teaspoon cinnamon and a pinch of nutmeg to the dry ingredients for a warm, cozy flavor.
My favorite personal twist? Once, I swapped half the vegetable oil for melted coconut oil and added a teaspoon of orange zest to the frosting. It was unexpected but delightful—especially for a springtime celebration.
Serving & Storage Suggestions
This cake is best served at room temperature so the cream cheese frosting is soft and luscious. If you’ve refrigerated it, let it sit out for about 30 minutes before slicing. Presentation-wise, a few fresh strawberries or edible flowers on top add a charming touch.
For a special touch, serve with a glass of cold milk, a cup of coffee, or even sparkling rosé for grown-up celebrations. The tangy frosting and subtle cocoa balance beautifully with these drinks.
Store leftovers in an airtight container in the refrigerator. The cake keeps well for up to 4 days. For longer storage, wrap tightly in plastic wrap and freeze for up to 2 months; thaw overnight in the fridge before serving.
Reheating isn’t usually necessary, but if you prefer warm cake, a quick 10-second zap in the microwave per slice does wonders without melting the frosting too much.
Flavors deepen the next day, so if you’re not in a hurry, try making this a day ahead. Trust me, the love in the kitchen tastes even better when it’s had a little time to settle.
Nutritional Information & Benefits
This red velvet cake is a treat, but it also includes some ingredients with nutritional value. Here’s an approximate breakdown per serving (based on 12 slices):
| Calories | 320 |
|---|---|
| Total Fat | 18g |
| Saturated Fat | 7g |
| Carbohydrates | 38g |
| Sugars | 28g |
| Protein | 4g |
Key ingredients like buttermilk and cream cheese provide calcium and protein. Cocoa powder contains antioxidants, while the moderate use of vegetable oil supplies healthy fats.
For those with dietary concerns, this recipe can be adjusted to be gluten-free or vegan (see variations). It does contain dairy and eggs in the classic version, so be mindful if allergies are a factor.
Personally, I see this cake as a joyful indulgence—perfect for special moments when the joy of sharing outweighs the calorie count. Moderation and savoring every bite are part of the experience!
Conclusion
So, what makes this perfect red velvet heart-shaped layer cake with cream cheese frosting worth your time? It’s that rare combination of classic flavor and approachable technique that anyone can pull off. Whether you’re baking for a loved one, a special occasion, or just treating yourself, this recipe delivers a moist, tangy, and visually stunning cake that stands out without stress.
Feel free to experiment, add your favorite twists, or keep it classic. I love this recipe because it turns a simple kitchen moment into a celebration of flavor and heart—literally! If you give it a try, I’d love to hear how it goes. Leave a comment with your variations or questions, and share the love by passing it on to fellow bakers.
Happy baking, and may your kitchen be filled with the warmth and sweetness this cake brings!
FAQs
Can I make this cake without red food coloring?
Yes, but the classic red velvet color will be less vibrant. You can try using beet juice or powder as a natural alternative, though the color may be more muted.
How do I prevent the cream cheese frosting from becoming runny?
Make sure the cream cheese and butter are softened but not warm. Beat them together thoroughly, add powdered sugar gradually, and chill the frosting if it feels too soft before applying.
Can I bake this cake in one pan and slice it into layers?
Absolutely! Use a 9×13-inch pan, bake until done, then slice horizontally into two or three layers once cooled.
What’s the best way to store leftover cake?
Wrap the cake tightly and store in the refrigerator for up to 4 days. For longer storage, freeze wrapped cake for up to 2 months.
Can I make this cake ahead of time?
Yes, you can bake the layers a day or two in advance and keep them refrigerated. Assemble and frost the cake on the day you plan to serve for best freshness.
Pin This Recipe!
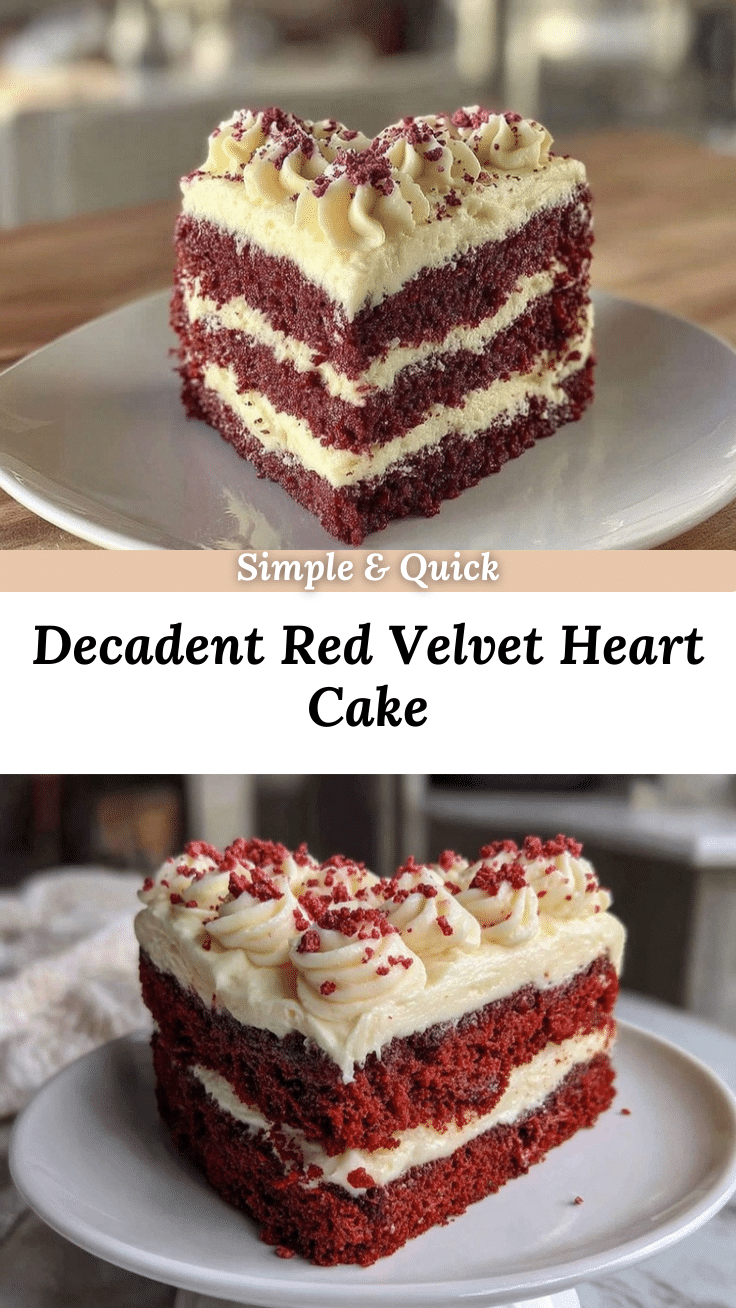
Perfect Red Velvet Heart Shaped Layer Cake Easy Homemade Recipe with Cream Cheese Frosting
A moist and tender red velvet heart-shaped layer cake with tangy cream cheese frosting, perfect for romantic occasions or special celebrations. This recipe is quick, easy, and uses simple pantry ingredients.
- Prep Time: 20 minutes
- Cook Time: 30 minutes
- Total Time: 50 minutes
- Yield: 12 servings 1x
- Category: Dessert
- Cuisine: American
Ingredients
- 2 ½ cups (315g) all-purpose flour, sifted
- 1 ½ cups (300g) granulated sugar
- 2 tablespoons unsweetened cocoa powder
- 1 teaspoon baking soda
- ½ teaspoon salt
- 1 cup (240ml) buttermilk, room temperature (or milk + 1 tbsp lemon juice/vinegar)
- 1 cup (240ml) vegetable oil (neutral oils like canola preferred)
- 2 large eggs, room temperature
- 1 tablespoon white vinegar
- 2 teaspoons vanilla extract
- 2 tablespoons red food coloring (liquid or gel)
- 8 oz (225g) cream cheese, softened
- ½ cup (115g) unsalted butter, softened
- 4 cups (480g) powdered sugar, sifted
- 1 teaspoon vanilla extract (for frosting)
- Pinch of salt (for frosting)
Instructions
- Preheat oven to 350°F (175°C). Grease two 8-inch heart-shaped pans with butter or non-stick spray, dust with flour, and tap out excess.
- In a large bowl, sift together flour, cocoa powder, baking soda, and salt. Whisk to combine and set aside.
- In a separate bowl, beat sugar and vegetable oil until smooth. Add eggs one at a time, beating well after each addition.
- Stir in vanilla extract, white vinegar, and red food coloring until uniform in color.
- Slowly mix in room temperature buttermilk until batter is smooth and slightly thick but pourable.
- Gradually fold dry ingredients into wet mixture with a rubber spatula until no dry streaks remain. Avoid overmixing.
- Divide batter evenly between prepared pans. Smooth tops and tap pans gently to release air bubbles.
- Bake for 28-32 minutes. Check doneness with a toothpick inserted in the center; it should come out clean or with a few moist crumbs.
- Cool cakes in pans for 15 minutes, then turn out onto wire racks to cool completely before frosting.
- For frosting, beat cream cheese and butter until smooth and creamy (3-4 minutes). Gradually add powdered sugar on low speed, then increase speed until fluffy.
- Mix in vanilla extract and a pinch of salt until combined.
- Place one cake layer on serving plate. Spread a generous layer of frosting on top.
- Place second layer on top, align heart shapes, and cover top and sides with remaining frosting.
- For smooth finish, dip spatula in warm water, shake off excess, and glide over frosting gently.
- Refrigerate cake for at least 30 minutes to set frosting and meld flavors before serving.
Notes
If you don’t have heart-shaped pans, use round pans and cut into heart shapes after baking. For dairy-free frosting, substitute cream cheese and butter with vegan alternatives and use coconut sugar instead of powdered sugar. Chill frosting if too soft before spreading. Use gel food coloring for vibrant color without thinning batter. Avoid overmixing to keep cake tender. Let cake come to room temperature before slicing if refrigerated.
Nutrition
- Serving Size: 1 slice (1/12 of cak
- Calories: 320
- Sugar: 28
- Fat: 18
- Saturated Fat: 7
- Carbohydrates: 38
- Protein: 4
Keywords: red velvet cake, heart shaped cake, cream cheese frosting, Valentine's Day cake, easy red velvet, homemade cake, layer cake


