Let me tell you, the smell of freshly baked vanilla cookies paired with the sweet, creamy frosting is enough to make anyone’s mouth water instantly. The first time I made these homemade Dunkaroos, I was instantly hooked—the kind of moment where you pause, take a deep breath, and just smile because you know you’re onto something truly special. You know, when I was knee-high to a grasshopper, those little snack packs were the highlight of my lunchbox, and recreating that magic in my own kitchen years ago felt like uncovering a delicious treasure.
Honestly, my family couldn’t stop sneaking these off the cooling rack (and I can’t really blame them). Let’s face it, this homemade Dunkaroos recipe is dangerously easy and offers pure, nostalgic comfort. It’s perfect for potlucks, a sweet treat for your kids, or just to brighten up your Pinterest cookie board with a bit of 90s nostalgia. After testing the recipe multiple times (in the name of research, of course), it’s become a staple for family gatherings and gifting. It feels like a warm hug in snack form, and trust me, you’re going to want to bookmark this one.
Why You’ll Love This Recipe
This homemade Dunkaroos recipe isn’t just a re-creation; it’s a little slice of childhood with a homemade twist that’s been kitchen-tested and family-approved. Here’s why it stands out:
- Quick & Easy: Comes together in under an hour, perfect for busy weeknights or last-minute snack cravings.
- Simple Ingredients: No fancy grocery trips needed; you probably already have everything in your pantry.
- Perfect for Nostalgic Snacking: Great for lunchboxes, after-school treats, or 90s-themed parties.
- Crowd-Pleaser: Always gets rave reviews from both kids and adults who remember the original.
- Unbelievably Delicious: The cookie’s tender crunch combined with the creamy frosting is next-level comfort food.
What makes this recipe different from the rest? I use a slight tweak in the cookie dough to make it softer than the original but still perfectly dunkable, plus a frosting that’s just sweet enough without being overpowering. It’s comfort food that makes you close your eyes after the first bite, a little nostalgic hug that’s healthier and fresher than the store-bought version. Whether you’re impressing guests without the stress or just craving a simple, memorable snack, this recipe hits the spot.
What Ingredients You Will Need
This recipe uses simple, wholesome ingredients to deliver bold flavor and satisfying texture without the fuss. Most are pantry staples, and substitutions are easy if needed.
- For the Cookies:
- 1 cup (2 sticks) unsalted butter, softened (adds richness)
- 1 cup granulated sugar
- 1 large egg, room temperature
- 1 teaspoon pure vanilla extract (I recommend Nielsen-Massey for best flavor)
- 2 ½ cups all-purpose flour (use almond flour for gluten-free version)
- ½ teaspoon baking powder
- ¼ teaspoon salt
- Sprinkles – about ½ cup rainbow jimmies or nonpareils (for that iconic look!)
- For the Frosting Dip:
- ½ cup unsalted butter, softened
- 1 ½ cups powdered sugar, sifted
- 1 ½ teaspoons pure vanilla extract
- 2 tablespoons heavy cream or whole milk (use dairy-free milk if needed)
- Pinch of salt
- Optional: a few drops of food coloring to brighten it up
Look for firm, high-quality butter and fresh eggs for the best texture. If it’s summer, you can swap sprinkles for mini chocolate chips for a seasonal twist. If you want to keep it vegan, use plant-based butter and milk substitutes, and swap the egg with a flax egg (1 tablespoon flaxseed meal + 3 tablespoons water).
Equipment Needed
- Mixing bowls – medium and large (glass or metal work fine)
- Electric mixer or stand mixer (hand mixer works too, but a stand mixer saves your wrists!)
- Measuring cups and spoons – precise measurements make all the difference
- Baking sheets lined with parchment paper or silicone mats (keeps cookies from sticking and ensures even baking)
- Cooling rack – important for letting cookies cool and keep their perfect texture
- Small spatula or spoon for frosting spreading
If you don’t have a mixer, a sturdy wooden spoon and some muscle can get you through, but it’ll take a bit longer. I’ve used both silicone mats and parchment paper over the years and honestly prefer parchment for easy cleanup and crisp bottoms. A good cooling rack is a kitchen MVP for any baker—don’t skip it!
Preparation Method
- Preheat your oven to 350°F (175°C). Line two baking sheets with parchment paper or silicone mats. This usually takes about 10 minutes including prep.
- Make the cookie dough: In a large bowl, cream together 1 cup softened butter and 1 cup granulated sugar until light and fluffy, about 3-4 minutes with a mixer on medium speed. This step is key for tender cookies.
- Add the egg and vanilla extract: Beat in 1 large egg and 1 teaspoon vanilla until just combined. If the mixture looks a little curdled, don’t worry—that’s normal.
- Mix dry ingredients separately: In another bowl, whisk together 2 ½ cups flour, ½ teaspoon baking powder, and ¼ teaspoon salt.
- Combine wet and dry: Gradually add the flour mixture to the wet ingredients, mixing on low speed until just combined. Avoid overmixing to keep cookies tender.
- Fold in sprinkles: Gently stir in about ½ cup rainbow sprinkles with a spatula. Don’t overdo it or the colors might bleed in the dough.
- Shape the cookies: Scoop tablespoon-sized balls of dough and place them 2 inches apart on the baking sheets. Flatten each ball gently with the bottom of a glass or your palm to about ½ inch thick.
- Bake: Place in the oven and bake for 10-12 minutes, until edges are lightly golden but centers still look soft. They’ll firm up while cooling.
- Cool: Let cookies cool on the baking sheet for 5 minutes before transferring to a cooling rack. This prevents breakage.
- Make the frosting dip: While cookies cool, beat ½ cup softened butter with 1 ½ cups powdered sugar on low speed until combined. Add 1 ½ teaspoons vanilla, 2 tablespoons cream, and a pinch of salt. Beat on medium-high for 3-4 minutes until fluffy and spreadable. Add food coloring if desired.
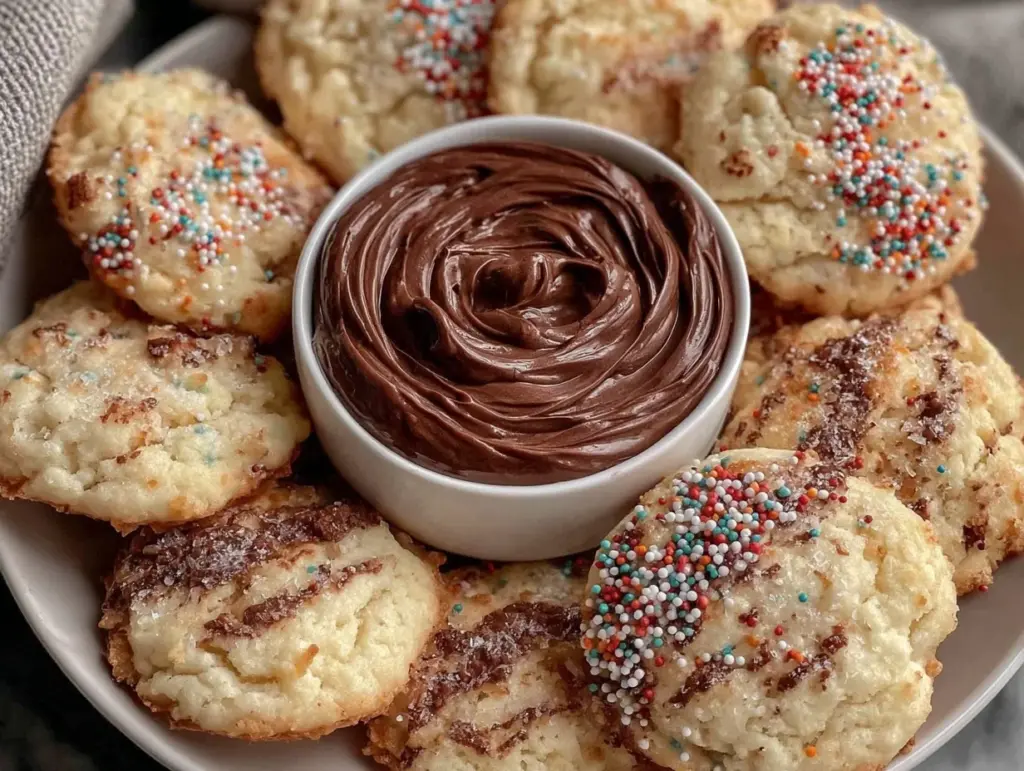
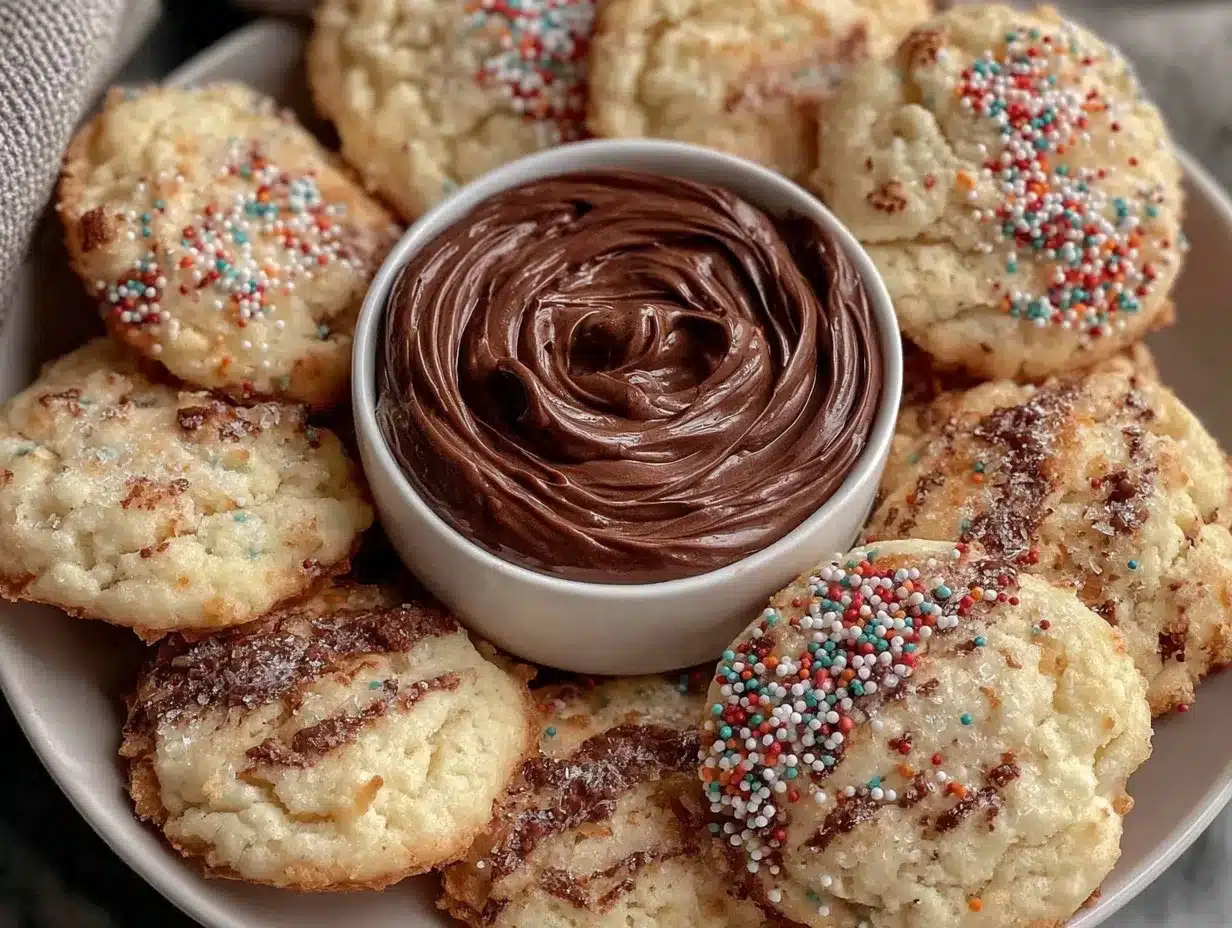
- Serve: Arrange cookies on a plate with a small bowl of frosting for dipping. It’s the nostalgic magic you remember!
Tip: If your dough feels too sticky, chill it for 15-20 minutes before shaping. This helps with handling and keeps cookies from spreading too much in the oven.
Cooking Tips & Techniques
One thing I’ve learned making this homemade Dunkaroos recipe is don’t rush the creaming step! That’s where air gets into the dough, making cookies tender and light. Also, measuring flour properly is crucial—too much and your cookies get dry, too little and they spread too thin. Use a spoon to fluff flour before scooping, then level with a knife.
When baking, pull the cookies out just when edges turn golden but centers look soft—overbaking makes them hard, and underbaking leaves a doughy mess. Cooling on the sheet first helps them set without breaking. For the frosting, beat long enough to get fluffiness but not too long or it might get runny.
Multitasking tip: While the cookies are baking, start the frosting so everything’s ready at the same time. This trick saves time and keeps your kitchen rhythm smooth. Trust me, these little details make the difference between “meh” and “wow.”
Variations & Adaptations
- Gluten-Free Version: Swap all-purpose flour with a 1:1 gluten-free baking blend. The texture is just as delightful, though cookies may be a bit more crumbly.
- Chocolate Dunkaroos: Replace ½ cup flour with unsweetened cocoa powder and add mini chocolate chips. Use chocolate sprinkles for that extra fun factor!
- Vegan Version: Use plant-based butter and milk, replace egg with a flax egg, and skip the dairy sprinkles for allergy-friendly options.
- Seasonal Twist: Swap sprinkles with crushed peppermint candies during holidays or cinnamon sugar topping in fall.
One personal favorite is adding a pinch of sea salt to the frosting—it cuts the sweetness just right and adds a grown-up twist. If you want to bake smaller cookies, just reduce baking time by a couple of minutes and watch carefully.
Serving & Storage Suggestions
Serve these homemade Dunkaroos at room temperature with the frosting dip fresh out of the fridge for a delightful contrast. They pair wonderfully with a cold glass of milk, hot chocolate, or even a fruity iced tea. These little cookies also make a great party platter centerpiece for kids or 90s-themed gatherings.
Store leftover cookies in an airtight container at room temperature for up to 3 days. The frosting dip keeps best in the fridge for up to a week—bring it to room temperature before serving for easy dipping. You can also freeze baked cookies for up to 2 months; just thaw fully before serving. Over time, cookies do soften a bit, but honestly, they still taste amazing and perfect for dunking.
Nutritional Information & Benefits
One serving (about 3 cookies with frosting) contains roughly 250 calories, 12 grams fat, 30 grams carbs, and 2 grams protein. While this treat is definitely a sweet indulgence, using real butter and fresh ingredients means no artificial preservatives or fillers.
The vanilla in the frosting offers a comforting aroma that can boost mood, and sprinkles bring the fun factor that encourages mindful eating. For those with dietary needs, the recipe is easy to adapt to gluten-free or vegan diets. Just keep in mind the allergens: dairy, eggs, and wheat. Moderation is key, but honestly, this recipe makes treating yourself feel like a wellness moment for the soul.
Conclusion
This homemade Dunkaroos recipe is worth every minute you spend making it. It’s a nostalgic treat that brings a smile and cozy memories to any snack time. Customize it with your favorite sprinkles or swap in a different frosting flavor to make it your own. Honestly, I love how it brings my childhood and my kitchen together in the best way.
Try it out, share your thoughts or creative twists in the comments below, and don’t forget to share with fellow 90s kids who’d appreciate a homemade throwback. You’ve got this, and trust me, these Dunkaroos will become your new go-to snack. Happy dipping!
FAQs About Homemade Dunkaroos
What makes homemade Dunkaroos better than store-bought?
Homemade Dunkaroos use fresh ingredients and customizable frosting, giving you better texture and flavor without preservatives or artificial ingredients.
Can I make the cookies ahead of time?
Yes! You can bake the cookies a day or two ahead and store them in an airtight container. Just whip up the frosting fresh or store it separately in the fridge.
How do I prevent my cookies from spreading too much?
Chill the dough for 15-20 minutes before baking and avoid overmixing the dough. Also, flatten the dough balls gently for even baking.
Can I use different sprinkles for the cookies?
Absolutely! Use any sprinkles you like, but avoid large or chunky ones that might melt or alter the texture.
Is this recipe kid-friendly for baking activities?
Definitely! This recipe is simple enough for kids to help with measuring, mixing, and decorating the cookies, making it a fun family project.
Pin This Recipe!
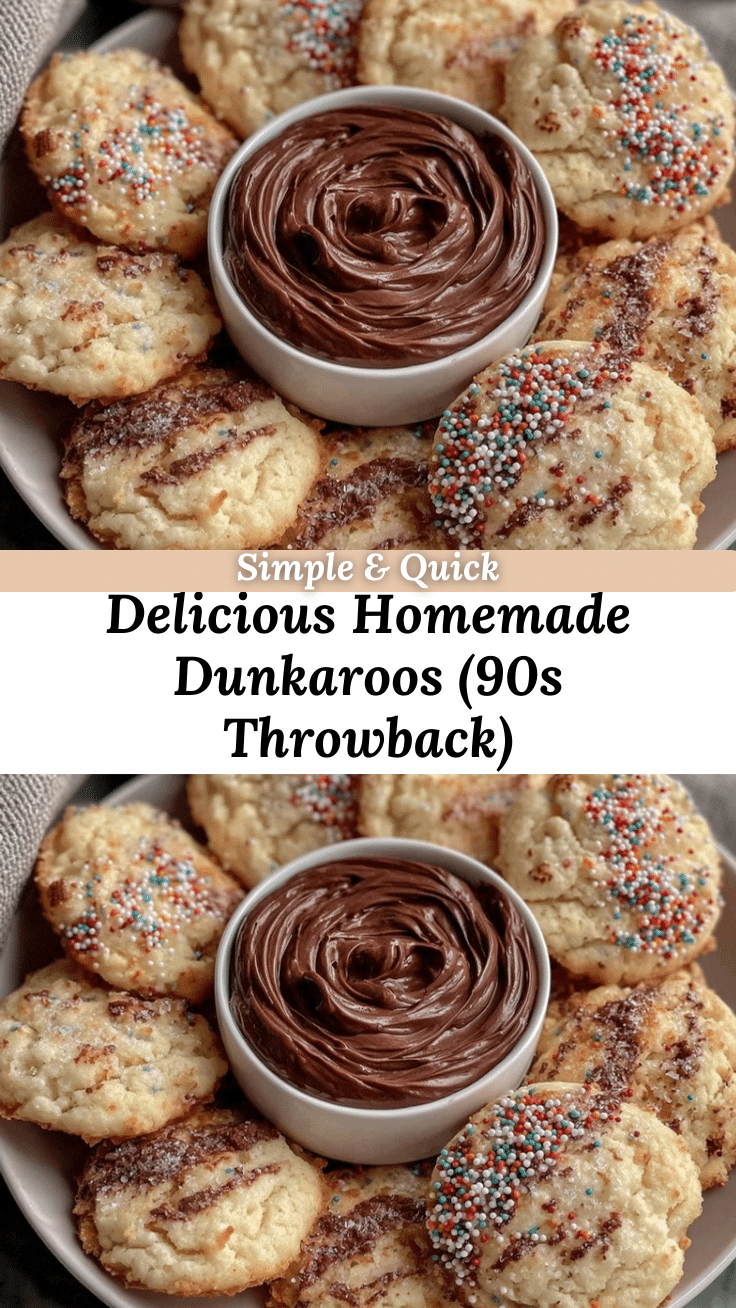
Delicious Homemade Dunkaroos Recipe Easy 90s Throwback Treat to Make
A nostalgic homemade version of the classic Dunkaroos snack featuring soft vanilla cookies with a creamy frosting dip. Perfect for kids, parties, and 90s-themed gatherings.
- Prep Time: 15 minutes
- Cook Time: 12 minutes
- Total Time: 45 minutes
- Yield: About 24 cookies (8 servings) 1x
- Category: Dessert
- Cuisine: American
Ingredients
- 1 cup (2 sticks) unsalted butter, softened
- 1 cup granulated sugar
- 1 large egg, room temperature
- 1 teaspoon pure vanilla extract
- 2 ½ cups all-purpose flour (use almond flour for gluten-free version)
- ½ teaspoon baking powder
- ¼ teaspoon salt
- ½ cup rainbow sprinkles (jimmies or nonpareils)
- ½ cup unsalted butter, softened (for frosting)
- 1 ½ cups powdered sugar, sifted
- 1 ½ teaspoons pure vanilla extract (for frosting)
- 2 tablespoons heavy cream or whole milk (use dairy-free milk if needed)
- Pinch of salt (for frosting)
- Optional: a few drops of food coloring
Instructions
- Preheat your oven to 350°F (175°C). Line two baking sheets with parchment paper or silicone mats.
- In a large bowl, cream together 1 cup softened butter and 1 cup granulated sugar until light and fluffy, about 3-4 minutes with a mixer on medium speed.
- Beat in 1 large egg and 1 teaspoon vanilla extract until just combined.
- In another bowl, whisk together 2 ½ cups flour, ½ teaspoon baking powder, and ¼ teaspoon salt.
- Gradually add the flour mixture to the wet ingredients, mixing on low speed until just combined. Avoid overmixing.
- Gently stir in about ½ cup rainbow sprinkles with a spatula.
- Scoop tablespoon-sized balls of dough and place them 2 inches apart on the baking sheets. Flatten each ball gently to about ½ inch thick.
- Bake for 10-12 minutes, until edges are lightly golden but centers still look soft.
- Let cookies cool on the baking sheet for 5 minutes before transferring to a cooling rack.
- While cookies cool, beat ½ cup softened butter with 1 ½ cups powdered sugar on low speed until combined.
- Add 1 ½ teaspoons vanilla extract, 2 tablespoons cream, and a pinch of salt. Beat on medium-high for 3-4 minutes until fluffy and spreadable. Add food coloring if desired.
- Arrange cookies on a plate with a small bowl of frosting for dipping.
Notes
If dough is too sticky, chill for 15-20 minutes before shaping. Avoid overmixing to keep cookies tender. Pull cookies from oven when edges are golden but centers are still soft. Frosting can be colored with food coloring. For vegan version, use plant-based butter and milk, and replace egg with flax egg. Gluten-free flour can be used as a 1:1 substitute. Store cookies in airtight container for up to 3 days; frosting keeps in fridge for up to a week.
Nutrition
- Serving Size: About 3 cookies with
- Calories: 250
- Sugar: 18
- Sodium: 110
- Fat: 12
- Saturated Fat: 7
- Carbohydrates: 30
- Fiber: 1
- Protein: 2
Keywords: Dunkaroos, homemade cookies, frosting dip, 90s snack, vanilla cookies, nostalgic treats, easy cookies, kid-friendly dessert


