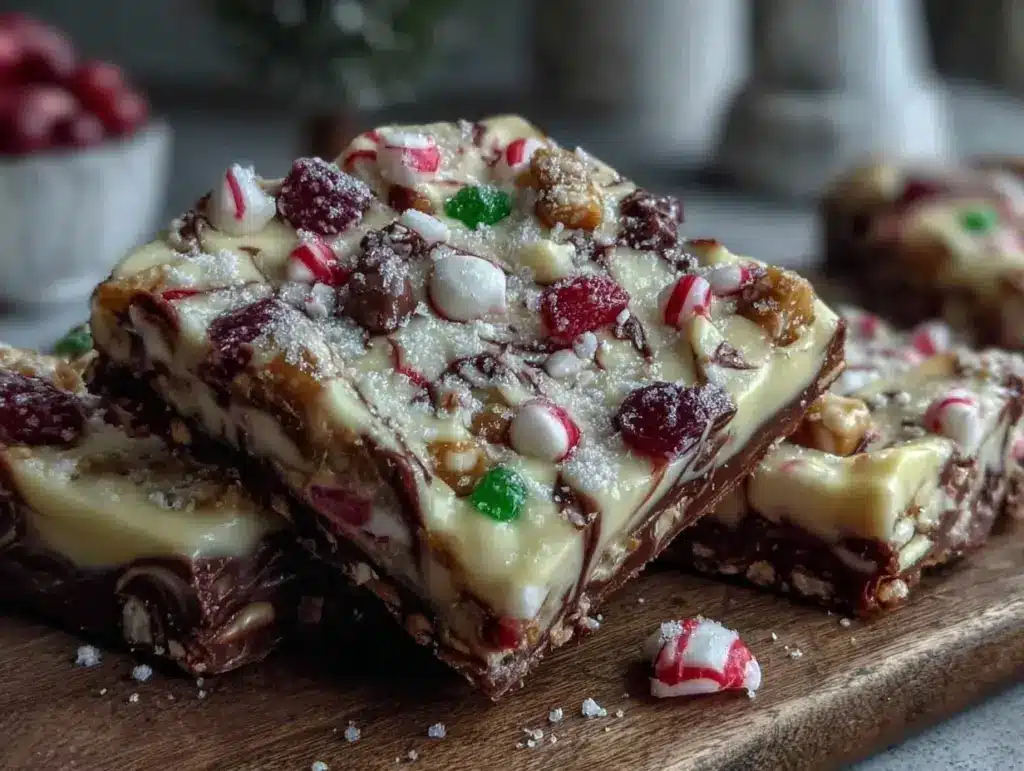
Let me tell you, the smell of melting chocolate mingling with bursts of colorful candy bits is enough to make anyone’s mouth water. The first time I whipped up this Easy Irresistible Candy Bark from leftover candy, I was honestly stunned by how something so simple could taste so darn good. It was one of those moments where you pause, take a deep breath, and just smile because you know you’re onto something truly special.
Years ago, when I was knee-high to a grasshopper, my grandma would save every last crumb of candy after the holidays. One rainy weekend, as I rummaged through her stash, I decided to toss all those leftover sweets into melted chocolate — and boom! Magic happened. My family couldn’t stop sneaking pieces off the cooling rack (and I can’t really blame them). This candy bark quickly became a staple for family gatherings and last-minute gifts, and honestly, I wish I’d discovered this trick years ago. It’s dangerously easy, packed with nostalgia, and perfect for brightening up your Pinterest cookie board or jazzing up your dessert table with minimal effort.
You know what’s the best part? This recipe comes together in under five minutes, making it perfect for those “I need a sweet fix now” moments. So if you’re staring at a pile of leftover candy wondering what to do, this Easy Irresistible Candy Bark from Leftover Candy is going to feel like a warm hug you never knew you needed.
Why You’ll Love This Recipe
Honestly, this candy bark is one of those recipes that you’ll find yourself coming back to again and again. Tested multiple times in the name of research, of course, it’s become a crowd-pleaser for both kids and adults. Here’s why it stands out:
- Quick & Easy: Ready in just about 5 minutes, perfect for busy weeknights or last-minute cravings.
- Simple Ingredients: No fancy shopping trips required — just your leftover candy and some chocolate.
- Perfect for Any Occasion: Whether it’s a potluck, holiday morning, or a sweet treat for your kids, it fits right in.
- Crowd-Pleaser: The mix of melty chocolate and crunchy candy bits always gets rave reviews.
- Unbelievably Delicious: The texture combo of smooth chocolate with bursts of candy flavor is next-level comfort food.
What makes this recipe different? Well, rather than just tossing candy on chocolate, I’ve found that melting the chocolate slowly and spreading it evenly before layering the candy creates a bark that’s perfectly crisp and not too sticky. I also recommend using high-quality chocolate like Ghirardelli or Lindt for that silky smooth finish. This isn’t just another candy bark — it’s your best version, combining practicality with pure indulgence. The kind of treat that makes you close your eyes after the first bite and think, “Yep, this is happiness.”
What Ingredients You Will Need
This recipe uses simple, wholesome ingredients to deliver bold flavor and satisfying texture without the fuss. Most of these ingredients are pantry staples or leftover treats you probably have lying around after the holidays.
- Chocolate: 12 ounces (340 grams) of semi-sweet or milk chocolate chips (I personally prefer Ghirardelli for smooth melting).
- Leftover Candy: About 1 to 2 cups (150-300 grams) of chopped candy pieces. Think crushed peppermint, chopped peanut butter cups, mini M&Ms, toffee bits, or even gummy candies (for a fun twist).
- Sea Salt: A pinch for sprinkling on top (optional, but it adds a nice contrast).
- Optional Mix-ins: Chopped nuts (like almonds or pecans), shredded coconut, or dried fruit (for added texture and flavor).
Ingredient Tips: For the candy, I recommend using small pieces or chopping larger ones down so they spread evenly. If using peppermint, crushed candy canes work wonders for a refreshing pop. And if you want a dairy-free option, swap the chocolate chips for a vegan-friendly brand like Enjoy Life.
Equipment Needed
- Microwave-safe bowl or double boiler: For melting the chocolate gently. I usually use a glass bowl in the microwave, heating in 30-second bursts to avoid scorching.
- Baking sheet: To spread the candy bark on. Lined with parchment paper or a silicone baking mat for easy removal.
- Sharp knife or kitchen scissors: For chopping candy into bite-sized pieces.
- Spatula: To spread the melted chocolate evenly.
- Measuring cups: To portion candy and chocolate accurately.
If you don’t have a double boiler, no worries — the microwave works just fine. Just keep a close eye and stir often. For budget-friendly options, parchment paper is your best friend for cleanup and release, and a basic silicone spatula works perfectly.
Preparation Method
- Prepare your workspace (5 minutes): Line a baking sheet with parchment paper or a silicone baking mat. Chop your leftover candy into small, even pieces using a knife or kitchen scissors.
- Melt the chocolate (3-4 minutes): Place chocolate chips in a microwave-safe bowl. Heat in 30-second intervals, stirring well after each, until smooth and fully melted. Alternatively, melt chocolate in a double boiler over simmering water, stirring frequently.
- Spread the chocolate (2 minutes): Pour the melted chocolate onto the prepared baking sheet. Use a spatula to spread it evenly into a rectangle or circle about ¼ inch (6 mm) thick. The chocolate should be glossy and smooth — if it starts to clump, give it a quick stir and keep spreading.
- Add the candy toppings (1-2 minutes): Quickly sprinkle your chopped leftover candy evenly over the melted chocolate. Press them down gently with the spatula so they stick, but don’t press too hard or the candy will sink.
- Optional salt sprinkle (less than 1 minute): Add a pinch of sea salt over the top to balance the sweetness.
- Chill and set (20-30 minutes): Place the baking sheet in the refrigerator for about 20-30 minutes, or until the chocolate is fully set and firm to the touch.
- Break into pieces (1-2 minutes): Once set, lift the bark from the parchment and break it into irregular pieces with your hands. Store in an airtight container.
Pro Tips: Don’t rush the cooling — letting the bark set fully in the fridge means it snaps beautifully instead of bending or melting in your hands. If your chocolate gets too thick to spread, gently warm it a bit more. And always stir the chocolate well while melting to avoid burning or grainy texture.
Cooking Tips & Techniques
Making candy bark is honestly one of the easiest sweet treats, but here are a few pointers to keep it foolproof:
- Use good-quality chocolate: This makes all the difference. Cheaper brands often don’t melt smoothly, leading to clumpy bark.
- Chop candy into small pieces: This helps the toppings stick better and ensures every bite has a candy surprise.
- Don’t skip the parchment paper: It makes cleanup a breeze and helps your bark pop off the sheet easily.
- Mind the chocolate temperature: Overheating chocolate can cause it to seize. Heat gently and stir often.
- Work quickly when adding candy: Chocolate sets fast once off the heat, so sprinkle toppings right after spreading.
- Store bark properly: Keep it cool and dry to prevent melting or sticky clumps.
- Multitasking tip: While the chocolate is setting in the fridge, you can tidy up your kitchen or prep beverage pairings.
From personal experience, I once tried to rush the cooling by popping the bark in the freezer. Big mistake — it caused condensation and made the bark sticky. Slow and steady wins this race!
Variations & Adaptations
This candy bark recipe is a fantastic base for all sorts of creative twists. Here are some ideas:
- Dietary twists: Use dark chocolate for a dairy-free version, or swap candies for nuts and seeds to make it paleo-friendly.
- Seasonal spins: In winter, add crushed candy canes or gingerbread bits; in spring, try pastel-colored jelly beans or dried edible flowers.
- Flavor boosts: Stir a pinch of cinnamon, chili powder, or espresso powder into the melted chocolate for an unexpected kick.
- Cooking method swap: Instead of melting chocolate in the microwave, try using a slow cooker on low with a double boiler insert for even melting.
- Personal favorite: I once made a version with chopped salted caramel candies and sprinkled flaky sea salt on top — dangerously addictive!
Feel free to mix and match based on your stash and mood. The candy bark world is your playground.
Serving & Storage Suggestions
Serve your candy bark at room temperature for the best snap and flavor pop. It pairs beautifully with a hot cup of coffee, tea, or even a festive glass of eggnog during the holidays.
If you’re gifting it, wrap pieces in cellophane bags tied with a ribbon for a charming homemade touch. For parties, arrange the bark chunks on a pretty platter or tiered tray to wow your guests.
Store leftover candy bark in an airtight container at room temperature if your kitchen is cool, or in the refrigerator if it’s warm. It keeps well for up to two weeks, but honestly, it rarely lasts that long around here!
To reheat slightly (if needed), let the bark come to room temp naturally — microwaving can make it melt unevenly. Over time, the flavors meld and intensify, making it even more delightful.
Nutritional Information & Benefits
Here’s a rough breakdown for a 1-ounce (28 grams) serving of this candy bark:
| Nutrient | Amount |
|---|---|
| Calories | 150-180 kcal |
| Fat | 9-12 grams |
| Sugar | 14-18 grams |
| Protein | 1-2 grams |
While this is definitely a treat, the dark chocolate versions offer antioxidants and minerals like magnesium. Plus, using leftover candy reduces food waste, which feels good on the planet and your conscience. If you want to lighten it up, try mixing in nuts or seeds for extra fiber and protein.
Keep in mind, this recipe contains common allergens like dairy, nuts (if added), and soy (in some chocolates), so adjust accordingly if needed. Overall, it’s a sweet indulgence best enjoyed in moderation but totally worth every bite from my wellness perspective.
Conclusion
In short, this Easy Irresistible Candy Bark from Leftover Candy is one of those recipes that delivers big flavor with minimal effort. You can customize it based on whatever candy you have, making it as simple or as fancy as you want. Personally, I love this recipe because it turns cluttered candy jars into fabulous treats that bring smiles all around.
Give it a try, tweak it to fit your taste, and watch how quickly it becomes your go-to for holiday leftovers or spontaneous snacking. If you make it, drop a comment below — I’d love to hear how you customized your bark or any fun candy combos you discovered. And hey, don’t forget to share this recipe with friends who need a sweet rescue in their kitchen!
Trust me, you’re going to want to bookmark this one.
FAQs
Can I use any type of chocolate for this candy bark?
Yes! Semi-sweet and milk chocolate chips work best for smooth melting, but you can also use dark chocolate or white chocolate. Just be sure to melt gently to avoid burning.
How long does the candy bark keep fresh?
Stored in an airtight container at room temperature or in the fridge, candy bark stays fresh for up to two weeks. Keep it away from heat and humidity to prevent melting or stickiness.
Can I freeze candy bark?
Absolutely! Wrap the bark tightly in plastic wrap and store in a freezer-safe container. Thaw at room temperature before serving to avoid condensation.
What are good candies to use in this recipe?
Almost any candy works! Popular choices include crushed peppermint, peanut butter cups, mini M&Ms, toffee bits, or chopped chocolate bars. Just chop into small pieces for even distribution.
Is this recipe suitable for kids to make?
Definitely! This candy bark is a fun and safe no-bake project for kids with a little adult supervision during the chocolate melting step. It’s a great way to use up leftover candy together.
Pin This Recipe!
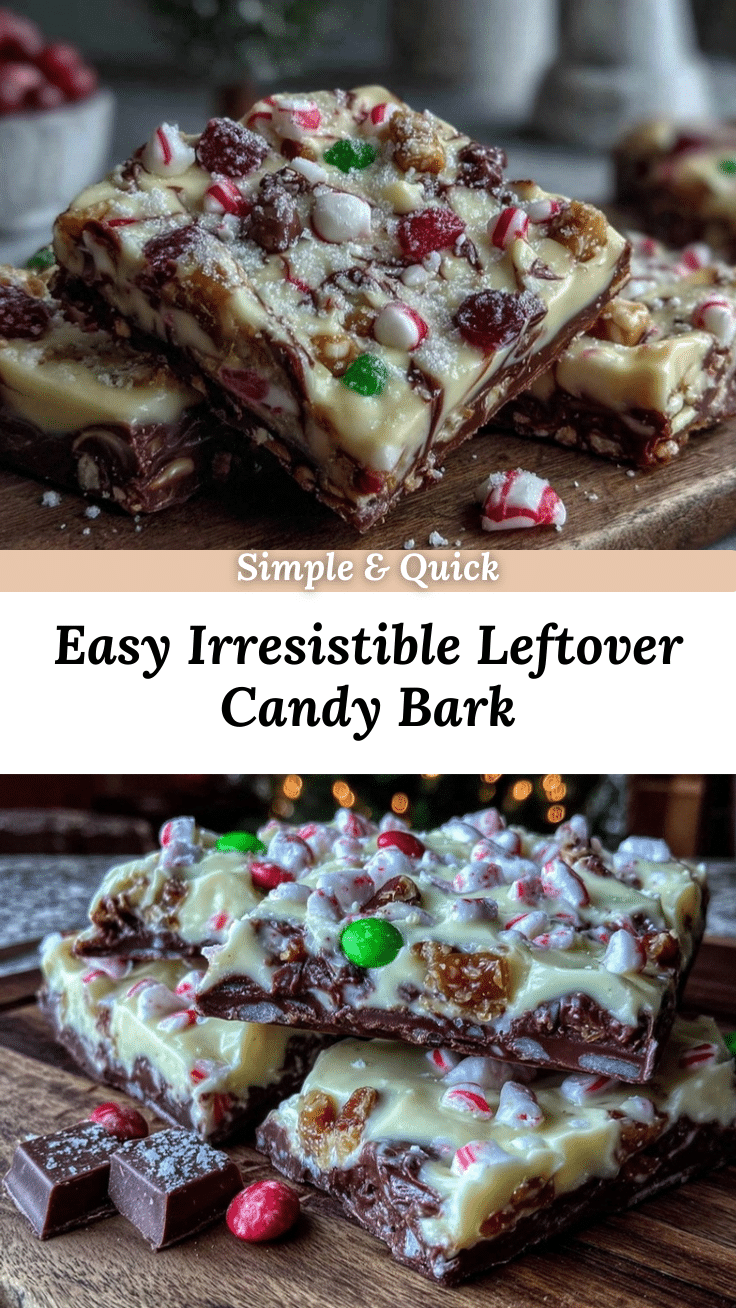
Easy Irresistible Candy Bark Recipe Using Leftover Candy in 5 Minutes
A quick and simple candy bark recipe using leftover candy and melted chocolate, ready in under 5 minutes. Perfect for last-minute treats and reducing food waste.
- Prep Time: 5 minutes
- Cook Time: 3-4 minutes
- Total Time: 30-40 minutes
- Yield: About 12 servings 1x
- Category: Dessert
- Cuisine: American
Ingredients
- 12 ounces semi-sweet or milk chocolate chips
- 1 to 2 cups chopped leftover candy (e.g., crushed peppermint, chopped peanut butter cups, mini M&Ms, toffee bits, gummy candies)
- Pinch of sea salt (optional)
- Optional mix-ins: chopped nuts (almonds or pecans), shredded coconut, dried fruit
Instructions
- Line a baking sheet with parchment paper or a silicone baking mat. Chop leftover candy into small, even pieces.
- Place chocolate chips in a microwave-safe bowl. Heat in 30-second intervals, stirring well after each, until smooth and fully melted. Alternatively, melt chocolate in a double boiler over simmering water, stirring frequently.
- Pour melted chocolate onto the prepared baking sheet. Spread evenly into a rectangle or circle about 1/4 inch (6 mm) thick using a spatula.
- Sprinkle chopped leftover candy evenly over the melted chocolate. Press gently with spatula to stick, but do not press too hard.
- Optionally, sprinkle a pinch of sea salt over the top.
- Place the baking sheet in the refrigerator for 20-30 minutes until chocolate is fully set and firm.
- Once set, lift bark from parchment and break into irregular pieces. Store in an airtight container.
Notes
Use high-quality chocolate like Ghirardelli or Lindt for best results. Chop candy into small pieces for even distribution. Avoid overheating chocolate to prevent seizing. Let bark set fully in fridge for a crisp texture. Store in airtight container at room temperature or fridge. Avoid freezing to prevent condensation.
Nutrition
- Serving Size: 1 ounce (28 grams)
- Calories: 150180
- Sugar: 1418
- Fat: 912
- Protein: 12
Keywords: candy bark, leftover candy recipe, quick dessert, easy candy bark, chocolate bark, holiday candy recipe, no bake dessert


